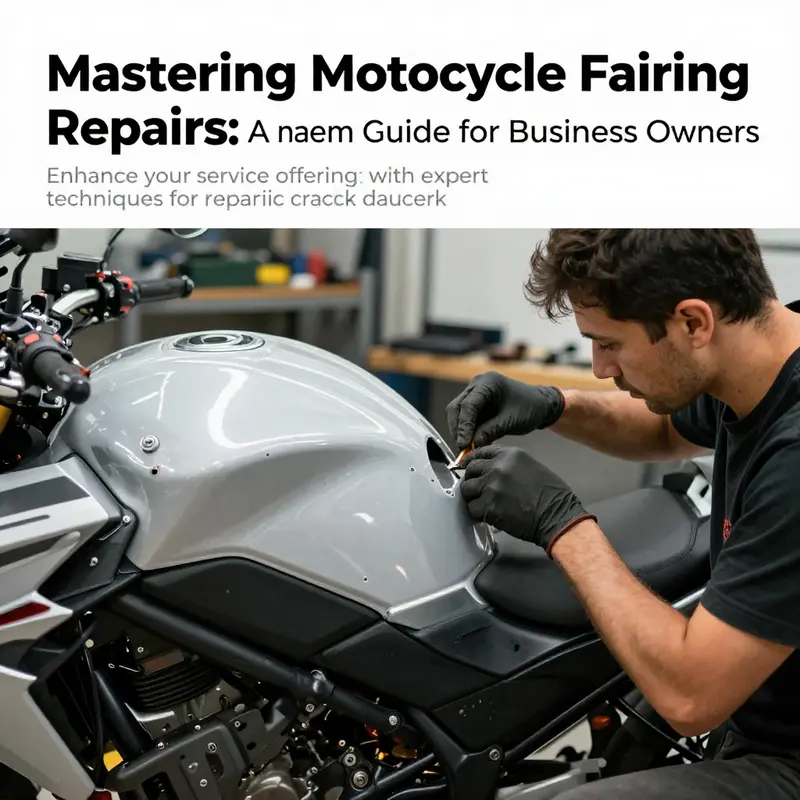
Cracked motorcycle fairings can be a common issue faced by riders, impacting both aesthetics and aerodynamics. For business owners in the motorcycle repair industry, mastering the art of fairing repair not only adds to service offerings but also reinforces customer trust. This article will provide a detailed guide on how to effectively assess damage, prepare surfaces, employ repair methods, and apply finishing touches—all essential skills for restoring motorcycle fairings to their original glory, ensuring both safety and style for clients. Each chapter builds upon the previous one, creating a robust framework for tackling fairing repairs with confidence.
Reading the Cracks: A Rider’s Thorough Assessment Before Repair
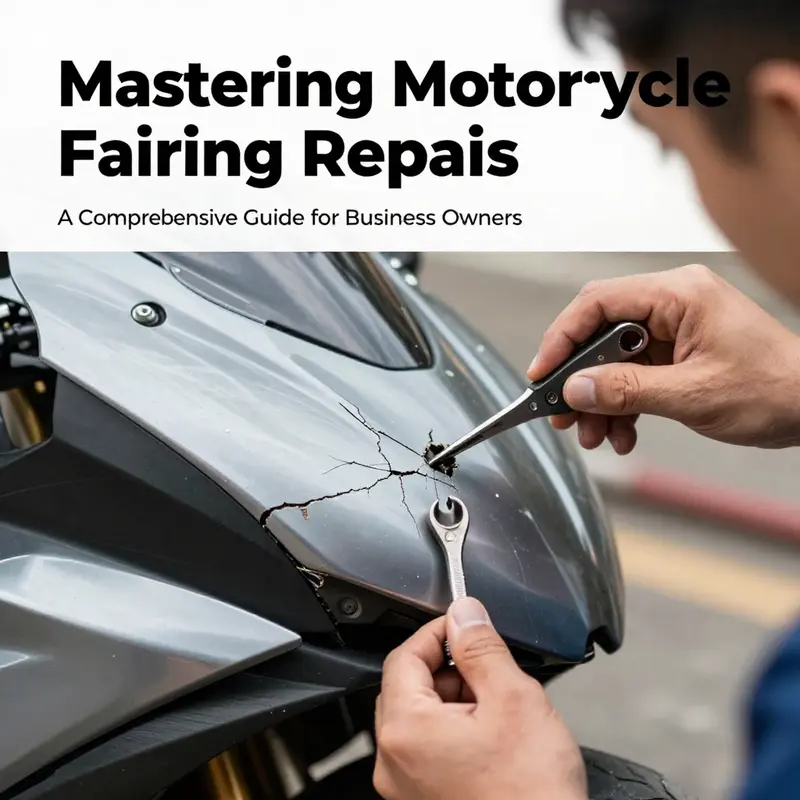
When a motorcycle fairing cracks, the first instinct is often to fix it quickly and ride again. But a lasting repair starts with a careful assessment that weighs the crack’s size, location, and the material involved against the fairing’s role in aerodynamics, protection, and aesthetics. The path from patchwork to a strong, durable finish begins with asking the right questions: Is this a hairline opening or a through-and-through break? Does the crack encroach on a mounting point or a load-bearing area? And what is the fairing made of—ABS plastic, fiberglass, or carbon fiber? Each material has its own repair language, and the answers will guide not only the repair technique but also whether replacement is the safer route. The aim is to understand the damage, not merely the appearance of it. This chapter threads those questions into a cohesive approach that helps riders decide when to repair, how to repair, and when to replace, all while preserving safety, performance, and the bike’s value.
A visual audit is the natural starting point. A close inspection reveals more than the visible crack line. Look at the length, the depth, and whether the crack has penetrated the full thickness of the panel. Superficial fissures that barely scratch the surface may be cosmetic and amenable to filler and paint, but a crack that slices through the material can act like a lever arm under stress, especially at high speeds or when exposed to air pressure and wind gusts. Cracks near mounting points or along joints demand particular attention because they can compromise attachment integrity. If the fairing feels loose, wobbly, or if the crack has caused distortion or deformation, the structural story changes: a rigid, stable shell is essential for predictable aerodynamics and rider protection. In those cases, replacing the affected panel or even the entire fairing might be safer and more cost-effective than a repair that can never restore original strength.
Beyond the visual, a structural integrity check translates the eye into engineering reality. Even a small crack that looks cosmetic may invite air leakage or alter the intended airflow. The fairing is not just an aesthetic shell; it is part of the bike’s aerodynamics and wind management. A crack that disrupts the smooth curvature can increase drag, create noise, or shift the balance of downforce in ways that may fatigue the rider over long journeys. The assessment then expands to consider the purpose of the panel in the overall system: does the crack affect a region that helps channel air to radiators, coolers, or brakes? If the area around the crack is a high-stress junction or if the crack has altered the panel’s shape enough to cause misalignment with adjacent fairings, the risk calculus tilts toward replacement. The same logic applies regardless of whether the fairing is made from ABS plastic, fiberglass, or carbon fiber. The repair toolkit and the durability you can expect from a patch vary with material, and what works for a hairline fracture in ABS might not yield a strong, lasting bond in carbon fiber-reinforced composites.
Material awareness is essential, and it reframes the question from “how bad is it to fix this?” to “how well can we restore original performance?” ABS plastic fairings respond differently from fiberglass ones. Small cracks in ABS can often be bridged with specialized adhesives and fillers designed for plastics, sometimes with a subsequent layer of paintable filler for a smooth finish. However, larger or deeper cracks that threaten structural integrity may require more robust strategies, like plastic welding or even panel replacement. Fiberglass fairings present a different set of challenges. Repairing a crack in fiberglass typically involves reinforcing the damaged area with resin and cloth, then sanding and finishing to blend the repair with the surrounding surface. Carbon fiber, when involved, is even more nuanced; its repair often demands professional handling because the matrix and weave patterns influence strength restoration and visual uniformity. The overarching principle remains constant: a repaired panel should not only look right but also behave like the original under load, vibration, and aerodynamic stress.
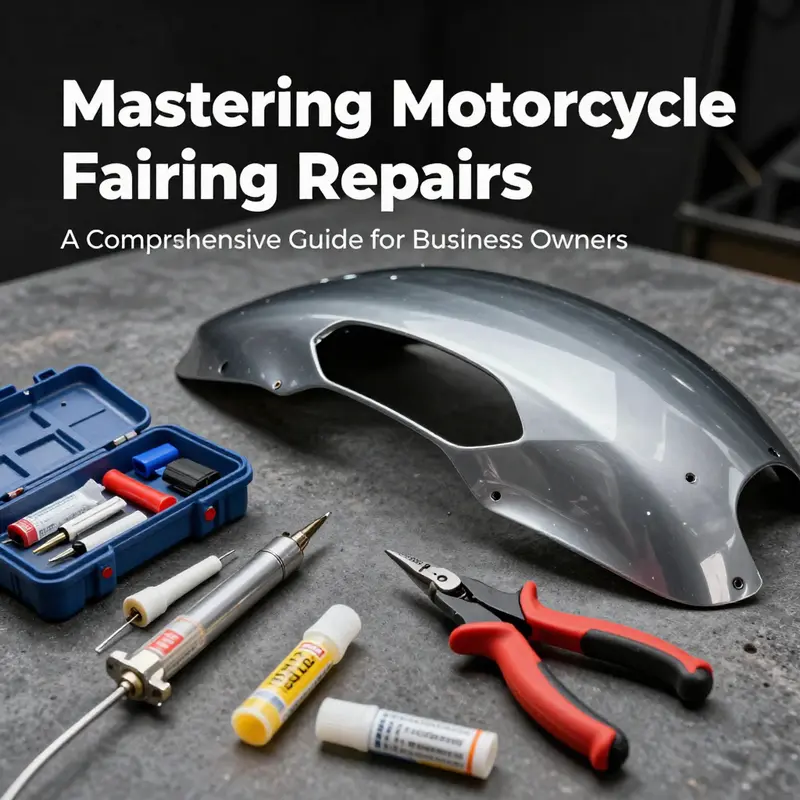
Armed with a material map and a sense of structural risk, the next step is a disciplined prep that paves the way for a reliable repair. Preparation is not cosmetic; it is the foundation of adhesion and longevity. Cleanliness is non-negotiable. A degreaser or isopropyl alcohol is used to strip oils, waxes, and contaminants from the area around the crack. Any lingering residue can sabotage adhesion and cure, leading to delamination or a brittle repair. After cleaning, a light scuff with 120–200 grit sandpaper removes gloss and creates a microvoxel surface that helps bonding agents stick. The goal is a surface that is dull, clean, and free of dust, so the repair materials can fuse or adhere properly. Sanding also reveals the true extent of the damage, exposing any hairline splits that may have been hidden beneath the finish. Once the surface has been prepared, a fresh wipe removes dust and solvent residues, preparing the way for repair materials to do their work.
When it comes to repair options, the path is not one-size-fits-all. For small to moderate cracks in plastic fairings, two main strategies emerge. The first, often the strongest, is plastic welding. The concept is straightforward: heat a welding tip and feed a compatible plastic rod into the developing seam as the crack melts, creating a fused join along the crack line. This method seeks to restore the original continuity of the material, distributing stress across the repaired seam rather than concentrating it at a brittle edge. The process requires steady hands and a patient pace. Work slowly, maintain even heat, and avoid gaps or gaps that trap air or voids. After the weld cools fully, the area is sanded smooth through progressively finer grits to achieve a flush, paint-ready surface. The second option for non-structural repairs is an epoxy putty or ABS-specific repair compound. Mix and apply the putty into the crack, filling all voids, then smooth with a blade or spatula. The cure time, often around 24 hours at room temperature, should be respected before sanding. When visible repairs are unavoidable, choosing a filler with good paintability and minimal shrinkage becomes a practical concern. These choices underwrite a smoother final appearance and reduce the risk of a repaint job revealing the repair seam.
For larger or more complex repairs, particularly on fiberglass fairings, the reinforcement approach changes the equation. A patch of fiberglass cloth cut slightly larger than the crack is saturated with resin and laid over the repair area. More resin is applied on top to saturate the cloth fully, and the layer is allowed to cure for at least a day. This method builds structural integrity back into the panel and provides a solid base for finishing that can withstand the stresses of riding and wind pressure. After curing, the area is sanded to blend the repair, and a gel coat or filler layer can be added to restore an even surface before primer, color, and clear coat. The finishing stage is where the repair moves from functional to aesthetically seamless. Sand the repaired zone with fine-grit paper, typically 600 or higher, until it feels impeccably smooth to the touch. A thorough cleaning follows, ensuring no oils or dust remain before primer is applied. The primer, which creates the proper undercoat for paint, is then followed by multiple ultra-thin coats of automotive-grade paint matched to the bike’s color. The color match is not merely cosmetic; it aids resale value and ensures the repaired panel sits visually in harmony with the rest of the bike. A final clear coat adds durability, enhances gloss, and protects the repair from UV exposure that could otherwise accelerate aging and color fade.
In practice, the decision to repair or replace hinges on safety and performance. If the crack crosses a structural joint, affects the aerodynamic profile, or the damage is so extensive that the repair would be overly complex or unlikely to restore original strength, replacement is the prudent path. When replacement is chosen, seek OEM panels or carefully matched aftermarket fairings that fit the model and maintain the lines of the bike. A well-chosen replacement preserves the bike’s look and performance, and it can be more economical in the long run than a repair that may require ongoing touch-ups or revisits to the shop. A practical reminder from the field is to consult a qualified technician or body shop if there is any doubt about the repair’s safety or the quality of the finish. Structural integrity and aerodynamic fidelity are not negotiable when a bike is in motion at speed; the goal is a seamless, dependable surface that behaves like the original when air forces meet the chassis.
To anchor the discussion in the practical journey of repair, consider how a rider navigates materials and methods while seeking a stable, glossy outcome. A rider with ABS plastic fairings might begin with a straightforward assessment, then weigh plastic welding against epoxy repair, knowing that both can yield smooth, durable results when done with care. The rider with fiberglass fairings may lean toward resin and cloth reinforcement, followed by careful sanding and finishing to restore the smooth, painted exterior. In both cases, the finishing touches—primer, paint, and clear coat—are critical for color fidelity and surface longevity. The final appearance matters, but the strength of the repair under the stresses of real-world riding matters even more. A repaired panel that looks right but underperforms in wind or vibration is a compromised fix. Conversely, a repair that looks imperfect but holds firm under load leaves rider confidence intact but misses the aesthetic and resale potential. The balance is nuanced, and the best outcomes come from a disciplined approach that respects material realities, structural needs, and the rider’s expectations.
For riders who want a straightforward path, it helps to view repair as a continuum rather than a one-step fix. Begin with careful assessment, move through appropriate repair methods matched to material and crack severity, proceed to meticulous finishing, and finally evaluate whether the repaired panel meets the bike’s performance and appearance standards. If the crack is stubborn, if the area around the mount is compromised, or if the panel’s shape has been significantly distorted, replacement is not a failure but a prudent choice that preserves safety, performance, and value. When in doubt, the safest course is to replace with a panel that matches the model as closely as possible, ensuring a seamless integration with mounts, fasteners, and adjacent fairings. For riders who want to explore a broader range of panels, a catalog or category specific to the bike model can be a useful starting point; for example, a rider seeking a specific make could browse the Honda fairings catalog to locate a corresponding replacement piece. This approach keeps the repair journey grounded in reliability while respecting the bike’s original design intentions. See how a targeted catalog can streamline the decision to replace when repair is impractical or unsafe, and keep the rider moving with confidence: Honda fairings catalog.
In sum, assessing cracked motorcycle fairings is an exercise in balancing cosmetic concerns with structural realities. A crack is more than a line in the plastic or laminate; it is a signal about how much stress the panel is bearing and how well the repair will stand up to the next ride. By combining careful inspection, material-aware repair strategies, and a disciplined finishing process, riders can restore both function and form. When safety or performance is doubtful, replacement offers a cleaner, safer solution that preserves the bike’s aerodynamics and value. The aim is a repaired or replaced panel that matches the original performance envelope and remains invisible to the eye, so the rider can focus on the road ahead rather than the crack behind.
External reference: For standardized criteria and more technical guidance on assessing vehicle damage, including motorcycles, see the international standards resource at https://www.sac.gov.cn/.
The Quiet Foundation: Mastering Surface Preparation for Cracked Motorcycle Fairings Repair

Cracked fairings can look like a simple cosmetic nuisance, but their true impact runs deeper. A crack that seems small on the surface often acts as a pathway for moisture, UV exposure, and filler failure. The repair process, in turn, begins not with the epoxy or the fiberglass cloth, but with the surface beneath. Surface preparation is the quiet groundwork that determines whether the repair will hold, how smooth the finish will be, and how long the fix will last. When you approach a cracked fairing with care for the surface you intend to rebuild, you set the stage for a bond that behaves as if the crack never happened. This chapter treats surface preparation as its own art form within the broader craft of fairing repair, tying together the discipline of cleaning, abrasion, priming, and intimate detail work that often separates a professional-looking patch from a clearly visible bandage.
Begin with a clean slate. Contaminants are the unseen villains of any adhesion. Dirt, grease, wax, and old residues—especially oils left behind by the hand, bike cleaners, or even rain—create a slick barrier between the repair materials and the plastic or fiberglass beneath. The first rule is ruthless cleanliness. Use a degreaser that is compatible with plastics, and wipe the area thoroughly around the crack. Do not rush this step. Allow the solvent to dry completely so you do not trap moisture under the repair. If you inadvertently leave a film of solvent, the subsequent bonding layer can fail, and you may end up chasing adhesion problems long after you think the job is done.
Next comes the light touch of abrasion. Abrasion is not about tearing up the surface; it is about providing a mechanical key for the repair compound to grab onto. Lightly sand the damaged area with a fine grit, typically in the range of 200 to 400 grit. The goal is to dull the glossy surface without creating deep scratches that require more filler later. Sanding also removes any micro-sheens of polish that some manufacturers apply to fairings, which can hinder bonding. After this gentle abrasion, wipe away the dust with a clean, lint-free cloth. A quick blast of clean air can help dislodge stubborn particles, but avoid blowing dust back into the crack. The area should look dull and clean, with no visible gloss left on the surrounding plastic.
An optional but wise step is to apply a primer designed for plastic surfaces. Primer acts as a bridge between the plastic and epoxy or filler, improving adhesion, especially in areas prone to UV exposure and weathering. A primer layer can help even out the surface color and texture, providing a uniform canvas for the repair material and, later, for paint. If you decide to use primer, apply a light, even coat after the sanding has fully dried. Let it dry according to the manufacturer’s instructions before proceeding. The primer step is not required for every repair, but it is a practical safeguard when the fairing lives in sun, rain, and the many swings of daily riding.
For cracks that are minor and non-structural, there is a helpful precaution that often gets overlooked: drill stop-holes at each end of the crack before you apply filler or epoxy. Stopping the crack from propagating is a small, deliberate action that pays off during curing. The stop-holes act as pressure relief points, reducing the chance that the crack will re-open or creep, particularly when a filler is later worked into the seam. This step is simple—tiny drill bits and careful control—and its payoff can be substantial, particularly on high-stress panels or joints where flex and vibration can aggravate fatigue.
With the surface prepared, the repair material itself takes center stage, but the rules of engagement have already been laid. For small to moderate cracks on plastic fairings, a two-path approach is commonly recommended. The first path is a plastic-welding approach designed to fuse the damaged area from within. The second path uses an epoxy putty or a plastic repair compound that fills the crack and bonds to the surrounding plastic. Both methods depend on the same foundation: excellent surface prep. In practice, you may choose based on the crack’s size, location, and whether the repaired area will bear any significant load. Plastic welding creates a seam that, when cooled, behaves as a continuous part of the original panel. Epoxy fillers can restore shape and smoothness quickly, but they depend more on a clean, primed surface to achieve a lasting bond.
If you opt for plastic welding, begin by heating the tip of the welding tool to the appropriate temperature for ABS or a similar automotive plastic. Feed a compatible plastic rod into the seam, melting it evenly along the crack’s length. Work slowly and steadily to ensure full fusion and to avoid gaps that could trap air or moisture. After welding, allow the area to cool completely before proceeding to sanding. Then, sand with progressively finer grits—starting around 200 and moving up to 400 and then 600—until the repaired seam is smooth to the touch and visually seamless. The sanding sequence is not merely cosmetic; it is the final step that reveals whether the fusion was complete and whether the surface will accept paint without noticeable texture under the clear coat.
If the crack is non-structural or not in a region subjected to heavy forces, an epoxy putty or ABS-specific repair compound can be a practical alternative. Mix the two-part epoxy or follow the compound’s instructions for preparation. Generously apply the mixture into the crack, ensuring it penetrates all voids. Smooth the surface with a flexible spatula or a similar tool, working from the inside out to minimize air pockets. Allow the epoxy to cure fully; this typically means a full day at room temperature, though environmental conditions may alter the timing. When curing is complete, you will likely need to sand again to achieve a uniform contour with the surrounding fairing. Begin with a coarser grade to flatten any high spots and gradually move to finer grits to achieve glass-smoothness. The objective is a surface that can be painted with minimal feathering and a uniform finish that does not reveal the repair beneath a gloss coat.
The choice between plastic welding and epoxy repair is not merely about strength. It is also about the final appearance and the panel’s behavior under heat and sun. Welded repairs tend to be stronger and more forgiving in load-bearing zones, where the fairing experiences flex and wind pressure. Epoxy repairs, when done with care, offer a reliable cosmetic fix that can be perfectly adequate for non-structural cracks and areas where the structural integrity of the panel is not compromised. In either path, the surface preparation you completed earlier determines the bond and the long-term durability of the fix. If the repair is in a visually critical area, or if you intend to keep the bike in pristine condition, you may choose to proceed with a primer and a high-quality paint system after curing. The paint steps themselves will be easier and more predictable on a well-prepared surface.
The chapter’s focus is not the final color match or the exact shade, but the probability of a durable, visually cohesive result. In practice, the repair process flows from surface preparation to material fill, to curing, and finally to finishing. Sanding remains a shared language across plastics and composites. Begin with a gentle touch to reveal a flat plane, then refine to a level where the repair sits flush with the surrounding material. The goal is not only to hide the crack but to create a smooth, uniform surface that accepts primer and paint evenly. A well-prepared surface makes subsequent steps—filler application, priming, and color coats—more predictable and more likely to vanish into the original aesthetic of the bike.
When the repair is finished and the paint has cured, it is natural to step back and assess the results. A well-executed surface preparation phase should reveal a repair that feels indistinguishable from undamaged plastic under normal lighting. There should be no visible edges or color mismatch on close inspection, and the finish should reflect the same surface texture as the surrounding area. A good test is to view the panel from different angles and under varying light. If you notice any shadow lines where the repair meets the original surface, a light feathering of clear coat or a final polish can help, but the underlying objective remains intact: the repaired area should behave like a single piece of the panel, not a patchwork patch that catches the eye.
Ultimately, the quality of surface preparation carries through every subsequent step. Even with the most advanced repair materials, a poorly prepared base will undermine adhesion, cause micro-cracking later, or compromise the finish. The best practice is to plan the repair as a complete workflow: clean, roughen, prime, stop the crack if needed, fill, cure, sand, and finally paint. In the end, the fairing will not only look restored but will also perform with confidence against the stresses of riding, weather, and speed. If the repair’s visibility is critical—for instance, on fairings that sit directly in the rider’s line of sight—you may want to consult with a professional body shop for color matching and a flawless finish. The underlying workmanship, however, begins long before the paint, in the careful surface preparation that anchors every following step.
For readers seeking the broader context of fairing replacement options, including OEM and aftermarket panels, explore the Honda fairings category linked here: Honda fairings for CBR. This resource can help you consider whether a repair remains the most practical choice or if a panel swap offers a cleaner, more durable outcome in the long run.
In sum, surface preparation is the hinge on which all subsequent repair success turns. It governs adhesion, smoothness, and the longevity of the fix. By treating cleaning, sanding, priming, and careful crack management as deliberate, repeatable steps, you set a durable foundation for a repair that not only looks good but endures the ride ahead. The quiet work done in these moments often determines whether the repair remains invisible to the eye or becomes a telltale sign of a well-executed fix. It is a discipline that, once mastered, elevates the entire craft of restoring cracked fairings to a level of reliability that riders can trust.
External reference for a detailed, step-by-step approach to minor fairing and bodywork repair can be found here: https://www.motorcyclecruisers.com/how-to-repair-minor-bike-fairing-and-bodywork-damage/.
Reading the Crack: Practical Repair Methods for Cracked Motorcycle Fairings
Cracked fairings tell a story. They tell you where the damage sits, how the panel behaves under load, and what kind of repair path will restore both strength and aesthetics. The repair approach hinges on three key factors: the severity of the crack, the material of the fairing, and the location of the damage. ABS plastic is common in many sport and street bikes, and fiberglass or composite fairings also appear, especially on older models or race replicas. Each material behaves differently when heat and adhesive are applied, so the first step is a careful assessment. Small, hairline cracks that do not compromise the structural joint can often be coaxed back to life with well-chosen adhesives or light welding. Larger cracks that run through load-bearing sections, or those accompanied by deformation, require a more nuanced decision: repair with the right technique, or replacement to maintain safety and aerodynamic integrity. The choice should be guided not just by the crack’s appearance but by its impact on mounting points, frame alignment, and the panel’s ability to bear vibration at highway speeds. In the course of this chapter the aim is to offer a coherent, practical path that you can follow without being overwhelmed by the options. When in doubt, the safest move is to replace the panel with a part that mirrors the original fit and finish, because a weak repair in a high-stress zone can become a safety risk at speed.
Preparation begins long before any tool touches the plastic. Cleanliness first. Remove nearby oils and waxes with a degreaser, such as a wipe with isopropyl alcohol, and wipe again to ensure there’s no residue that could undermine adhesion. The surface around the crack should be clean and dry. Light scuffing with 120 to 200 grit sandpaper is recommended to remove gloss and create a mechanical key for the adhesive or filler. For cosmetic repairs where the goal is a near-perfect surface, a finer approach works too: 600 to 800 grit can help the area accept color later, but never skip the first step of roughening the surface where the repair will sit. After sanding, wipe away the dust with a clean cloth and let the area dry completely. This preparation may seem meticulous, yet it pays off in stronger, longer-lasting repairs and a smoother final finish.
The repair methods you choose depend on the crack type and the panel material. For small to moderate cracks in plastic fairings, two routes are commonly considered: plastic welding for strength, or a high-quality epoxy or plastic filler for non-structural repairs. Plastic welding, when done with a dedicated plastic welding kit designed for ABS or similar automotive plastics, is the recommended option if you need real strength. The process begins with heating the welding tip to the appropriate temperature, typically in the 300 to 400°C range. A compatible plastic rod—matched to ABS or the exact material of the fairing—is fed into the crack as heat is applied, blending the new material with the original. The trick is consistency: move slowly and steadily, creating a seamless seam that fuses the crack closed and re-establishes the panel’s integrity. After the weld cools completely, the surface is sanded with progressively finer grits—200, then 400, then 600—to achieve a smooth, level plane ready for finishing. It’s almost like the joint never existed.
If the crack is non-structural or the panel isn’t bearing a heavy load, an epoxy putty or ABS-specific repair compound provides a practical alternative. The repair sequence is straightforward: mix the two-part epoxy putty according to the instructions, press the mixture into the crack filling all voids, and smooth the surface with a spatula or a similar tool. Let the repair cure fully, often about 24 hours at room temperature, then sand to a feathered edge and prepare for painting. A key consideration with fillers is shrinkage and paintability. For visible repairs, select a filler with minimal shrinkage and good paint compatibility so the repaired area can blend with the surrounding fairing after finishing. In some cases, a thin mesh reinforcement—such as a copper foil strip or a lightweight fiberglass mesh—placed over the crack before applying the adhesive adds extra strength and helps distribute stress away from the seam. The goal is to achieve a repair that is neither a weak point nor highly visible—a balance between durability and aesthetics.
When cracks progress beyond small or moderate damage, or when the fairing is fiberglass rather than a pure plastic, more substantial repairs are required. Fiberglass fairings behave differently from ABS, and the repair approach reflects that. For larger or structurally compromised areas, fiberglass resin and mat serve as a reinforcement. Start by cutting a piece of fiberglass mat slightly larger than the crack. Apply resin over the damaged area, lay the mat on top, and saturate it with more resin. The laminate should be built up in layers, allowing each layer to saturate and cure. A standard cure takes at least 24 hours, after which you sand the area smoothly and assess whether an additional gel coat or filler layer is needed to restore a uniform surface. The goal is to create a resilient patch that behaves like a single piece of the original panel rather than a stitched-together repair. Finally, a light gel coat or filler layer can be applied to prep for finish sanding, ensuring the repaired area matches the contour and shine of the surrounding surface.
Regardless of the repair route, finishing is crucial. Even the strongest weld or patch can look uneven if the finishing steps are skipped. After curing, begin with a thorough sanding of the repair and adjacent area using fine-grit sandpaper, ideally 600 grit or finer, to eliminate any ridges and create a perfectly smooth plane. A second wipe-down with isopropyl alcohol removes dust and oils, ensuring the surface is pristine for priming. Primer is essential if you’re painting. The color-matching process starts with the manufacturer’s color code or vehicle VIN data, so you can apply an automotive spray paint that matches the bike’s original shade. Apply multiple thin coats rather than a single heavy layer, allowing ample drying time between coats to prevent runs or a mismatched tone. After color has cured, a clear coat is applied to protect the finish and impart depth and gloss. The overall result should be a repair that you cannot easily distinguish from the untouched sections of the fairing.
Professional refinement matters in this step. If the repaired area is highly visible or located on a fairing panel that interacts with air flow and mounting hardware, taking the work to a shop specializing in auto body or cosmetic motorcycle repairs can yield a flawless finish. A professional can ensure that the color match aligns perfectly with the rest of the bike, the clear coat is evenly applied, and the panel’s contour remains true to its original shape. This is especially important when the repair sits near critical mounting points or aerodynamically sensitive zones where even minor deviations can alter handling characteristics or drone the effect of the bike’s silhouette.
The decision to repair or replace often hinges on safety. If the crack extends across a structural joint, compromises the aerodynamics, or involves mounting points, replacement is the safer option. A new fairing panel—whether OEM or a vetted aftermarket option—will restore the bike’s integrity, provide the correct mounting geometry, and avoid the risk of future failure along the repaired seam. In making this choice, it can be helpful to consider the total cost of repair, the time involved, and the potential impact on ride safety. If there is any doubt about the repair’s strength or the repair’s ability to withstand highway vibrations, replacement is prudent. When replacement is necessary, seek panels that match your model’s geometry as closely as possible to ensure proper alignment with the fender, windscreen, and bodywork. Model-specific panels can simplify fitment and ensure that all fasteners and mounting points align as designed.
For riders who prefer direct avenues for replacement, an internal route exists that can simplify sourcing. You can browse the BMW fairings category for model-specific panels, which can help you locate a panel that matches your bike’s lines and mounting points. This category page is a useful starting point when a complete replacement is warranted, and it allows you to compare fitment across different years or trim levels. In the context of this guide, using a model-appropriate replacement is often the most reliable path to restoring both aesthetics and function when cracks are extensive or when the panel’s structural role is compromised. See https://ultimatemotorx.net/product-category/bmw-fairings/ for the category page that can help you identify compatible panels.
The overarching principle is simple: treat the crack for what it is, then pick the repair path that restores the panel’s integrity and the bike’s appearance. Minor cracks can be stitched back with confidence using plastic welding or a sturdy epoxy bond, followed by careful finishing. Moderate damage benefits from a welded seam or high-strength filler, paired with precise sanding and painting. Severe damage or any crack that threatens mounting points or aerodynamics should trigger replacement rather than repair. In all cases, the preparation and finishing steps are essential for long-term durability and a professional look. And while it’s possible to achieve a near-perfect finish at home, don’t undervalue the advantage of professional assistance when the stakes involve safety and performance on the road. For reference and deeper guidance, you can consult an authoritative external resource that outlines step-by-step techniques and safety considerations for repairing cracked motorcycle fairings.
External reference: For a detailed, step-by-step reference with practical safety tips and material-specific guidance, see the Motorcycle.com article on repairing cracked motorcycle fairings. https://www.motorcycle.com/maintenance/repairing-cracked-motorcycle-fairings/
From Repair to Reveal: Finishing Touches That Make Repaired Cracked Motorcycle Fairings Look Like New
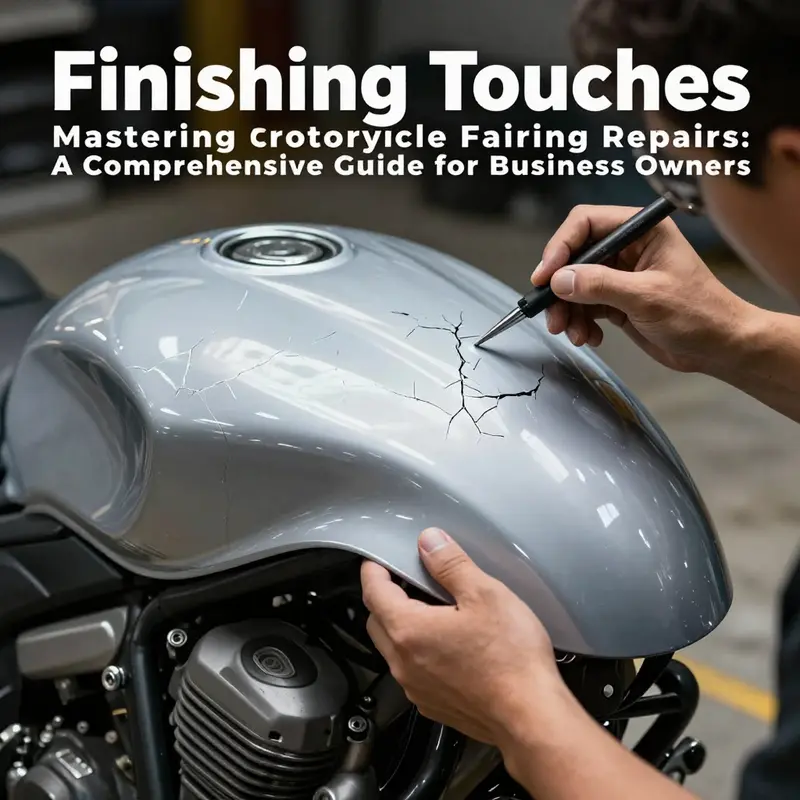
Repair is only half the battle. The visible results depend as much on the finishing touches as they do on the initial welds, fills, and fabrications. When a fairing cracks, especially across a curved panel or along a joint that catches sun and grime, the naked repair can look obvious and uneven unless the final steps are executed with care. The finishing phase is where texture, color, and gloss are rebuilt, and where the repaired area either disappears into the surrounding shell or remains a stubborn, telltale mark. This is not simply about cosmetics; it is about restoring integrity, resistance to the elements, and the smooth airflow that a properly finished panel is designed to support. The sequence—grinding and sanding, meticulous cleaning, priming, painting, and a final polish—reads like a careful craftsman’s ritual, because each step builds on the last. Skip a stage or rush the process, and you risk feathering paint, color shade mismatches, or a finish that dulls and blackens under sun exposure. The goal is not to camouflage the repair but to integrate it so well that the eye travels across the fairing without snagging on an inconsistency. This is especially important for riders who spend hours staring into their own reflection at stoplights or who track the visual flow of their bike in garage lights. The discipline of finishing touches also pays dividends in durability. Proper grinding and sanding create an even base with adequate adhesion, while a correct primer ensures the paint sticks and remains uniform over the long term. The paint itself must be color-matched with precision, and the final clear coat provides resistance to UV damage, scratching, and chemical exposure from road grime and cleaning agents. The mechanics of this process are not mysterious, but they demand patience, the right conditions, and attention to detail. A properly finished repair can take a panel from a visible blemish to a seamless continuation of the bike’s design language, preserving aerodynamics and aesthetics alike. The narrative of finishing touches begins with the realization that every repaired edge, every scar of a crack, carries potential weakness if left untreated. The sanding that follows a repair is not merely cosmetic; it is a rebalancing act that ensures the repaired area sits flush with the surrounding skin. Start with a coarser grit to flatten any high spots and remove excess material, then progress to finer grits to erase the scratches left by the initial repair. This gradual refinement is essential because it determines how the adhesion layer will perform and how the final paint will lay down. The number one enemy of a flawless finish is texture variation. You want a surface where light travels evenly, and where the eye perceives a smooth panel rather than a patchwork of highs and lows. A smooth base also reduces the risk of paint cracking in the future, especially where flex occurs during riding. As the surface nears plumb and true, the cleaning ritual becomes critical. The material around the repair can accumulate dust, oils from hands, and tiny fibers from rags. A dedicated degreaser or isopropyl alcohol used with clean, lint-free towels will remove residues that compromise adhesion. The emphasis on cleanliness cannot be overstated. Any oil left on the surface will create a barrier that prevents the primer from gripping, and trapped dust can lead to subtle pits that show through the paint. Once the surface is clean and completely dry, the priming stage begins. Plastics and composites have their own priming requirements, and selecting a plastic-specific primer can make the difference between a color match that sinks and a finish that shines. The primer should be sanded lightly after drying to knock down any tiny imperfections and to create a consistent matte base that captures the subsequent paint evenly. A light touch with 600-grit paper or finer is usually enough to keep the primer from being gouged or clogged with dust. When painting, the environment matters as much as technique. A controlled, well-ventilated space with stable temperatures minimizes humidity and dust. The application of multiple thin coats is essential; a single heavy coat is a recipe for runs, sags, and a finish that never fully cures. Each layer should be allowed to flash between coats, yielding a smoother, more uniform appearance. The color-matching exercise is a subtle art. Even a slight shade variance becomes noticeable on glossy plastics when the light catches the panel at a particular angle. For recovered fairings, it is common to blend the repair into the existing color through careful shading and, if needed, a color-sanding approach that integrates the repaired area with the rest of the panel. This is where the decision to seek professional color matching often pays for itself, especially on high-visibility panels or limited-edition finishes. The next step—the clear coat—provides the protective shell that guards against sun, rain, and cleaning solvents. A clear layer helps retain the gloss and provides a hard barrier against micro-scratches. A typical sequence is multiple light coats of clear that cure to a high-gloss, durable finish. The final polish then brings back the glassy top layer that catches light and makes the repair disappear in plain sight. Polishing compounds, applied with a soft pad and enough patience to avoid heating the surface, restore the reflective properties of the paint. A well-executed polish leaves a uniform, glass-like surface that looks as though the repair never happened, while also strengthening the protective layer against UV damage. The finishing phase also requires careful attention to masking edges and protecting adjacent areas. It’s easy to over-apply paint and create a hard line where the repaired edge meets the original shell, which can catch the eye and undermine the seamless look you want. Masking tape, along with a steady hand, ensures that borders stay clean and that the surrounding texture remains unaltered. In some cases, the repair might sit near mounting points or aerodynamic edges where symmetry matters. Here, precision becomes a kind of discipline. A panel that sits off by a millimeter or two will not only feel wrong when visually tested but can also alter handling characteristics as the bike moves through air. The chromatic nuance—whether the fairing presents a warm, creamy white or a cool, metallic blue—requires a steady eye and sometimes an expert color-match process. For hobbyist repairs, the goal is a durable, aesthetically pleasing outcome that you can live with on the weekend ride. For a showpiece, or for a rider whose bike turns heads at every corner, professional refinishing may be warranted to achieve an OEM-like finish. The finishing phase also invites a degree of philosophical patience. It’s tempting to rush to a painted surface, but the long-term look will reward a slower, methodical approach. It is common to pause after the initial clear coat to inspect for dust nibs or orange-peel texture, using a light, bright source to reveal irregularities. When imperfections are found, a targeted light wetsand with higher-grit paper can address them before the final polish. The interplay of light on a freshly finished panel is almost a test: if the repair hugs the surrounding contour and reads as part of the original design, you have achieved success. If not, the process can be revisited with careful retrimming, additional sanding, and, if necessary, a reapplication of primer and paint. Beyond the technical steps, the finishing touches carry an almost artistic responsibility. The rider’s eye must flow along the fairing without breaking for a fault line. This is particularly vital for high-gloss finishes and complex curves, where micro-scratches or minor color shifts are more noticeable. The long-term resilience of the finish also hinges on how well you protect it from the sun and the elements. Clear coat, wax, and regular cleaning routines help extend the life of the repair, preventing yellowing, fading, or dulling that would betray the repair years later. If you are uncertain about your own ability to reproduce a precise color or to achieve the level of smoothness you desire, consider consulting with a professional auto body technician. They can provide exact color-matching systems and the studio environment needed for a flawless, nearly invisible repair that holds up to the sun and road grime alike. For riders who want to explore a practical path while still learning, a middle ground exists: practice on a spare fairing or test panel to refine your technique before applying the process to the bike itself. In cases where the repair lies on a visible, high-stress area, this precaution can save you from a costly misstep. If you are curious about the broader ecosystem of fairings and want to explore compatible options for future projects, you can browse dedicated sections that catalog fairings by model. For example, one practical destination is Honda fairings, which can help you assess fit and color compatibility as you plot future upgrades or replacements. You can visit the collection here: Honda fairings. While not every rider will choose to replace a panel, knowing what is available helps you gauge how a repaired area can be integrated with existing styling rather than breaking the visual rhythm of the bike. In the end, finishing touches are not a single act but a sequence of deliberate moves that, when performed with patience, discipline, and a respect for the original design, restore both the look and the function of the fairing. The ride home after a well-executed finish is smoother not only because the panel is structurally sound but because the eye recognizes continuity where there was once a visible seam. For riders who care about longevity and aesthetics in equal measure, these steps offer a reliable blueprint. They transform a repair from a temporary fix into a lasting restoration, preserving aerodynamics and the visual language of the bike you love to ride. As you apply the final gloss, take a moment to acknowledge the care that went into the process. The difference is not just in appearance; it is in confidence—knowing that the repaired panel can withstand the daily pounding of road debris, UV exposure, and repeated washing without surrendering its finish. The finishing touches, when properly executed, honor the intent of the original design and extend the life of your motorcycle’s bodywork, ensuring that every curve, line, and contour continues to tell the story of a ride that’s meant to last. For more practical guidance on plastics repair and painting, social knowledge, and best practices drawn from established repair communities, you can consult authoritative resources that outline a step-by-step approach to plastic fairings repair, including the nuances of different plastic families and the subtleties of achieving a durable finish. See the detailed guidance at Motorcycle.com: https://www.motorcycle.com/maintenance/repairing-cracked-motorcycle-fairings/.
Final thoughts
In the competitive world of motorcycle repair, understanding how to effectively repair cracked fairings is a valuable skill that can attract and retain customers. By mastering the assessment of damage, preparing surfaces adequately, utilizing appropriate repair techniques, and perfecting the finishing touches, business owners enhance their service offerings and provide significant value to their clients. Ensuring quality repairs not only extends the life of motorcycle fairings but also contributes to the safety and satisfaction of riders. Emphasizing these techniques in your repair business will cultivate a reputation for excellence and reliability in motorcycle maintenance.