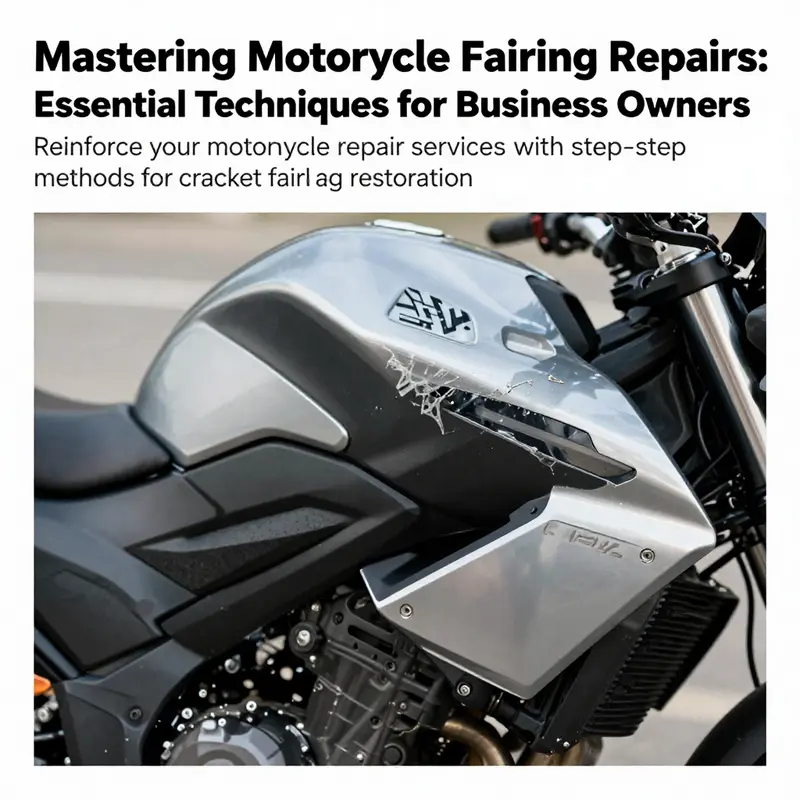
Cracked motorcycle fairings pose not only aesthetic concerns but also structural challenges that can affect a motorcycle’s performance. Understanding how to repair these damages can significantly enhance your service offerings and customer satisfaction. This guide explores effective techniques—plastic welding for larger damages, epoxy and reinforcements for small cracks, and filling, painting, or replacement when necessary. Each chapter delves into practical applications, making repairs manageable while ensuring high-quality results that appeal to hesitant customers. By mastering these methods, business owners can position themselves as experts in motorcycle fairing restoration.
Plastic Welding Mastery: Restoring Cracked Motorcycle Fairings
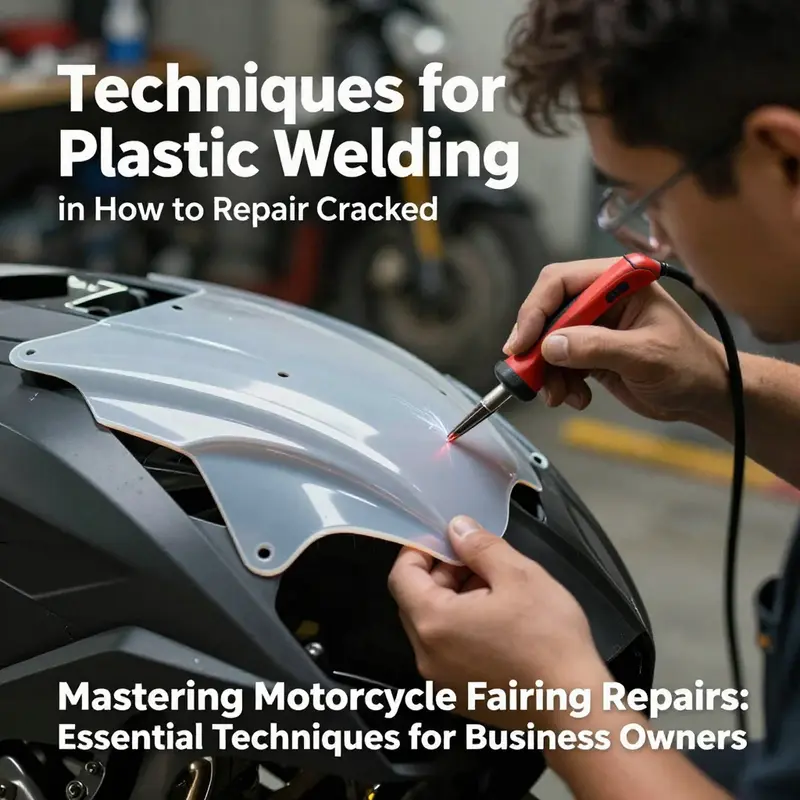
Repairing cracked motorcycle fairings starts with a material check of ABS or PC/ABS and a plan for the crack size and location. For small cosmetic cracks a reinforced epoxy can work, but for structural damage welding offers stronger results. In practice, start with careful cleaning, dry surfaces, and use a compatible filler or backing material such as fiberglass cloth pressed into the wet adhesive. When the crack is larger, ultrasonic welding delivers fast clean bonds, while laser welding provides precise heat input for sensitive shapes. Hot plate welding offers a broad joint on flat sections, and hot air welding is a practical DIY option when specialized equipment is not available. Always match the filler material to the base polymer, and ensure proper curing and finishing with sanding, priming, and color matching. For safety, work in a ventilated space and wear PPE. If the panel or mounting points are compromised or the finish is heavily distorted, replacement may be the safer option. With experience, you can achieve a repair that blends with the surrounding fairing and endures real riding conditions.
Epoxy and Reinforcement: Strengthening Cracked Motorcycle Fairings for Real-World Rides

Cracks in a motorcycle fairing can feel like more than just a cosmetic issue. They threaten the structural integrity of the plastic shell that protects the engine, rider, and precious electronics tucked behind the fairing’s curves. When a crack appears, the instinct is often to sand, fill, and paint as quickly as possible. Yet in the world of plastic repairs, the longest-lasting results come from a thoughtful combination of epoxy repair and deliberate reinforcement. This approach builds a bond that resists impact, vibration, and the flex that comes with riding at speed. It isn’t a guess or a quick patch; it’s a carefully engineered repair that treats the damage as a shared problem between the fairing’s material and the stresses it experiences on the road. By starting with meticulous surface preparation, applying a well-mixed epoxy, and adding a reinforcement layer that borrows strength from fiberglass or similar fabrics, you restore more than appearance. You restore confidence—both in the repair and in the machine as a whole.
Repairing a cracked fairing with epoxy and reinforcement is not a single, one-size-fits-all maneuver. The material of the fairing, the crack’s location, and the intended use of the motorcycle all shape the method. The base resin you choose must adhere well to the plastic, tolerate temperature fluctuations, and play nicely with the reinforcement material you embed into the repair. Epoxy systems are particularly forgiving when it comes to bonding to plastics, provided you follow a clean, well-prepared surface and maintain proper ratios and curing conditions. The core idea is simple: place a saturated reinforcement fabric over the crack, and saturate it with epoxy so that the bond becomes a composite that distributes stress, rather than a bare seam that concentrates it.
Before you dive into the repair, inventory the crack. A small, hairline fracture is a different proposition from a long, through-thickness split that runs along a high-stress edge or a joint line. Small cracks often respond brilliantly to a thickened epoxy fill that penetrates into the crack and then hardens as a solid, glassy repair. Larger cracks benefit from the reinforcement layer, which acts like a patch that spans the crack’s length and width, tying the surrounding plastic into one continuous, load-bearing piece. The goal is not merely to seal the crack but to create a repair that behaves like the surrounding material under real-world loads. To that end, the process I describe blends careful prep, controlled resin application, and a fabric-backed layer that distributes forces away from the crack tip.
Materials for this method are straightforward enough to assemble in a well-equipped home shop. You’ll need epoxy resin and a hardener, a piece of fiberglass cloth or mesh large enough to cover the crack with margins that extend beyond it, and a solvent such as isopropyl alcohol for surface cleaning. Sandpaper in a few grits helps you create a surface that the epoxy can bite into. A paint system to match the fairing’s finish completes the repair, because the aesthetic aspect matters as much as the strength. A brush or applicator makes it possible to apply resin precisely where it’s needed, while clamps keep panels aligned as the epoxy cures. Ventilation and personal protective gear—gloves, a mask, and eye protection—are not optional; they’re essential when working with epoxy and solvents.
A small, practical detail often overlooked is the crack’s end condition. Drilling a tiny hole at the crack’s tip can interrupt the curvature of the crack and slow or stop the propagation that would otherwise continue under vibration. This step is not a cure-all, but it provides a prudent safeguard that helps the subsequent repair endure. Think of it as a way to steer the damage into a controlled repair zone rather than letting it radiate outward. With the crack stabilized in this way, you can proceed with greater confidence that the repair will hold long enough for the epoxy to cure and the reinforcement to take hold.
Begin with surface preparation, which sets the stage for a lasting bond. Clean the cracked area thoroughly with isopropyl alcohol to remove oil, wax, finger oils, and dust. Any residue can act like a barrier, preventing the epoxy from penetrating and adhering properly. After cleaning, lightly abrade the area around the crack with medium-grit sandpaper. The goal is not to remove material but to create a micro-rough surface that increases the mechanical grip of the epoxy. Once you’ve prepared the surface, wipe again with alcohol to remove leftover particles. A dry surface is essential for predictable curing and a uniform finish.
Now mix the epoxy resin and hardener according to the manufacturer’s instructions. Precision matters here; the wrong ratio can yield a fragile repair that won’t stand up to vibrational stress. Use a clean disposable container and a mixing stick, and avoid introducing air into the resin. In many systems, a 1:1 or proportionally specified mix sets the stage for a strong, durable bond. Once mixed, you’ll apply a generous layer of epoxy over the crack itself, ensuring the resin penetrates into the crack’s length. This initial coat is critical; it saturates the fracture and sets the foundation for the reinforcement that follows.
Cut a piece of fiberglass cloth or mesh large enough to cover the crack with an ample margin around it. The reinforcement needs to extend several centimeters beyond the crack on all sides to distribute loads effectively. Place the fabric into the wet epoxy and press with steady, careful pressure to saturate the fibers fully. Air bubbles are the enemy here; they can create weak pockets that compromise strength. A common technique is to apply a second layer of epoxy over the fabric to fully saturate and embed it, creating a continuous panel of resin and fabric that underpins the repaired area. If needed, you can add a light coat of epoxy on top of the fabric to ensure everything is flush and smooth.
This reinforcement acts as a band that shares the load across the crack. It is the key difference between a patch and a repair that can endure real-world riding. In some cases, an additional small piece of fiberglass can be applied across the tip of the crack as an extra reinforcement, similar to how a patch on a torn fabric would extend across the seam. The central idea remains the same: saturate, embed, and cover the fabric so the resin surrounds each fiber strand and locks the fabric in place. If you’re repairing a higher-stress area—such as a lower edge near the wheel well or a protruding scoop—consider a thicker or double layer of fabric, ensuring the patch is continuous and smooth.
With the reinforcement in place, allow the epoxy to cure fully. Curing times vary with temperature and resin formulation, but most systems require at least 24 hours at room temperature, and sometimes up to 48 hours for maximum strength. Do not hurry this step by applying heat or stress to the repair; movement during curing can create micro-movements that degrade the bonded area. A clamp can help hold the fabric flat while curing, preventing the patch from lifting or warping as the resin sets. Protect the area from dust and accidental contact during this period. A quiet, stable environment is ideal for predictable hardening.
Once the epoxy has fully cured, you begin the finishing phase. Lightly sand the repaired area with fine-grit paper to remove ridges and create a smooth transition between the old plastic and the repaired patch. It’s important to avoid cutting too deep or creating a swallow in the surface that would require more repair work. After shaping the repair, clean the area again to remove sanding dust, and then apply a primer compatible with both the epoxy and the underlying plastic. The primer helps seal the repair and provides a uniform base for paint. If you’re aiming for a factory-like finish, multiple light coats of primer are better than a single heavy coat, because they reduce the chance of paint cracking or peeling at the repair line.
Painting follows primer. Use automotive-grade paint that matches the fairing color. Achieving a color match can be tricky, particularly on bikes with unique colorways or metallic finishes. A controlled spray environment—whether a dedicated booth or a clean room with good ventilation and steady air flow—yields the best results. If you lack a spray gun, you can still obtain a professional finish with careful brushing or using a compatible aerosol system, but the brushable or spray approach tends to produce fewer brush marks and a more consistent sheen. In any case, apply multiple thin coats rather than a few heavy ones. Allow adequate drying time between coats, and finish with a clear coat if your chosen color system requires it. The final result should feel like the rest of the fairing in both texture and appearance, with the repaired area invisible from a reasonable riding distance.
The philosophy behind this epoxy-and-reinforcement repair is not about replacing the partner plastic with a patch that looks different. It’s about reuniting the fractured material with a joint that behaves as a single, continuous piece under normal riding loads. The reinforcement layer is what makes this possible. Without it, the epoxy might seal the crack temporarily but would still be at risk of re-opening under pressure from wind, vibration, and road irregularities. With reinforcement, the crack’s energy is dissipated across the fabric and surrounding plastic, reducing the chance that a fault line will reopen after you’ve signed off on the repair and put the bike back on the road.
This approach also dovetails with practical considerations of model variety and maintenance. If you own a modern sport or touring bike, you’ll likely encounter fairings made from different plastics or composite blends. A repair that uses epoxy and fiberglass can be adapted to many of these materials as long as you prepare the surface properly and select a resin system designed for plastics. For riders who like to keep the visual language of their bike intact, the color-matching process is worth the time. Even if you don’t achieve a flawless color match on the first attempt, you can always refine the finish with additional sanding, more primer, and another pass of paint until the repair becomes indistinguishable from the rest of the shell.
For riders considering a broader repair strategy, there is a case to be made for viewing epoxy reinforcement as part of a broader maintenance plan. Epoxy does not magically prevent future cracks; it strengthens the repaired area so that it can withstand the same stresses that caused the initial failure. If a fairing is repeatedly stressed in a high-speed or high-vibration environment, you may eventually need to reassess the overall fairing condition. In some cases, a crack that repeatedly propagates along a seam or near a mounting point might signal a deeper issue in the fairing’s support structure or the way the bike is assembled. It could be a sign of mounting hardware shifting, cracked mounting points, or a misaligned subframe. Addressing those underlying issues can be as important as the cosmetic and structural repair itself, because it eliminates a recurring source of stress that will undermine any patch over time.
As you move through this process, you’ll probably notice that the repair is not a single, isolated event but a learning curve. The more you work with epoxy and reinforcement, the better you’ll become at judging how much resin is enough, how much pressure to apply when saturating the fabric, and how to manage cure times in your workshop’s climate. For a broader understanding of choosing the right materials and reinforcement strategies for different fairings, you can explore domain-specific resources that discuss how different plastics respond to adhesives and heat. In practice, the epoxy-and-reinforcement method is a versatile, reliable path for small-to-moderate cracks that are not located in extremely high-stress zones. It gives a rider the best chance of returning the bike to service quickly while preserving aesthetics and, crucially, safety.
In terms of brand and model considerations, it is useful to think about the coverage you might need if you plan to replace or repair multiple fairing panels in a single project. Some riders with multi-model fleets or aftermarket fairings may want to reserve a portion of their repair budget for the possibility of panel replacement in the future. While this may seem excessive, it acknowledges that high-stress areas—such as air intakes, leading edges, or mounting points—often bear the brunt of road stress. If the crack is near a mounting point that experiences repeated vibration or if the panel’s stiffness has been compromised to the point where alignment becomes a challenge, replacing the damaged panel may ultimately deliver the cleanest, most durable result. Even in such cases, a well-executed epoxy reinforcement can extend the life of nearby components, buying you time until a replacement is feasible.
A practical note about compatibility and options can help you plan the repair with confidence. If you’re exploring aftermarket options or a broader fairing repair project, you may encounter a wide range of panels and subcomponents. A relevant resource to guide your brand-specific choices is the Honda fairings category, which can offer insight into how aftermarket pieces align with factory mounting points and air management goals. Honda fairings on UltimateMotorX may provide a sense of the scale and surface characteristics you’ll encounter when working on certain models. While the epoxy-reinforcement approach remains consistent across plastics, understanding how a given panel is built helps you tailor the repair to its geometry and stress paths. This context supports a repair that not only holds up under wind pressure but also preserves the fairing’s appearance and aerodynamics so that the bike can return to its intended performance.
It’s worth ending with a disciplined reminder: safety and external integrity. The repair must be strong enough to withstand road vibrations, wind load, and potential contact during a stumble or minor collision. If you doubt the repair’s strength, if the crack is larger than a typical hairline, or if you observe recurring movement at the repaired site, consider seeking professional help. A qualified motorcycle body shop has the tools and experience to assess the fairing’s overall integrity, confirm the repair’s long-term viability, and offer alternatives such as a full panel replacement when necessary. The goal is a repair that is not only technically sound but also aesthetically seamless and safe for everyday riding.
For riders who want to explore further, the detailed guidance from established repair resources can be a valuable complement to hands-on practice. The Motorcycle Fairing Repair Guide provides a thorough overview of materials, techniques, and safety considerations, along with tested steps that align with the epoxy-and-reinforcement approach described here. This external resource offers a broader perspective on choosing epoxy systems and reinforcement strategies tailored to different plastics and fairing geometries. You can consult it as you plan your repair, while keeping in mind the specifics of your bike and the repair’s scope. RevZilla’s Motorcycle Fairing Repair Guide presents a careful, safety-conscious framework for handling these repairs on a DIY basis.
In summary, epoxy combined with reinforcement—enthusiastically applied with prepared surfaces, carefully saturated fabric, and thorough curing—gives you a robust, durable repair for cracked motorcycle fairings. This method balances strength, appearance, and feasibility, letting riders return to the road with confidence. It’s a practical middle ground between quick fixes and full panel replacement, preserving the look and protection that the fairing provides while restoring structural integrity. If you treat the initial crack as a symptom of broader stress, you’ll not only fix the current damage but also position yourself to respond effectively to future wear. And if aesthetics matter as much as performance, the finish can be tuned to disappear into the surrounding color, so the repair remains a quiet, dependable part of the bike’s overall presentation.
From Cracks to Clear Coat: Integrating Filling, Painting, and Replacement in Motorcycle Fairing Repairs
Repairing a cracked motorcycle fairing begins with material awareness and a disciplined sequence: surface preparation, filling, finishing, and color protection. Begin by cleaning the damaged area with a degreaser or alcohol-based cleaner to remove oil, wax, and old finish, then inspect the crack to determine the best approach (epoxy fill, fabric reinforcement, plastic welding, or panel replacement). Feather the edges with fine-grit sandpaper (600–1200 grit) to create a micro-rough surface for adhesion and to help blend the repair with surrounding material. Mask nearby painted areas to protect from dust and overspray. For hairline or small cracks, apply a high-strength epoxy-based filler, pushing it into the opening and slightly above the surface to allow sanding flush once cured; mix and apply strictly according to the manufacturer’s instructions. If the crack is wider or subject to flex, reinforce with a thin fiberglass cloth over the wet filler and add another thin layer of filler. For larger cracks or distressed mounting points, plastic welding may yield a stronger bond, or replacement may be the simplest and most reliable option. After curing (typical times are 24 hours at room temperature, longer in cooler humidity), sand the repaired area using progressively finer grits: 800, 1000, 1500, and 2000, damping the surface to minimize heat buildup. Wipe clean and inspect for low spots or pinholes. Apply a plastic primer compatible with ABS or polycarbonate and sand lightly if needed to achieve a uniform base. Determine color with the original code or a close match, testing on a small inconspicuous area before applying the full finish. Apply thin, even base coats, allowing each coat to dry fully, then lay down the color coats in multiple very light passes to avoid runs. After color, apply a clear coat in thin layers to seal and protect, followed by a careful buff once cured. Wet sanding between coats can improve gloss and blend. If you decide that replacement is more practical—due to extensive cracking or compromised mounting—select an OEM or aftermarket panel that matches model and year, verify alignment and hardware compatibility, and confirm color matching with adjacent panels before swapping. Safety remains essential throughout: ensure ventilation, use PPE, and follow product instructions. When uncertain or working on complex geometry, seek a professional with plastic repair experience. Finally, conduct a thorough post-repair inspection under bright light and test the panel’s resistance to gentle flex to confirm a durable result.
Final thoughts
Repairing cracked motorcycle fairings is a valuable skill for business owners in the automotive industry. By employing methods such as plastic welding for major repairs, epoxy application for smaller cracks, and considering replacement when necessary, you enhance the integrity and visual appeal of the motorcycles you service. These repair techniques not only expand your service capabilities but also build trust with your customers who seek high-quality craftsmanship. By implementing these practices, your business can thrive in a competitive market, offering solutions that keep riders safe and satisfied.