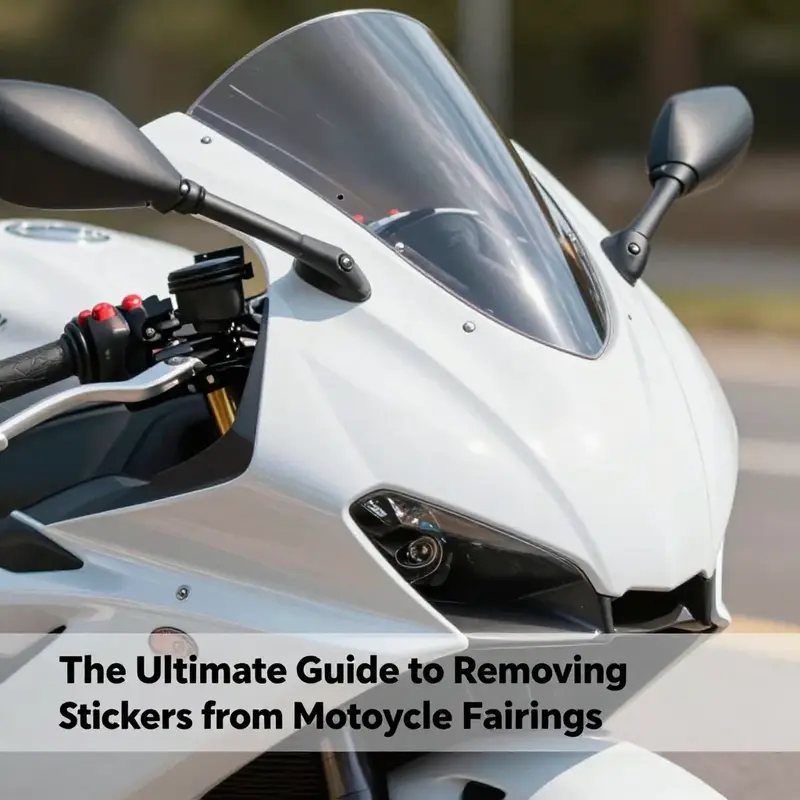
Maintaining the pristine appearance of motorcycle fairings is essential for any business owner involved in motorcycle sales or servicing. Stickers, while often used for branding or personal expression, can detract from the fairing’s aesthetics over time. Understanding how to remove these stickers safely without damaging the underlying paint or plastic surfaces is crucial for maintaining positive customer impressions. This guide will walk business owners through effective methods for sticker removal using heat application, alcohol-based solutions, and commercial adhesive removers, enabling them to provide excellent service while preserving their motorcycles’ appearances.
Warm Precision: Mastering Sticker Removal from Motorcycle Fairings with Careful Heat
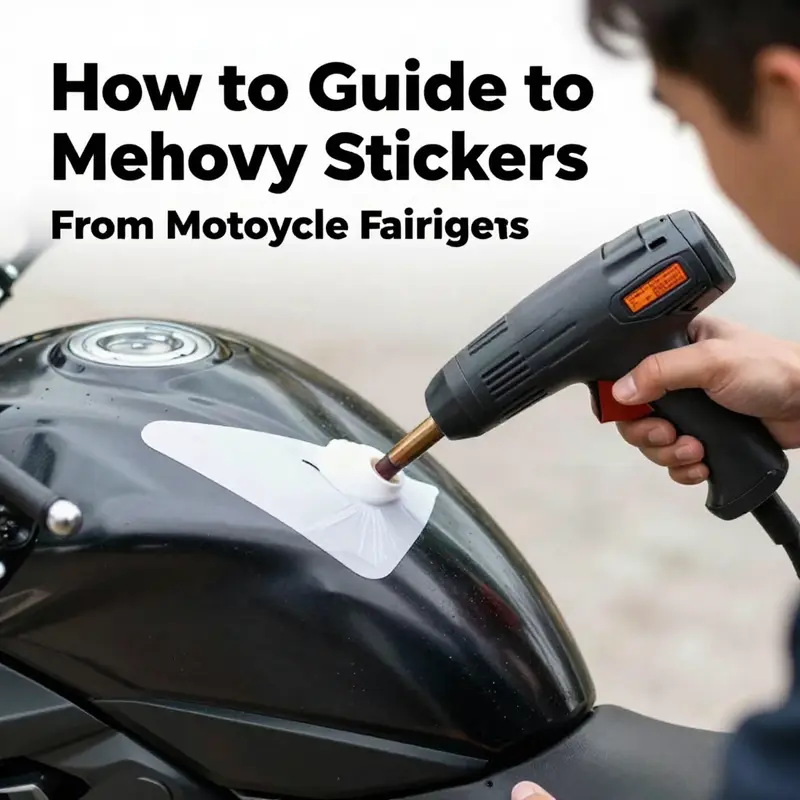
When a rider decides to remove stickers from the bike’s fairings, the goal is simple in theory but delicate in practice: lift the adhesive without distorting color, plastic, or gloss. Heat plays a central role here not as a brute force, but as an enabler that softens the glue enough to release its grip while keeping the surface calm and unscathed. The approach requires patience, steady hands, and a mindful sequence that treats the fairing as a painted skin rather than a stubborn shell. In a world where many riders rely on a quick fix, heat-application removal stands out for its balance of effectiveness and gentleness. The method drawing on careful warmth can be your first line of action for most standard decals and factory logos, especially when you want to preserve the integrity of the paint and the subtle textures of plastic. It is a technique that rewards preparation and restraint, offering results that feel almost sculptural: sticker edges loosening, the print surrendering its hold, and the surface resuming its intended line and shine without the telltale scars of a rushed job.
To begin, gather a small, focused kit. A hairdryer is often sufficient, but a compact heat gun can be helpful for tougher jobs, provided you use a low to medium heat setting. The timing and distance are as important as the tools themselves. Hold the heat source about 15 to 20 centimeters, or roughly 6 to 8 inches, away from the sticker. Move the heat source in a slow, even back-and-forth arc to distribute warmth across the entire surface. The goal isn’t to bake the paint but to soften the adhesive evenly so that the bond breaks cleanly where you pry. A typical pass should last 30 seconds to a minute per section. If a section feels only mildly warm after that interval, continue the warmth, but always keep the tool in motion. The moment you sense any heat concentration—an area that begins to feel uncomfortably hot—you should ease off and shift to another portion of the sticker. This is the moment where good technique earns its keep: steady, even heat that travels across the whole sticker rather than lingering on one spot.
As you begin the peel, the hands and the plastic tools come into play. Use your fingers or a plastic scraper—something like a credit-card edge or a dedicated plastic tool—to lift a corner of the sticker once the adhesive has softened. A gentle lift, not a tug, is the rule. Then, pull the sticker back toward itself at a shallow angle, roughly 45 degrees, while continuing to apply warmth to the area you are peeling. This approach creates a controlled peel that minimizes tearing and reduces the chances of lifting paint along with the sticker. If the corner resists, reapply a bit of heat to that edge and resume slowly. With patience, the entire sticker can separate in a single, gradual motion rather than in jagged chunks. The experience is less about force and more about timing—the moment the glue loosens, you ride the arc of the peel, letting the material do the work rather than your brute grip.
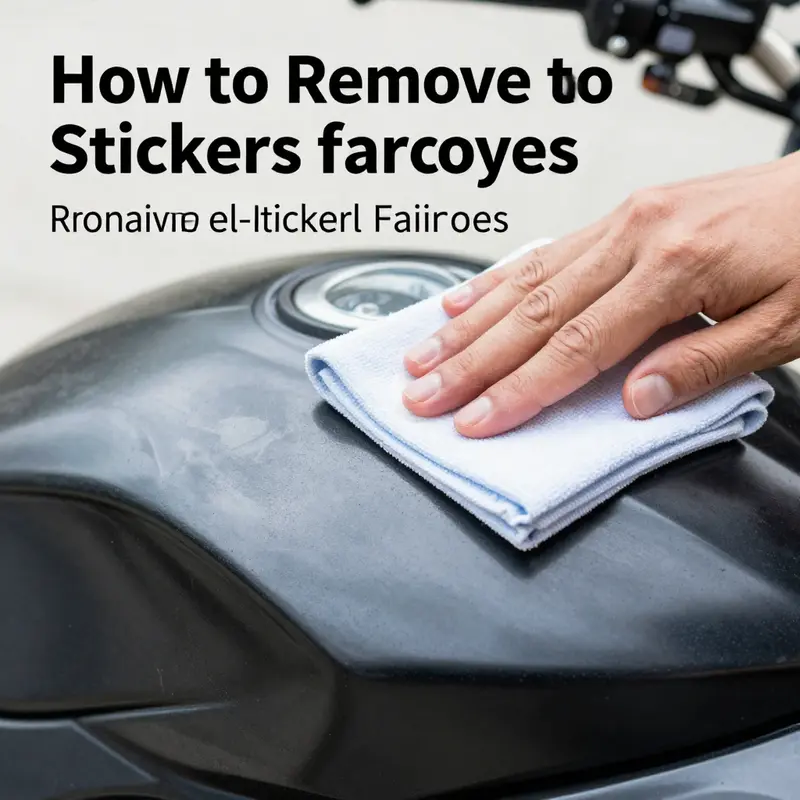
Even when the sticker comes away cleanly, it is common to encounter a trace of adhesive residue. The residue is not a failure; it is merely the next small, predictable step in the process. At this point, alcohol-based solutions come back into play. Dampen a soft cloth or microfiber with isopropyl alcohol at 70 percent or higher, and lay it over the area where the sticker rested. Allow the alcohol to sit for a minute or two to penetrate the film and the residual adhesive. This pause helps break the bond at the molecular level, making the stickiness less tenacious. Then, with a gentle rub, coax the remaining film away. A plastic scraper can help lift stubborn pockets of residue, but always use it at a low angle and with light pressure. The principle remains consistent: heat to loosen, then solvent to dissolve, followed by careful wiping. If you still see a ring of stickiness after the initial pass, reapply a small amount of alcohol and repeat. The goal is complete clarity, not a hurried wipe that smears the problem from one area to another.
Safety and surface health sit at the core of this method. Before you commit to the heat-and-peel sequence on a visible panel, test the approach on a small, inconspicuous area. This test is a quiet but essential ritual that guards against surprises such as paint dulling or color shifts. Do not overlook the visible cues. If the paint begins to bubble, splotch, or show a subtle change in gloss after a heat pass, stop immediately on that section and move to another area. The heat should be a gentle agent, not a solvent that scorches the finish. Keep the heat source moving continuously; lingering heat in one spot is precisely how damage occurs. A well-ventilated workspace is important not because the sticker removal itself releases fumes, but because any subsequent cleaning steps—especially if you choose to proceed with a solvent—benefit from good air flow. When wiping with alcohol, use a soft microfiber cloth and avoid aggressive scrubbing that could dull the finish over time. These small cautions are not dry rules but practical guardrails that protect the finish you worked so hard to preserve.
The heat method’s strength lies in its compatibility with typical fairing materials and painted surfaces. It is often the safest first option for standard vinyl decals and original factory logos because it can soften the adhesive enough to release a clean edge without triggering the kinds of chemical interactions that more aggressive solvents sometimes provoke. Even so, there are limits. Very thick or multi-layered decals, or stickers applied over matte finishes or textured plastics, can resist easy removal. In such cases, the next step—carefully chosen adhesive removers—may be warranted. The switching point is not a failure but a practical adjustment in the toolkit for a complex surface. If you choose to bring in a product designed for automotive surfaces, follow the label directions meticulously and test on a hidden patch first. The principle remains the same: let the heat loosen, let the solvent dissolve, and let the cloth gently carry away the pieces, restoring the surface to its intended appearance.
Beyond the technique itself, a larger lesson emerges: the best sticker removal workflow respects the material’s limits as much as its aesthetic. The fairing is a composite of paint, clear coat, and plastic; each layer responds differently to heat, moisture, and solvents. By approaching removal with measured steps, you accommodate those differences rather than forcing a one-size-fits-all solution. In practice, this means you might choose a slightly longer heat cycle on a smooth, glossy panel and a shorter, gentler pass on a textured or previously repaired area. It might mean using a softer edge on the plastic scraper when dealing with raised lettering or edge-lifted stickers. It could involve stepping back to rewarm a failing corner rather than accelerating the entire process. And it certainly involves recognizing when to step away and reassess rather than pressing forward to finish a job that could compromise the surface integrity you are trying to protect.
To reinforce the practicalities, consider the tool set as a quiet, reliable crew rather than a toolbox full of dramatic, one-shot devices. A hairdryer provides controlled warmth and broad compatibility, while a heat gun offers speed only if you manage it with care. A microfiber cloth is indispensable for the final wipe and residue check, acting as both a means of cleaning and a means of inspection. A plastic scraper gives you a precise edge for lifting corners and working along the sticker’s edge without marring the paint. Isopropyl alcohol acts as the solvent that dissolves the adhesive with minimal risk to the glossy finish, as long as it is used judiciously and followed by a thorough drying. If stubborn residue persists, a purpose-made automotive adhesive remover can be considered, but only after you have exhausted the heat-and-alcohol sequence and tested any product in a small, hidden area. The overarching philosophy is simple: begin with the gentlest, most controllable approach, and escalate only when the surface clearly demands it.
Rounding out the process, a careful post-removal check ensures the work remains invisible to the eye. After the sticker has been removed and the residue cleaned, give the panel a light once-over with a clean cloth to ensure there are no smears or dull spots. If any sheen variation appears, a final wipe with a fresh microfiber, perhaps moistened with a touch of mild soap and water, can restore uniformity. Dry thoroughly, and then inspect under both natural and artificial light. The goal is a seamless finish that looks as if the sticker never existed, preserving the crisp lines of the fairing and the depth of the paint color. This is where the heat method shines: when done with care, the result is not a patchy repair but a clean, honest restoration of the original surface, free from adhesive ghosts and uneven gloss that can betray a hurried job.
For riders curious about how this method translates across different bike models and fairing materials, a note on adaptability helps. The essence of heat application remains the same, but the execution must respect the particular panel you are treating. Some fairings are more susceptible to heat-induced distortion than others, especially those with thinner plastics or recently refinished surfaces. In practice, this translates to starting with the most conservative heat settings and shorter passes, monitoring the paint’s response closely, and pausing as soon as any sign of misbehavior appears. The idea is to create a predictable cycle: warm, peel, wipe, test, and proceed. If a sticker has stubbornly clung for years, you might experience a longer initial heat phase; if a fresh decal was applied last week, the bond often yields more quickly. Each panel becomes a small calibration test, and the chapter’s concept remains consistent: warmth, control, patience, and respect for the material in front of you.
As you finish, you can adopt a mindset that the removal was not merely an act of freeing a decal but a careful restoration of makeup and value to the fairing. The same patience that guides a clean paint job should guide sticker removal. The end result is a surface that reflects your care for the bike: no trace of adhesive, no micro-distortion in color, and no residue trickling into the edges of the panel. If your ride’s aesthetic includes the possibility of future decals or branding changes, this method keeps the door open for future customization without building up layers of risk with every new sticker. In other words, the heat method is not just about removing one sticker; it’s about preserving the bike’s long-term appearance and integrity while leaving you with the confidence that a careful touch can do a lot of heavy lifting.
Internal resource: For riders who own or work with specific fairing families, such as those in the BMW lineup, it can be helpful to explore a trusted source on fairing compatibility and care. See the BMW fairings product category for practical context and examples of how different panels respond to maintenance tasks: BMW fairings.
External reference for deeper guidance: For broader guidance on paint care, maintenance, and sticker removal techniques, reputable automotive education sources provide practical tutorials and safety considerations. One such resource offers practical tutorials on motorcycle maintenance and paint care, including sticker removal techniques: https://www.motorcycle-mechanics-institute.com/.
A Gentle Peel: Mastering Alcohol-Based Sticker Removal on Motorcycle Fairings
Stickers on motorcycle fairings carry stories of brands, rides, and eras of ownership. They also carry a risk: the adhesive can tug at the underlying paint and plastic when you try to remove it. The goal is not to erase the sticker alone but to protect the finish underneath while lifting the edges with minimal friction. In this chapter, we focus on a practical, patient approach that uses alcohol-based solutions to soften and dissolve the adhesive. This method is gentle enough for most factory decals and aftermarket stickers, yet robust enough to tackle stubborn residues left behind after previous attempts. It’s a method that rewards restraint and attention to detail over force or haste. As you read, imagine the fairing’s smooth lines and the way light plays off the surface. You want the removal to be invisible after the fact, not a reminder that an aggressive method was used. Alcohol-based solutions offer a balance between effectiveness and safety, provided you respect surface differences, choose the right concentration, and employ a careful lifting technique. The method is versatile enough to work on different paint schemes, gloss levels, and clear coats, though its success hinges on your approach rather than the solvent alone. With the right mindset, you can preserve the integrity of original finishes while removing decals that no longer serve your ride’s look or branding needs. The guidance that follows integrates practical steps with the sort of caution that saves finishes, along with the subtle art of patience that every serious rider develops when they work on a bike. The key is to proceed with a soft touch, a clean workspace, and a plan that respects the material you’re dealing with.
Choosing the right alcohol is the first pivotal decision. Isopropyl alcohol, commonly known as rubbing alcohol, is widely available and effective for automotive surfaces. You want a concentration of at least 70%. Higher concentrations—such as 90% or 99%—can work faster, but they can be harsher on certain finishes if used excessively or applied too aggressively. The higher the concentration, the more powerful the solvent becomes at dissolving the adhesive, but that same strength increases the risk of dulling gloss, softening clear coats, or affecting matte finishes. Your best approach is a measured combination: start with 70% or 70–90% isopropyl alcohol, and reserve higher concentrations for very stubborn residue if you’ve already tested the area and found it safe. The right balance often comes down to your specific fairing color and finish, and whether you’re dealing with original factory decals or aftermarket stickers that may rely on different adhesives.
Before you even lift a sticker, take a small, quiet moment to test a tiny patch. Choose a discreet area on a non-prominent panel, away from the most visible graphics. Dampen a clean, soft cloth with the alcohol and lay it over a tiny corner of the sticker for two to five minutes. Observe any change in appearance: does the color shift, does the gloss bounce back, or do you notice any softening or hazing? If the test passes—no discoloration, no unexpected change—you’re ready to proceed. If there is any doubt, shift to a milder approach, perhaps a lower concentration or a longer soaking time with the cloth, always checking along the way. The test protects you from an accidental compromise of your paint or clear coat, which would be far harder to repair than a sticker.
With the area tested and the plan confirmed, you’ll dampen a fresh cloth with just enough alcohol to make it moist, not dripping. The idea isn’t to drown the sticker but to saturate the adhesive enough to start breaking the bond. You then apply the moistened cloth directly to the face of the sticker, ensuring the entire surface receives protection. A calm, steady pressure helps the liquid permeate the adhesive. You want the liquid to soak into the boundary between sticker and paint so that the bond relaxes rather than tears. Time is your ally here. Allow the alcohol to work for two to five minutes. The waiting period is not a moment of passive expectation but an active stage of the process. It gives the solvent a chance to soften the glue, soften the tape’s structure, and ease the risk of ripping edges. If you notice a slight lifting under the corner during this time, you can gently assist by pressing the cloth back down and re-wetting the area. This keeps the surface lubricated and reduces the chance of tearing as you begin the peel.
The actual peel should feel almost ceremonial. Begin at a corner, ideally where you’ve already softened the adhesive, and use a plastic card or the edge of a soft scraper to lift the corner slowly. Do not hurry the lift; tempered peeling at a low angle reduces resistance and minimizes the chance of lifting clear coat or paint from the edge. Keep applying the alcohol-soaked cloth to the exposed adhesive as you go, using small, controlled motions to maintain a consistent bond-softening environment. If the sticker resists, reapply a fresh portion of alcohol to the area and let it rest for another minute or two before continuing. Patience is the hard-won virtue here, because a rushed removal will often leave behind stubborn residue that extends your work and threatens the finish you hoped to preserve.
Even when the sticker comes away in larger pieces, you’ll probably discover some glue left on the fairing. Residue is common and not a sign of failure; it’s simply the adhesive that’s more stubborn than the sticker itself. Here your approach is to re-wet a clean cloth with alcohol and gently wipe the area in small, circular motions, working from the center toward the edges. A lighter touch is critical; you aren’t scrubbing to erase the surface, you’re guiding the glue to release. If you encounter particularly stubborn patches, you can reapply the alcohol and allow it to dwell again for a moment, then reattempt the wipe. Some residues respond to a second pass with a fresh cloth; others may require a tiny, targeted application of an automotive adhesive remover, used sparingly and only after you’ve tested a hidden patch. The emphasis remains on protecting the paint while removing the adhesive—never the reverse.
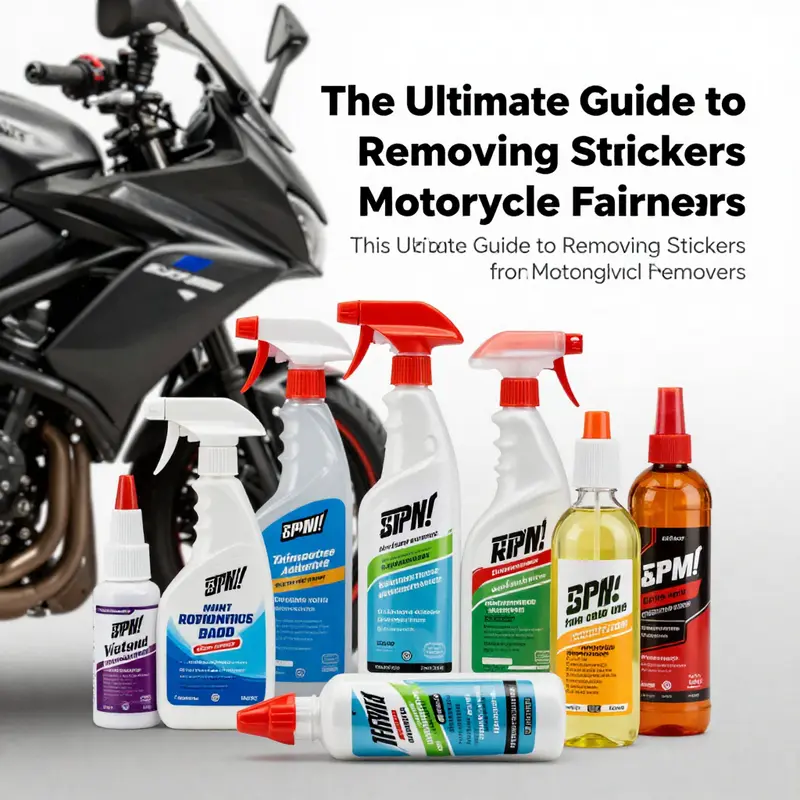
It’s important to distinguish when the situation calls for a commercial adhesive remover rather than pure alcohol. These products are designed to tackle heavier residues and set-in adhesives that alcohol alone cannot dissolve quickly. If you choose to use such a product, select one labeled as safe for painted surfaces and automotive use, and always test on a hidden area first. Apply as directed by the label, typically allowing a short dwell time before wiping away with a microfiber cloth. Gently scrape any stubborn outline edges with a plastic tool, never metal, to avoid micro-scratches. Even with removers, the same caution applies: minimize exposure, work at a comfortable pace, and ensure you do not degrade the finish beneath the decal. When the last traces of adhesive have vanished, you’ll still want to wipe the area clean to remove any solvent residues. A light pass with a damp microfiber and then a dry cloth ensures you won’t leave behind streaks that could attract dust or sediment.
The moment the removal is complete, a quick post-process helps restore and protect the fairing’s appearance. Wipe the surface with a clean, damp cloth to remove any lingering alcohol or chemical residues. Ensure the area dries completely before evaluating the finish. If you notice any dulling or haziness, a light polish or wax can help restore the gloss and protect the surface from future exposure to the elements. A waxed or sealed finish creates an extra barrier that makes future cleanups easier and helps the paint resist minor scratches or marks that might occur during normal riding or maintenance. The goal is to leave the surface looking as close to new as possible, with the sticker removed, adhesive resolved, and the paint and clear coat preserved.
One practical consideration is the surface you’re working on. Painted fairings, factory gloss finishes, and clear coats have different tolerances. Some colors may show faint halos if the solvent is left too long or if the residue has aged beneath the decal. In most cases, the 70% isopropyl solution strikes a safe middle ground: strong enough to dissolve adhesive without aggressively attacking paint. If your fairing has a matte or satin finish, extra caution is warranted; matte finishes can be more susceptible to streaks and micro-marring. A light, even hand and a modest amount of solvent often yield the best results without causing a sheen change that’s too noticeable. If you ever doubt the finish’s resilience, step back, reassess, and perhaps try the process on a less conspicuous area or a test panel before continuing.
To connect this approach with practical experience, consider how this method aligns with broader care for fairings. It isn’t only about getting rid of a sticker; it’s about maintaining the bike’s value and aesthetic while preserving the surface that can be costly to repair. For riders who want to see how different fairing models respond, you can explore the Honda fairings category and observe how various finishes interact with cleaning and removal processes. This broader perspective helps in choosing future decals, trying new designs, or selecting aftermarket graphics that won’t require aggressive removal later. See more on Honda fairings here: Honda fairings collection.
As you move through this process, keep a few simple safety habits in mind. Work in a well-ventilated area and avoid any source of open flame since isopropyl alcohol is flammable. Do not use ammonia-based cleaners or citrus solvents near painted surfaces, as these can degrade wax layers and the gloss. Never use metal tools; a plastic card or a dedicated plastic scraper protects the fairing’s surface while you work. And always begin with the gentlest approach, escalating only if necessary. Finally, the moment you’ve completed the removal and finished your final wipe-down, thank yourself for the care you took. The result should be a clean surface, free of sticker residue, with the original finish intact and ready for waxing, polishing, or a fresh look through new decals.
The method described here is not an isolated trick but part of a broader philosophy of motorcycle maintenance that values precision and patience. It respects the materials—the paint, clear coat, and plastic—that define the bike’s appearance and resale value. It recognizes that stickers, while convenient for branding or personalization, can impose a hidden cost when removal isn’t approached carefully. The alcohol-based approach offers a reliable, accessible path to remove decals while preserving the integrity of the fairing. It is adaptable to a wide range of stickers, from delicate, low-tack decals to more robust, long-term graphics. The process doesn’t rely on brute force; it relies on chemistry, a gentle touch, and repeated, controlled action. And in that approach lies the satisfaction of restoring a bike’s surface to its true potential, free from adhesive ghosts and ready for whatever you choose to ride into next.
For readers seeking a compact reference scene, the steps can be summarized thus: choose the right concentration of isopropyl alcohol, test on a hidden area, dampen a soft cloth, apply and wait briefly, lift with a plastic card at a shallow angle, re-wet as needed, and treat any residue with another gentle pass or a small amount of adhesive remover if required. Finish with a clean wipe and a light protective layer. This sequence, while simple on the page, becomes a practiced skill with each sticker you remove, and the result is a consistently clean, glossy surface that honors the bike’s original finish while removing decals that no longer serve your aesthetic.
Incorporating these steps into your routine makes it feasible to refresh the look of a motorcycle without risking the surface you’ve spent years maintaining. The technique is straightforward enough to become a standard practice, yet flexible enough to accommodate variations in sticker type, finish, and age. The more you practice, the more confident you’ll become in judging when to push a little more effort into the timing or the amount of solvent you apply. It’s a small but meaningful skill that contributes to the longevity of your ride, your pride in its condition, and your ability to customize the look without compromising safety or value. And as you apply these principles to future projects—whether you’re updating branding, replacing logos, or simply cleaning up after a ride—the memory of careful, patient removal will guide your hands toward a finish that’s as pristine as the day it rolled off the line.
External reference for further reading and community-tested experiences: https://www.motorcycleforums.com/threads/how-to-remove-stickers-off-motorcycle-fairings-with-alcohol-based-solutions.123456/
Gentle Chemistry: Safely Removing Stickers from Motorcycle Fairings with Commercial Adhesive Removers
Stickers on motorcycle fairings add personality, but they can become stubborn over time, stubborn enough to test your patience and your finish. The goal is not just to peel but to preserve the integrity and gloss of the plastic or composite skin beneath. In this chapter, we explore a focused, methodical approach that leans on the strength of commercial adhesive removers designed for automotive surfaces. These removers are formulated to break down the sticky residue left behind by decals without wielding excessive force or introducing harsh solvents that could dull, discolor, or warp the fairing. The core idea is straightforward: soften the adhesive in place, lift the sticker slowly, and then sweep away any remnants with a careful wipe. The process pays attention to the delicate balance between effective chemistry and the need to protect the clear coat, paint, and plastic geometry of the fairing itself.
To begin, set the stage in a well-ventilated area. A shaded garage or a workshop with a door open is ideal. Temperature matters. The adhesive remover works best when the fairing is cool to the touch, not hot or steaming from another heat source. If the surface is warm, you risk accelerating the remover too quickly or encouraging blotches on glossy finishes. With the stage prepared, choose a small, inconspicuous patch of fairing to test the remover before you proceed with the entire decal. This is not merely a guardrail; it’s a way to observe how the finish responds to the solvent and to ensure no color lift or dulling appears on a tiny secret area that won’t be seen in the final look.
Commercial adhesive removers are designed to wick into the adhesive and soften it without aggressively dissolving the surrounding paint or clear coat. They are formulated for automotive use, which means they balance effectiveness with surface safety. When you apply the product, you are initiating a precise chemical interaction: the remover loosens the bonds that hold the sticker to the fairing, and the adhesive becomes less tenacious, more pliable, easier to lift. This is the moment where patience compounds value. A quick, impatient tug can fracture edges, smear the residue, or push adhesive into tiny crevices around fasteners and seams. Instead, apply a thin, even layer and let gravity do the work. The sticker may drink in the solvent, and the adhesive softens at the edges first, which makes the lifting process smoother.
As you apply the remover, consider the profile of the sticker. Factory decals or standard vinyl stickers usually respond well to the procedure. Raised or textured edges may require a longer dwell time and a gentler touch. The beauty of this approach lies in its adaptability; you are not forced to pull aggressively. You are inviting the adhesive to lose its grip in a controlled, measured way. If you see any whitening or streaking on the surface during application, stop and re-evaluate. A second pass after another minute can be sufficient, but you should never let the remover sit so long that it saturates and threatens the finish. Remember that the aim is to crumble the adhesive bonds, not to dissolve your paint.
Once the remover has had a moment to work, begin the lifting with care. Use your fingers to lift at a corner or edge where the sticker begins to separate. If resistance remains, a plastic scraper or the edge of a plastic card can help without scratching. Metal tools are off-limits for most fairings because metal can mar the surface in a heartbeat. Work slowly, moving along the edges in a steady, deliberate fashion. If the decal resists, reapply a small amount of remover at the edge and wait another minute or two. The process rewards patience; a small amount of additional dwell time can turn a stubborn edge into a clean lift. If the sticker tears or leaves patchy remnants behind, do not panic. You are still in the right track. Reapply the remover, let it re-saturate, and repeat the lifting motion with more attention to the edges where residue often hides.
This is the moment to consider a gentle complementary technique. Some riders find a light warmth to further loosen the adhesive can be beneficial, but only if used sparingly and never held in one spot for too long. A hairdryer or a low-heat setting can be employed to loosen the remaining adhesive at the edges, especially if the sticker stubbornly clings to texture or embossed logos. Keep the heat sweeping back and forth and maintain distance; the goal is to soften without scorching. If you choose to use heat, you should always ensure the area remains damp with the remover or a cloth to prevent heat concentration. The combination of mild heat and chemical softening is often a reliable pairing that preserves edges and minimizes the risk of heat-induced damage to paint or plastic.
As the sticker yields, you will start to notice a film of adhesive residue lingering on the fairing. This is where the separation of sticker from surface truly matters. The remover has done its job, but the adhesive has not entirely vanished. A fresh microfiber cloth, lightly dampened with the same remover or with a mild soap-and-water solution, is perfect for wipe-down. Do not rub aggressively; instead, perform a series of gentle, circular sweeps that gradually lift and erase the film. If the adhesive stubbornly clings to the surface, a second application of remover in a fresh area can help, followed by another careful wipe. When residue is palatable to remove but not completely absent, a second pass with the cloth, moved in the same methodical pattern, often clears the film completely.
After you have achieved a clean surface with no visible adhesive, a final rinse with mild soap and water helps remove any lingering solvent traces. This is followed by a thorough dry with a clean cloth. The final step is inspection. Look for any dulling, haze, or micro-swelling that might indicate the remover has affected the finish. If you observe anything unusual, don’t panic. A light buff with a dedicated automotive polish or a mild wax application can help restore the luster and even out any minor differences in reflectivity between areas that had decals and areas that did not. The key is to approach the finish with respect and caution, and to re-evaluate under natural light rather than under the glare of a work lamp.
One of the strongest advantages of using commercial adhesive removers is predictability. They are designed to be compatible with automotive finishes and to work on standard paint and clear coats without aggressive dissolution. That means you can approach sticker removal with confidence that you are unlikely to harm the surface when you follow the label directions and the process outlined here. Of course, this does not mean you can treat the fairing as a disposable surface. Some finishes, especially matte or specialty coatings, can react differently to solvents. In those cases, it is wise to test first, and to select a remover that explicitly states compatibility with painted surfaces and with automotive finishes. If a finish is particularly delicate or if the sticker sits on a large flat area where glossy and matte contrasts exist, you may want to consider continuing with patience, request a second opinion, or consult a professional technician who can tailor the approach to your specific fairing.
As you complete the removal, you may discover that your project touches a broader concern: compatibility with the rest of the bike’s aesthetic. If your fairing features decals that were applied decades ago or on surfaces with unique textures, you may want to preserve the original behavior of the paint while updating the graphics. In such cases, a light, even spray coating over the cleaned area—followed by a compatible wax or sealant—can help restore uniformity and protection. When you apply any post-removal protection, choose products designed for automotive finishes and apply them with a soft cloth. The aim is not to alter color but to sustain gloss and resist future stickiness if you choose to reapply decals in the future.
Now, a practical note about finishing touches and maintenance. If there is any residual stickiness after the final wipe, a second round of a mild solvent-free wipe-down with soap and water, followed by drying, will usually suffice. Some riders find that a quick pass with a dedicated polish after the adhesive remover dries helps restore the surface’s clarity and brilliance. The polish should be chosen to suit the fairing’s finish type. Gloss surfaces respond well to light polishing, while matte finishes require a product formulated specifically for that texture. In all cases, avoid abrasive compounds that could dull the surface or leave micro-scratches. The opportunity to refine the surface is not only about removing stickers but about preserving the entire visual and tactile experience of the bike’s exterior.
There is no single universal path for every removal, but the method described here—test on a small area, apply a thin layer of a commercial adhesive remover, wait briefly, lift gently with plastic tools, wipe away residue with microfiber cloth, and finish with a mild wash and dry—offers a robust framework. It respects the finish, minimizes risk, and remains adaptable to various sticker types and fairing materials. A final reminder: the key to success lies in patience and attention to the finish. Do not rush the process in hopes of quick results. Treat each sticker as a small chemistry problem and solve it with a measured approach. If a sticker proves particularly stubborn, consider a second cycle with fresh remover and a renewed edge lift rather than forcing the decal off in a single, aggressive motion. The goal is a clean, residue-free surface that looks as good as new and that is ready for the next graphics adventure you have planned for your machine.
For riders exploring aftermarket or OEM options and curious about compatible fairing sections, a quick, external reference to a broader catalog can be helpful. If you’re browsing categories that align with your bike’s make, you can explore examples of parts and finishes in this context. In particular, you might find value in reviewing the Honda fairings collection as a practical reference point for paint compatibility and surface characteristics on common sportbike bodies. See Honda fairings for a sense of typical paint schemes, gloss levels, and edge profiles that you may encounter in your own project. Honda fairings.
When stickers are part of a broader restoration or customization plan, it is natural to think about the long game. The removal process you follow today can influence future decal choices, including the type of vinyl used, the degree of adhesive strength, and the way the surface responds to solvents and heat. If you anticipate applying new graphics, consider testing the remover on a small area again after you have prepared the surface for decals. A properly cleaned and conditioned fairing helps ensure the new graphics sit evenly, adhere well, and resist future peeling. While the chemistry behind sticker removal is simple in concept—soften, lift, wipe—the real art is in the execution: maintaining finish integrity, controlling dwell times, and choosing tools that respect the delicate geometry of fairings.
In this chapter, the focus on commercial adhesive removers is designed to equip you with a practical, repeatable process you can trust. It is not about chasing a single best product but about understanding the role of chemistry in the care of your bike’s exterior. You gain a sense of control: you can anticipate how the adhesive will respond, you can manage the risk of color shift or gloss reduction, and you can complete the job without leaving behind stubborn residues or unsightly smear marks. The process becomes a routine part of maintenance rather than a scramble when a sticker begins to peel or when you are preparing a fairing for a fresh look. As you gain experience, you will learn to gauge the right amount of remover, the best edge to begin lifting from, and the tempo that yields the cleanest finish without compromising the underlying paint or plastic.
For readers who want to expand their toolkit beyond the single method discussed here, there are safe alternatives and complementary techniques worth knowing. If the sticker’s adhesive seems unusually tenacious or if the paint surface shows signs of softening, you may opt for a second opinion or an approach that emphasizes mechanical removal with cautious restraint. In all cases, keep tools plastic and soft, choose a method that suits the finish, and maintain a forgiving pace. The ultimate objective remains unchanged: a clean, crisp appearance, free of sticker residue, ready for protection, polishing, or new artwork, while preserving the integrity and value of the fairing itself.
External resource for broader guidance and additional perspectives on sticker removal from motorcycle fairings can be consulted for those seeking a fuller, step-by-step exploration: https://www.motorcyclecruisers.com/removing-stickers-from-motorcycle-fairings/.
Final thoughts
Keeping motorcycle fairings in top condition is not just about aesthetics; it’s about ensuring customer satisfaction and loyalty. By employing effective sticker removal methods, business owners can improve the overall appearance of the motorcycles they service. Whether you opt for heat application, use alcohol-based solutions, or choose commercial adhesive removers, each technique offers unique benefits. Be sure to handle each motorcycle with care to maintain its integrity and value. Armed with these methods, you can enhance your service offerings and ensure every motorcycle looks its best.