Removing decals from motorcycle fairings is an essential skill for business owners in the motorcycle repair and customization industry. Properly removing decals not only enhances the aesthetic appeal of the motorcycle but also maintains the structural integrity of the fairings. This guide will delve into four effective techniques for decal removal: using heat, isopropyl alcohol, commercial adhesive removers, and avoiding harsh solvents. Each method is designed to empower business owners to tackle decal removal efficiently while preserving the quality of the surface beneath. By honing these skills, you can better serve your customers, ensuring their motorcycles look their best.
null

null
Gentle Adhesive, Pristine Finish: Mastering Isopropyl Alcohol for Decal Removal on Motorcycle Fairings
Decals on motorcycle fairings often carry style, identity, and a rider’s memories, but when the time comes to refresh the look or restore a panel, the goal is simple: remove the sticker without marring the paint or the delicate clear coat. Among the array of methods available, isopropyl alcohol stands out as a careful, versatile option. It behaves as a solvent that can soften adhesives while staying gentle enough to protect most clear coats and painted surfaces when used correctly. The approach described here treats isopropyl alcohol not as a reckless solvent to splash on and scrub away, but as a precise tool that, when wielded with patience, preserves the integrity of the fairing and keeps your finish looking sharp for the next chapter of your bike’s life.
Before you even lift a tool, the first steps are not about removing the decal. They are about preparing a workspace that minimizes risk. Park the motorcycle in a well-ventilated area. Lay a clean drop cloth or plastic sheeting on the floor or ground to catch any drips. Protect surrounding surfaces and components to avoid accidental contact with paint, rubber, or seals. The goal is a controlled, clean environment where you can observe the decal, the edge you’ll begin with, and any irregularities in the finish. This preparation reduces the chance that a stray cloth or dropped bottle will create new challenges later. The success of the process often hinges on this quiet, deliberate start.
Testing is the quiet guardian of the workflow. Start with a small amount of 70 percent or higher isopropyl alcohol on a lint-free cloth and dab it onto an inconspicuous area of the fairing—perhaps near a panel seam or a small, out-of-sight edge of the decal. Allow a moment for the solvent to interact with the surface. If there is any unusual reaction—color change, dulling, or a softening of the clear coat—stop. A paint layer that reacts to solvent is a sign that a gentler method or a different area should be chosen. This test is not a ritual to be skipped; it’s a safety check that can save you from costly refinishing work.
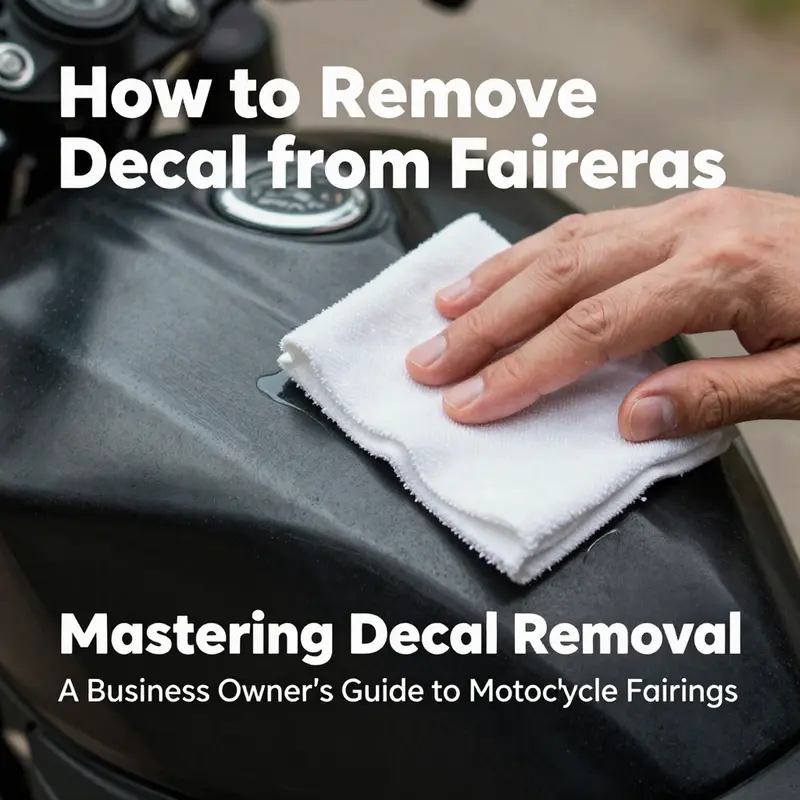
With the test approved, the actual application begins. Soak a clean, lint-free cloth or a cotton pad with the same high-percentage IPA. The key is to avoid soaking the entire decal at once. Instead, press the damp cloth against the decal’s edge for about 30 seconds to a minute. Use light, deliberate pressure rather than aggressive scrubbing. The idea is to invite the adhesive to surrender gradually, not to tear into the finish through brute force. In this moment, the alcohol travels through the adhesive layers and begins to soften the bond while remaining largely contained on the surface you’re treating.
As the decal loosens, your technique should transition to gentle, controlled movement. Rub in slow circular motions around the edge of the decal, letting the solvent continue to work its way under the adhesive. It is natural for the decal to resist at first; patience pays here. If any stubborn edge remains stubborn after the initial soak, re-apply IPA to a fresh cloth and repeat the process. The repeat soak is not a sign of failure but a patient persistence that reduces the risk of tearing or lifting the paint upholstery around the decal. The circular motion helps minimize the creation of micro-scratches; it distributes the solvent evenly and helps you observe progress as the adhesive loosens.
When the decal begins to release, switch to a plastic scraper or an old, credit-card-sized card with a smooth edge. The tool must be plastic to avoid scratching the paint. Gently lift at the loosened edge, and if the bond gives way, continue to work your way along the perimeter. Do not rush the lift. The goal is to separate the decal from the fairing with minimal resistance. If you encounter areas where the edge resists, return to the damp cloth and press again for another short interval. There is no prize for speed here; there is a risk of tearing or scuffing every time you hurry.
Adhesive residues rarely vanish on the first pass, especially if the decal has seen years of sun exposure or if multiple layers were applied over time. For those lingering bits, the approach remains consistent. Re-dampen the cloth, reapply the solvent, and repeat the softening and lifting sequence. A second or even third pass can be necessary to fully loosen the adhesive without pressing the finish into a corner. Avoid the temptation to use a metal scraper for stubborn residues. Metal tools can scratch the clear coat, leaving a footprint that will later catch waxes or polishes and reveal itself as a dull patch. The plastic scraper remains your ally in this phase, providing a pliable edge that can ride along the contours of the fairing without aggressive contact.
Once the decal is removed, the surface often reveals a ghost of the adhesive or a thin film that readers may describe as a residue halo. This is where the second wave of the IPA technique proves its value. Dampen your cloth, and wipe the area with light pressure in broad, straight motions. The alcohol can dissolve the residual residue, lifting it from the finish without introducing new hazards. If the halo persists, you may repeat the soaking and wiping cycle with a fresh cloth. Do not switch to harsher solvents in an attempt to speed the process. IPA, when established as the main method, normally keeps the surface safer than harsher blends that can penetrate or discolor clear coats.
Cleanup after decal removal matters as much as the removal itself. Even when the label appears to disappear, you can still detect faint tack or stickiness where the adhesive rested. A clean, alcohol-dampened cloth is again your friend. Wipe the area thoroughly to remove any adhesive remnants and then follow with a light rinse using a mild soap and water solution. This final wash removes solvent traces and any dissolved adhesive fragments. Rinse thoroughly, as IPA can leave a film if not fully wiped away. A thorough rinse also helps to reveal any areas that might have needed a touch more attention during the removal process. It’s prudent to inspect the fairing under good lighting. Look for any dullness, micro-scratches, or color changes that would signal a need for re-polishing or protective treatment.
Drying is not a step to rush. Allow the area to air dry completely, or gently pat with a microfiber towel if the climate invites quick drying. The goal is to prevent water spots or streaks that can complicate the eventual glaze and wax or sealant application. After drying, a careful inspection becomes essential. If you see minor discoloration or a trace of adhesive that did not release, you can apply another light layer of IPA around the edge and again work with the plastic edge to lift the stubborn film. The process benefits from keeping a calm rhythm rather than chasing quick results and risking a slip that could damage the paint.
The fairing’s finish determines how aggressively you proceed with polishing and protection after decal removal. If the surface is glossy clear-coated plastic, a mild polish and light wax sealant can restore and protect the shine. If the finish is more matte or textured, you may want to choose a protective coating that preserves the textural appearance while providing UV protection. The principle remains the same: clean, smooth, and sealed surfaces are less prone to product build-up or staining in future decal applications.
Integrating knowledge from broader maintenance resources helps you anticipate issues and plan your approach. For example, the broader field recognizes the value of a cautious, gradually escalated removal strategy when working with decals on curved or compound fairings. The curvature itself can trap adhesive in micro-grooves that require targeted, patient application of solvent and careful edging with a plastic tool. When dealing with complex shapes, it may be worth working in small panels rather than attempting to remove a larger decal in one pass. This modular approach reduces the chance of accidental edge lifting or finish damage and gives you better control of temperature, pressure, and solvent distribution across the surface.
As you move toward reassembly or replacement of panels, consider how your decal removal method interacts with the materials of the fairing and its protective layers. Isopropyl alcohol is generally compatible with clear coats and many paint systems when used thoughtfully. It’s not a universal solution, and some coatings may show sensitivity to solvents over repeated exposure. If you notice any unusual whitening, color shift, or surface dulling, pause and reassess your method. Sometimes a different approach—such as heat-assisted removal or a milder adhesive remover in a test area—may be necessary. The aim is to preserve the integrity of the base paint while letting new decals or finishes take hold cleanly.
To weave practical experience into the decision-making process, many riders considerations pivot around the type of decal and the age of the adhesive. A fresh decal often responds quickly to IPA, with rapid softening and easy lifting. An older, baked-on sticker may require extra patience, perhaps a slightly longer initial exposure to the solvent or a staged approach that alternates soaking and lifting. In all cases, the adhesive’s location and the fairing’s contour should guide every move. For instance, corners and edges might lift sooner, while central portions might cling longer. In such cases, it can be helpful to start at a corner, as suggested, and work your way along the perimeter so that the leading edge remains supported by the already loosened sections.
The narrative of decal removal would be incomplete without acknowledging the importance of resource-aware decisions. The choice to rely on isopropyl alcohol should be aligned with your vehicle’s specific materials, the decal’s composition, and your environment. A well-ventilated space is not merely prudent but essential when solvents are involved. If you work indoors, open a window or use a small fan to ensure air circulation and reduce the inhalation of vapors. Storage of IPA should be in a cool, dry place away from direct sun exposure and away from any ignition sources. While the solvent is generally safe for most finishes in the small quantities used in polishing and cleaning, routine exposure or improper storage can introduce hazards.
Within this careful practice, you can also plan for long-term results beyond the initial removal. After you’ve completed cleaning and drying, you may examine the fairing for micro-scratches or hazing. Minor defects can be addressed with a stage-appropriate polish and a protective sealant or wax, applied with a soft applicator and buffed with a microfiber cloth. The aim is not only to remove the decal but to restore the fairing’s luster and shield it from future UV exposure and weathering. A fresh layer of protection helps maintain the appearance during subsequent decal applications, tire kicks, trail rain, and the normal ride life that follows.
For riders who want to explore related options or to see how others approach decal removal within a broader ecosystem of fairing care, there are resources that bridge theory and practice. When you’re ready to extend this method to specific fairing families or models, you might explore the options that align with your bike’s make and finish. For instance, you can find fairings grouped by brand and model, which can help you understand how different surface materials respond to cleaning and refinishing efforts. One such resource category focuses on model-specific fairings, including sections that cater to various popular lines. This can help you anticipate how a particular finish might react to solvents, heat, or polishing.
The middle ground between caution and efficiency is what makes this approach durable. If you have a project where the decal is stubborn or has multiple layers, consider gradually expanding your toolkit. While IPA remains your core, you might engage a safer solvent for limited, targeted use on edge areas, always testing in a hidden corner first. In all cases, maintain a light touch, favoring time over force. The fairing’s surface deserves this respect, as it’s the canvas for your bike’s identity and the foundation for future customization.
Alongside practical steps, a mindset of meticulous care can transform decal removal from a dreaded chore into a dependable routine. When you treat the surface with respect, you’re also extending the life of the finish, preserving resale value, and ensuring the bike remains visually striking after clear surfaces are once again exposed to sun and rain. This philosophy—careful preparation, patient technique, and thorough cleanup—creates a resilient workflow you can carry into future projects, whether you are refreshing a single panel or planning a full fairing transformation.
As you close the chapter on the current decal, you may feel a sense of accomplishment that comes from balancing effectiveness with restraint. The technique described here emphasizes patience, proper testing, controlled application, and careful residue management. This approach aligns with broader maintenance practices that appreciate the subtleties of modern coatings and the precision required to preserve surface aesthetics over time. If you intend to explore more about surface-safe chemical removal techniques, you can refer to authoritative guides that expand on isopropyl alcohol use and its safety considerations. For additional context and step-by-step guidance, see this external resource: https://www.motorcycle-mechanics-institute.com/articles/removing-decals-isopropyl-alcohol
In the spirit of practical continuity, consider how this method supports future customization. When you encounter a decal that you want to replace, the experience gained with isopropyl alcohol helps you prepare the surface for new graphics or color schemes. You’ll have a clearer sense of how the finish behaves under mild solvent exposure and a better sense of the fairing’s resilience. For enthusiasts seeking model- or brand-specific ideas, you can explore related content that organizes fairings by category, such as fairings for CBR models. This internal reference can help you anticipate the texture and finish you might encounter when applying a new decal, ensuring your preparation aligns with the intended final appearance.
The practical arc from testing to final polish demonstrates that decal removal is not simply a mechanical task. It is an exercise in surface stewardship, a careful negotiation with adhesives, and a disciplined routine that keeps your fairing’s finish intact while you pursue a refreshed look. When you mirror this approach with attention to detail, you’ll find that preservation and transformation can share the same space. The bike remains a reflection of your riding philosophy—balanced, precise, and ready for the next chapter of design and performance, with the finish as crisp as the ride itself.
null
null
Gentle Heat, Clean Finish: Mastering Decal Removal on Motorcycle Fairings Without Harsh Solvents
Decals on motorcycle fairings carry a story. They mark identity, speed, and sometimes a rider’s journey. But when it’s time to peel them away, the goal isn’t just to remove the sticker. The aim is to preserve the integrity of the paint, the plastic, and the finish that keeps a bike looking prizeworthy ride after ride. The temptation to grab a harsh solvent or a razor blade is strong, especially when a decal has stubbornly clung on through seasons of sun and rain. Yet the best path blends patience with a few simple, repeatable steps: controlled heat to soften the adhesive, careful lifting to avoid scratches, and a gentle, residue-free cleanup that leaves a smooth surface ready for the next chapter of cosmetics or customization. The approach described here is built around safety first—for you, the finish, and the bike. It emphasizes methods that respect the delicate balance between adhesion and finish, and it prioritizes post-removal care to restore luster and protect against future adhesion issues.
Imagine the scene: a well-lit garage, the bike resting on its kickstand or, if you’re lucky, on a spotless lift. You gather tools that are simple, purpose-driven, and non-destructive—heat source, a plastic card or thin spatula, mild cleaners, microfiber cloths, and a project plan that respects the fairing’s material and its clear coat. The decision to start with gentle heat comes from a clear understanding of how decals age. The adhesive behind a decal is not a uniform matrix; it’s a patchwork of polymers that can respond differently to heat. By warming the decal surface evenly, you broaden the angle of attack. The goal is not to melt the finish but to soften the glue enough that the edge lifts with minimal effort. A hairdryer or a heat gun on a low to medium setting works well, but the technique matters more than the tool. Keep the heat moving, never keep it fixed on one spot, and monitor the surface closely. The recommended distance is typically around 6 to 8 inches from the decal, giving you a gentle, controlled plume of warm air that travels across the sticker rather than concentrates on one micro-area. Avoid exceeding roughly 70°C (158°F) for more than a few minutes in a row to prevent any risk of discoloration, paint softening, or bubble formation in the clear coat. If you see signs of overheating, pause, cool the surface, and resume with lighter passes. This is not a race; it’s a careful negotiation with the material.
Once the decal begins to yield at the edge, the peeling comes next. Lift a corner with a plastic card or a similar non-metallic tool. The plastic card acts as a gentle fulcrum, allowing you to hold the edge while you peel at a shallow angle. The idea is to reduce shear forces that could lift paint or crease the plastic. Work in small, deliberate sections, often starting at a corner and moving along the decal’s edge line by line. If resistance remains high, you can reapply a touch more heat to the specific area. Patience here pays off with a clean separation and a surface that looks almost untouched—the kind of result that makes you forget you ever had a decal in the first place.
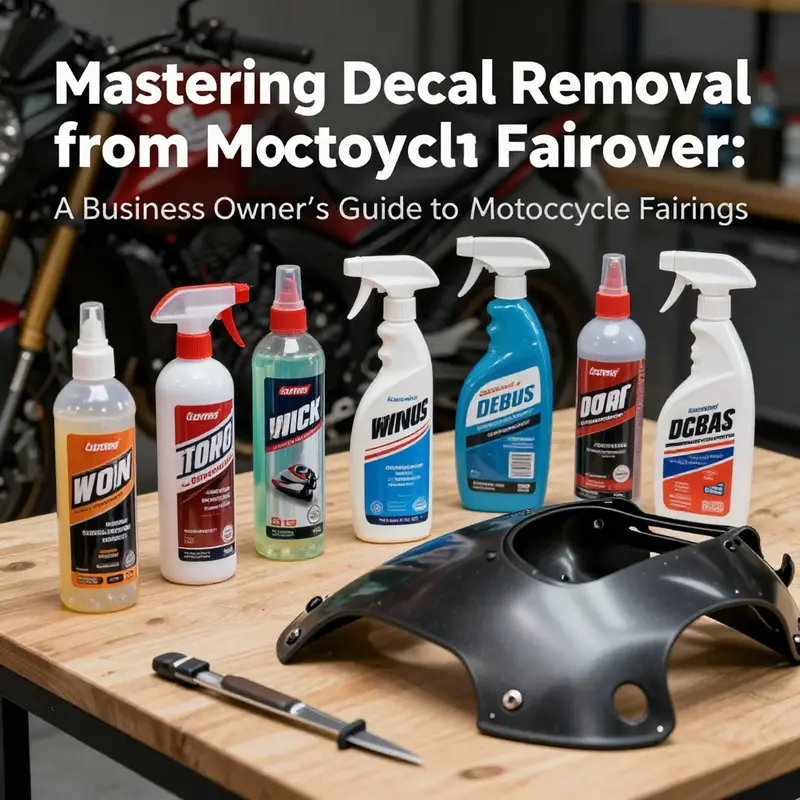
Even with the decal removed, some adhesive residue often clings to the fairing. This is where the process can stray into harsh territory if you follow a reckless path. The residue requires a soft touch and a small, persistent toolkit. A mild, non-abrasive cleaner formulated for automotive surfaces is your first choice. Apply a little to a clean cloth and blot the affected area—don’t soak it. The cleaner’s job is to dissolve the adhesive without dissolving the paint or the plastic. If the residue stubbornly clings, isopropyl alcohol—70 percent or higher—can be a reliable companion. Dampen a cloth and gently rub at the stubborn spots, then blot and wipe away with a fresh microfiber. The combination of a mild cleaner and alcohol is usually enough to dissolve even sticky residues without waging chemical war on the finish.
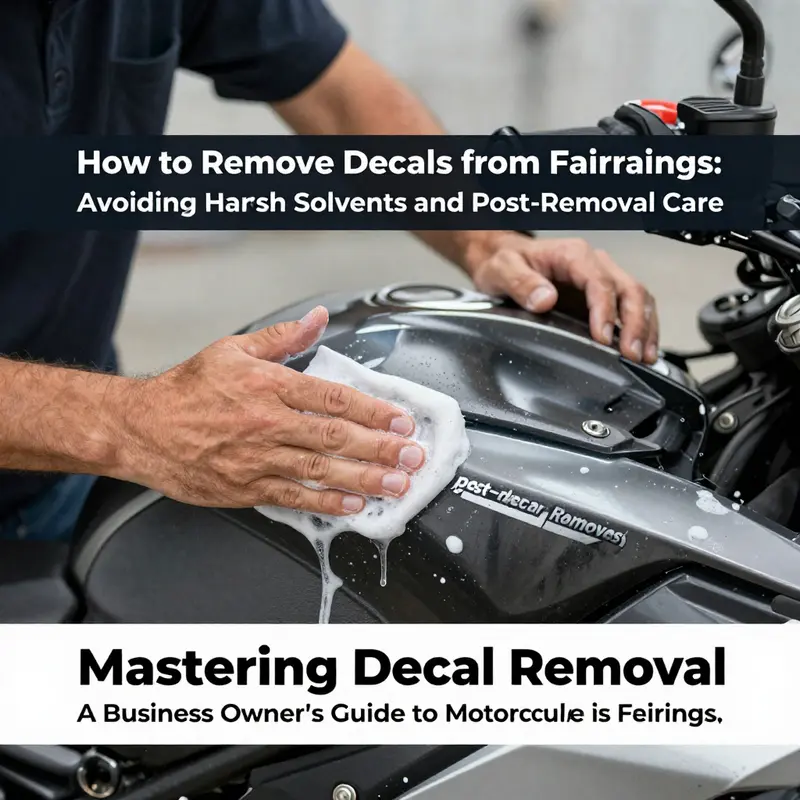
Avoid harsher solvents altogether when possible. Acetone, gasoline, and strong degreasers can compromise the clear coat, soften or craze plastics, or leave faint halos of damage that take hours of polishing to improve. This is not a battle you want to win by weakening the surface. Instead, escalate gradually. If a stubborn patch persists after routine cleaning and alcohol swabs, consider a dedicated adhesive remover designed for automotive surfaces, but test it first in a small, inconspicuous area. Follow the product’s instructions precisely, and rinse with clean water and a microfiber afterward to remove any residual solvent. The key here is restraint and verification: a patch test tells you how the surface will react before you apply something larger to a broader area.
After you’ve cleared away the decals and any stubborn residue, the transition to post-removal care becomes essential. Wash the area with a mild soap solution to remove any lingering cleaner or oil. Rinse thoroughly, then dry with a soft cloth. The next step is to protect and restore. A high-quality automotive wax or sealant helps reestablish a uniform shine and adds a light barrier against future debris, UV exposure, and the gradual re-adhesion of any new materials you might apply later. The waxed surface doesn’t simply look better; it’s also easier to clean in the future and less likely to trap new adhesive residues should you decide to try decals again. If you’re hesitant about your finishing skills, remember that a careful wax layer is not merely cosmetic. It creates a sacrificial, easy-to-clean layer that can save you from scrubbing hard later on.
The approach outlined here relies on a blend of physics and patience. Heat softens adhesive by increasing molecular mobility, allowing the decal to lift with less tearing. A carefully chosen lifting tool ensures you don’t gouge the paint or scratch the plastic. Residue-removal strategies prioritize chemistry and gentleness, using cleaners and alcohol to break down sticky substances without compromising surface integrity. Finally, a polite post-removal ritual—wash, dry, and wax—restores the finish and prepares the fairing for whatever comes next. It’s a sequence that respects the material’s fragility while embracing the practical realities of motorcycle maintenance. Every step is a reminder that a decal’s memory should fade gracefully, leaving behind a surface that still looks as pristine as the day it rolled off the showroom floor.
As you proceed, keep in mind that different fairings may have slight variations in material and finish. Some plastics may be more forgiving of heat than others, while older paint could show a stubborn tendency to blush if overheated. When in doubt, test a tiny patch first. If the area responds with a subtle warmth but no color change or dulling, you know you’re on the right track. If you notice any signs of distress, back off and re-evaluate your approach. This is not just about removing a sticker; it is about interpreting the language of the surface and responding with respect rather than force. The quiet confidence that comes from a careful, methodical routine is what yields truly professional results.
For riders who enjoy the idea of exploring different aesthetics, the process also opens doors to redecoration in a thoughtful way. If you’re planning to apply new decals later, the removal technique you adopt now will shape the ease of future work. A clean surface—free of old adhesive and ready for fresh bonding—helps ensure even adhesive spread, uniform color, and a long-lasting finish for the new graphics. As you plan, you might consider examining options for fairings that align with your machine’s identity. For example, if you’re exploring the Honda fairings category to assess compatible panels or replacement parts, you can find a breadth of options that align with your bike’s frame and styling goals. Honda fairings offers a spectrum of choices to study as you consider new graphics or color schemes that maintain the integrity of the bike’s stance and performance. This kind of browsing isn’t just shopping; it’s a practical step in planning your next cosmetic update while preserving the platform that carries your engine and rider experience.
Throughout this chapter, the emphasis remains on restraint, care, and consistency. If you’re new to decal removal, allow yourself to learn in small, incremental steps. If you’re experienced, you’ll recognize the same rhythms: observe the surface, apply warmth, ease the edge, wipe away residue, and finish with a protective layer. The beauty of this method is that it scales with the complexity of the task. A single small decal on a smooth panel might yield quickly to a few minutes of careful work. A cluster of decals on a contoured surface could demand a more patient approach, perhaps re-heating small zones as needed and advancing with meticulous attention to each section. In every case, you’re inviting the surface to speak to you, and you respond with respectful, measured actions rather than brute force.
In closing, the art of decal removal on motorcycle fairings is not about abandoning the idea of change; it is about embracing a cautious and knowledgeable process that protects the bike’s finish and ensures the best possible foundation for future customization. The combination of controlled heat, careful lifting, and gentle residue management forms a durable framework that you can rely on again and again. And when you finish, the surface you reveal—the color, the shine, the clarity of the clear coat—serves as a blank canvas for the next expression of personal style. If you want to deepen your understanding of the removal steps and see a broader community perspective, you can consult the practical guide linked in the detailed research resources for this chapter. For enthusiasts seeking additional insights and real-world tips, this external reference provides a thorough perspective on decal removal that aligns with the cautious, finish-first approach described here: https://www.motorcycle.com/motorcycle-maintenance/how-to-remove-decals-from-motorcycle-fairings/
In practice, the journey from decal to finish is a short sequence you can perform with modest tools, a careful hand, and a mindset that prioritizes the protection of your motorcycle’s paint and plastic. The chain of steps—apply measured heat, lift with a plastic card, treat residue with mild cleaners and alcohol, avoid harsh solvents, and seal with wax or a sealant—forms a reliable routine you can reuse on future projects. It’s a discipline that honors the material’s delicacy while delivering dependable results. And as you ride forward, the knowledge you’ve gained will accompany you on every future update, making decal removal less a dreaded chore and more a confident skill set you can call upon whenever your bike’s graphics need a fresh chapter.
Final thoughts
Mastering the removal of decals from motorcycle fairings not only enhances visual appeal but can significantly improve customer satisfaction. By utilizing heating methods, isopropyl alcohol, and commercial adhesive removers, while steering clear of harsh solvents, business owners can protect the integrity of motorcycle surfaces. Implementing these techniques will ensure a smooth process, leaving fairings ready for a new look or restoration. Taking the time to care for the post-removal area will further cement your reputation as a meticulous service provider in the industry. Every motorcycle you restore or customize adds to your brand’s prestige, making decal removal an essential aspect of your business practice.