
Properly prepping motorcycle fairings for paint is not just a step in the finishing process; it’s a crucial aspect that affects the quality and durability of the final result. For business owners, understanding this process can lead to improved customer satisfaction and a stronger reputation for quality work. This guide will delve into essential steps such as cleaning the surface, mastering sanding techniques, and applying primer with precision. Each chapter will equip you with the knowledge to ensure a durable, professional finish that sets your business apart in the competitive motorcycle repair and customizing market.
From Surface to Sparkle: The Clean Gatekeeper for a Flawless Motorcycle Fairing Paint Job
Every successful paint job begins long before the color is chosen or the gun fires. In the realm of motorcycle fairings, the surface you see is the only canvas that truly matters. Dirt, grease, wax, and fingerprints don’t disappear just because they’re small or hidden. They linger, waiting to undermine adhesion, shimmer in the light, or cause subtle defects that spoil the final gloss. The cleaning stage is not a cosmetic ritual; it is a decisive, technical act that sets the stage for every subsequent step. When you treat the fairing with care from the first wash, you build a foundation that prevents fisheyes, peel, and micro-scratches from becoming permanent features of the finished paint.
Begin with a calm, methodical approach. The goal is to lift contaminants without upsetting the plastic’s integrity or leaving behind residues that could sabotage adhesion. A mild soap and water solution is often sufficient for a first pass. The water acts as a solvent, loosening dirt and oils, while the soap reduces surface tension so particulates can be swept away rather than dragged into the material’s pores. Use a soft sponge or a microfiber cloth; hard scrubbing with abrasive materials invites surface micro-tears and dullness. If you’ve ever wiped a fairing and felt a faint, waxy film, you’ve encountered a common culprit that must be removed before any paint can take hold. Harsh chemicals, strong solvents, or abrasive cleaners may seem efficient, but they risk softening or crazing plastics or leaving behind film after drying. The sensitive nature of composite and thermoplastic fairings makes a gentle touch essential.
After the initial wash, a thorough rinse is nonnegotiable. Rinse until all soap residues are gone. Even a thin soap film can act like a barrier, preventing the paint from bonding evenly. Residue creates tiny islands where primer and base coats sit differently, producing an uneven color and a finish that appears dull in certain lighting. The rinse should be clear, with no cloudy pockets or streaks. If your water has minerals, these can leave mineral deposits that show up as specks once the paint cures. In areas with hard water, a final wipe with clean, distilled water can help prevent these marks.
Drying the surface completely is the next critical move. A lint-free towel is the preferred instrument here. Wipe in a single direction where possible to minimize dragging any remaining particulates across the surface. Moisture droplets can be a stage for water spots or micro-mise en place of minerals that later interact with solvents during painting. Some riders prefer air drying in a clean, dust-free environment, letting the fairing reach a dry, neutral state before moving on. The important part is to avoid leaving damp spots, which can later wick into the paint layers and create micro-blemishes or blushing once solvents are applied. If you’re in a humid workshop, a quick, controlled warm air dry from a hair dryer held at a safe distance can speed up the process, but never overheat the plastic; excessive heat can warp or soften the surface.
For tougher grime or residues, a deeper clean is warranted. This is where dedicated plastic cleaners or automotive plastic degreasers come into play. Choose products designed for plastics and composites, and always follow the label for dwell time and dilution. Test any cleaner on a small, inconspicuous area first to ensure there’s no discoloration or dulling. The goal is to break down oils, waxes, and silicone without dissolving or weakening the plastic surface. After using a plastic cleaner or degreaser, rinse thoroughly again and dry. This step is not optional if your fairings have accumulated road grime, tar, or stubborn residues from previous finishes. It’s the difference between a smooth paint laydown and a finish that looks ragged or uneven.
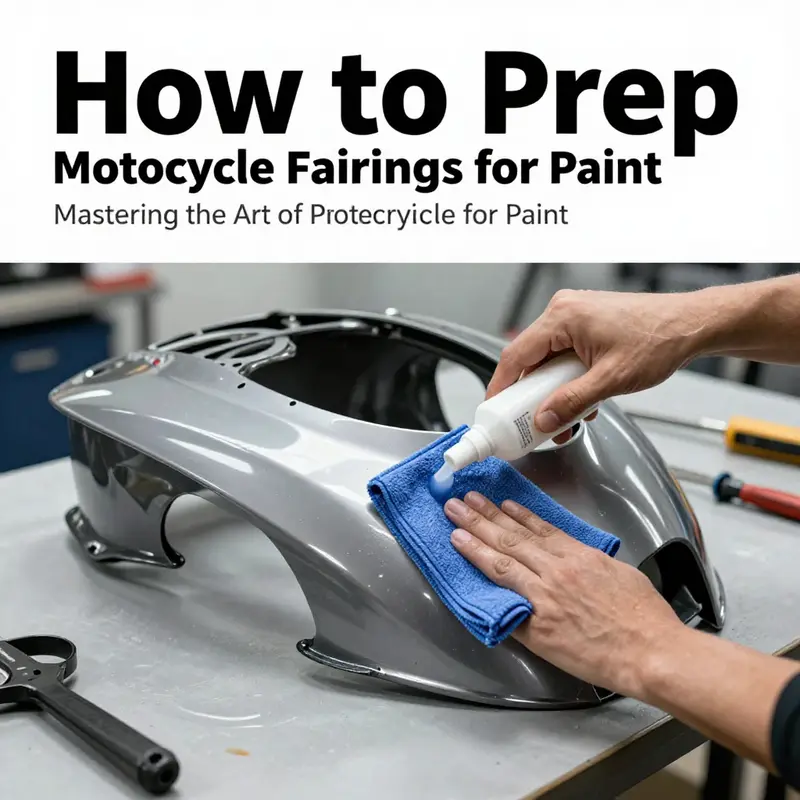
Even after a deep clean, the surface must be prepared for paint at the most fundamental level: the removal of any residual oils or fingerprints. A final wipe with isopropyl alcohol at a minimum of 70 percent concentration is the common practice. This solvent evaporates rapidly and can break down the last traces of skin oils, silicone residue, or fingerprints that a wash may not fully remove. Use a clean, lint-free cloth and wipe with deliberate, even motions. Some technicians prefer a light, circular motion to cover every square inch, then switch to a final straight wipe to ensure any remaining film is lifted. The alcohol acts not just as a cleaner, but as a preparation step that reduces the risk of “ghosting” or staining once the primer is sprayed.
Patience at this stage pays dividends. Allow the surface to air dry completely after the alcohol wipe. Humidity or a lingering solvent smell can indicate that the surface isn’t yet ready for sanding or priming. A gentle, odorless environment also helps ensure that no new dust settles on the tack-free surface as you proceed. Once dry, the fairing is ready for the next phases of preparation. The transformation from a dirty, contaminants-laden shell to a clean, even canvas is, in many ways, the quiet architect of the final appearance. A clean surface prevents common paint defects and creates a predictable base for adhesion, which translates into a truer color, crisper edges, and a more uniform level of gloss across the entire panel.
The discipline of cleaning is worth extra emphasis because it determines how forgiving the subsequent steps will be. If the surface harbors even microscopic residues, you can anticipate subtle pinholes, fisheyes around dust particles, or a finish that never reaches true depth. The primer, base coats, and clear will all reveal these imperfections more readily when the underlying surface is compromised. By investing time in meticulous cleaning, you’re ensuring that your sanding, priming, and painting will function as intended rather than fighting an uphill battle against hidden contaminants.
In practice, this means treating clean as a repeatable, verifiable state rather than a vague goal. Develop a routine—wash, rinse, dry, deep-clean if needed, wipe with isopropyl, air dry—that you can repeat with each project. If you miss a step on one project, the difference can be noticeable in the final finish. A good habit is to inspect the surface under bright lighting after the alcohol wipe. Look for any streaks, oily patches, or dust nibs that may still be present. If you see them, address them before you proceed. A clean surface is not a single act but a continuous standard that governs your entire workflow.
For readers who want a practical touchstone as they map their approach, consider reviewing a framework that discusses plastic prep in a broader context, such as the Honda fairings for CBR page on our site. This resource illustrates how different fairing subsets respond to cleaning and prep protocols, and it can help you adapt the core principles to the particular shapes and resin systems you’re dealing with. Honda fairings for CBR demonstrates how even within a single brand, materials and surface finishes can vary enough to demand careful attention during cleaning and prep. While the details differ, the underlying discipline remains the same: a clean, dry, residue-free surface is the passport to a consistent, durable paint job.
When you complete this cleaning sequence, you’re not simply removing dirt. You’re setting an even, receptive surface that helps the next layers of preparation—the sanding that creates a mechanical key, the primer that seals and evens the surface, and the color coats that rely on consistent adhesion—to behave predictably. If the fairing has any glossy areas that stayed glossy after cleaning, light scuffing with a fine, clean sanding pad (or simply a tack cloth dampened with a small amount of denatured alcohol) can help ensure the surface is uniformly matte. The aim is not to abrade aggressively but to break the surface sheen enough to encourage paint to grab without introducing deep scratches that will show through after clear. This is a nuanced balance: enough bite to hold, but not enough to mar.
The broader takeaway is simple: successful painting begins with a clean foundation, and a clean foundation is more forgiving than a dirty one. In the high-stakes environment of motorcycle aesthetics, where a race-day fairing or a show-stopping color scheme hinges on a flawless finish, the cleanliness threshold is higher. Your attention to the detail of cleaning is the invisible warranty that your primer and topcoat will behave as expected. The evidence of good cleaning won’t be visible until the paint cures, yet its effects will be unmistakable in the uniformity of the color, the smoothness of the surface, and the absence of micro-defects that can trap light and ruin the perceived depth of the finish.
In closing, the cleaning phase embodies a practical philosophy: slow, deliberate, and repeatable. Do not rush through the wash. Do not skip the rinse. Do not skip the final IPA wipe. These steps are your early safety net, your first line of defense against an imperfect finish. When you treat the fairing surface with the respect it deserves—when you treat it as a critical, technical substrate rather than as a simple shell—you gain leverage over the entire process. The road to a pristine, durable paint job runs through this quiet, methodical cleaning routine. As you move from this foundation toward sanding, priming, and color, you’ll notice that the surface quality you established at the outset continues to shine through in every subsequent layer. For those who want to explore the continuity of care across fairing families, the linked Honda fairings for CBR page serves as a useful reference that connects principles to practical, brand-specific applications. External resource and further reading can deepen your understanding of plastic prep and paint adhesion, particularly as it relates to complex shapes and varied resin compositions. External resource: https://www.motorcycle-riding.com/how-to-prep-motorcycle-plastic-for-paint/.
Sanding Mastery: Achieving the Perfect Surface on Motorcycle Fairings

Sanding is where a paint job is won or lost. For motorcycle fairings, sanding does more than remove shine; it creates the precise texture that allows primer and paint to lock on and last. The challenge is balancing aggression with delicacy: remove just enough of the existing finish to create adhesion without thinning the plastic or introducing heat damage. This chapter guides you through the sanding mindset, the sequence of grits and techniques, how to handle tricky contours, and the finishing steps that send a fairing into the priming stage ready to deliver a professional result.
Start by treating sanding as a controlled process, not a race. Work in a clean, well-lit area with steady temperature and low humidity when possible. Lay out all materials before you begin: a selection of wet/dry sandpapers from coarse to ultra-fine, a small block or soft pad for hand sanding, an orbital sander for larger panels, a spray bottle of water for wet sanding, a plastic-safe adhesion promoter for later, and a tack cloth for dust removal. Personal protection matters too. Always use a respirator rated for fine particulates and paint fumes, and wear eye protection and gloves. Sanding plastic generates fine dust that can settle into paint and ruin a finish, so control dust from the start.
Cleaning first. Before any abrasive contact, clean the fairing thoroughly with a degreaser or a mild soapy solution. This removes oils, waxes, and road grime that will smear under sandpaper and lead to uneven abrasion. Rinse and dry completely. Inspect the surface under direct light for cracks, gouges, and factory texture variations. Small stress cracks or deep scratches should be repaired before you begin the main sanding sequence. If your fairing came from a replacement supplier, check for release agents that keep plastic parts smooth; these must be removed during cleaning.
Choose the right starting grit based on the fairing’s condition. If a part has a glossy factory finish and no damage, begin with a medium grit such as 600. If the surface has been previously painted or has a thicker clear coat layer, you can start slightly coarser—around 400 to 600—but proceed with caution. Avoid using grits coarser than 400 on most plastic fairings, unless you are removing a previous heavy coating or massive imperfections. Starting too coarse risks creating low spots and a rough texture that requires extra work to correct.
For hand sanding, mount sandpaper on a flat rubber or cork block for larger flat sections. Use a softer pad or fold the paper for concave shapes. Keep your strokes even and consistent in direction across each panel. The goal is not to sand out every visible blemish at once, but to remove the glossy surface and establish a uniform matte texture that looks the same across the whole piece. Varying pressure causes uneven sanding marks and visible transitions after paint. If a localized area needs more abrasion, focus on that spot lightly and then blend the edges with the surrounding surface.
Wet sanding is your friend when working toward fine finishes. Wet sanding reduces dust and prevents the paper from clogging. For mid-stage sanding, immerse 800-grit wet/dry paper in water and keep the surface wet while you sand. Light, circular motions work well on shallow curves; straight-line strokes work best on flat areas. As the grit becomes finer—1200 to 1500—wet sanding helps produce a silky, consistent surface. Wet sanding also reduces heat buildup. Excess heat softens plastics and leads to warping or shiny patches known as burn marks.
Power sanding with an orbital sander improves speed and consistency on large, gently curved panels. Use the sander with care. Select a random-orbit model to minimize swirl marks and always use appropriately rated pads. Start at a higher grit for power sanding—around 600 to 800—and keep the sander moving. Never hold the sander in one place. Excessive local pressure or prolonged contact generates heat and can melt or distort the plastic. Finish power-sanded areas by hand with finer grit paper to blend the texture and remove any patterns the sander might have left.
Contours, vents, and tight edges demand a different approach. Use folded sandpaper, foam sanding sticks, or specialty flexible pads to reach recessed areas. For edges and mounting tabs, sand lightly and watch for thickness. Tabs often have less material and can be weakened if over-sanded. For vents, avoid aggressive motions that may widen openings or alter the intended shape. Hand sanding allows you to feel the surface. When you can feel a sudden change in texture or thickness, back off and reassess. The aim is to make the entire visible surface read as one continuous plane to the eye when painted.
Feathering transitions is a critical technique. When blending a repaired or scuffed area into the surrounding surface, use progressively finer grits to feather the old film into the new. Start with a medium grit to remove obvious defects, then move through 800, 1000, and 1500 grits to smooth the transition. Feathering eliminates ridges and edges that would otherwise telegraph through paint. Keep the feathered area larger than the visible repair to ensure seamless blending.
Pay attention to the surface feel and visual cues. A properly sanded fairing will feel uniformly matte and slightly velvety to the touch. Under direct light, the surface should scatter light evenly without shiny spots. Run your fingertips gently across the surface to detect high spots or rough patches. Small pinholes or textured blisters will be visible under light and should be marked and addressed before priming. For pinholes, a light skim of plastic-compatible filler can close voids, followed by local sanding to blend.
After the sanding sequence, cleaning is vital. Use a lint-free tack cloth to remove dust, then wipe with a slightly damp microfiber cloth and a final solvent wipe that is safe for plastics. Solvents that are too aggressive can soften or cloud plastic, so choose a cleaner formulated for plastic surfaces. Once wiped and dry, inspect the part again. Dust or residue left behind will show up under primer and ruin an otherwise perfect finish. If you find dust, repeat the cleaning process until the surface is pristine.
An adhesion promoter can be applied after cleaning and before primer. This step is especially important for certain plastic types. Fine-sanded plastic can still resist primer due to low surface energy. An adhesion promoter is a thin chemical layer that enhances bonding. Apply it sparingly in thin, even coats. Allow the promoter to flash off per instructions, then proceed to primer. Overapplication can create a tacky surface that traps dust, so moderation is essential.
When it comes to primer, match the primer type to the sanding level you achieved. A primer designed for plastics will flow into fine sanding scratches and create a uniform base. Apply primer in light coats, building to full coverage. Between coats, follow recommended dry times and avoid aggressive sanding of primer unless directed. If you must sand primer to remove imperfections, use ultra-fine grit such as 1000 to 2000, and wet sand to avoid clogging and heat buildup.
Sanding techniques also vary with the kind of plastic. Hard thermoplastics react differently than flexible composites. Hard plastics tolerate slightly more aggressive sanding and respond well to orbital tools. Flexible plastics require gentler approaches to prevent crazing and cracking. If you are unsure of the plastic composition, err on the side of caution with finer grits and more wet sanding. When replacing fairings or matching aftermarket pieces, consult the supplier if possible. Some aftermarket parts arrive with varied textures that need specific prep.
Attention to environmental factors will improve results. Sand in a dust-free environment whenever possible. Even tiny airborne particles can embed into a sanded surface and telegraph through paint. Use drop cloths, clean floors, and control airflow to minimize contaminants. Avoid sanding outdoors on windy days. High humidity can cause sanding grit to clog and will extend drying times for cleaners and adhesion promoters.
Keep an eye out for problem signs. Heat glossing—shiny patches caused by excessive friction—appears as localized glossy areas. If you see this, stop sanding and let the piece cool. Lightly re-wet the area and continue with softer pressure and finer grit. Crazing, which looks like fine hairline cracks, often stems from incompatible solvents or too much aggressive sanding on flexible plastics. If crazing occurs, repair with a compatible filler and re-evaluate solvent choices.
Tool maintenance improves outcomes. Change sandpaper often. Clogged paper scratches rather than smooths. Inspect sanding pads for wear that can create swirl patterns. Keep water for wet sanding clean; replace it when it gets dirty to avoid grinding contaminants back into the surface. When using an orbital sander, check that the pad is centered and the backing is clean. A damaged pad will not sand evenly.
Finally, think about sanding as a step toward continuity. The goal is a surface that reads as one when painted. That means consistent grit selection, even strokes, proper tool use, and careful cleaning. When you hand off a sanded fairing to primer, it should be free of visible defects, feel uniformly matte, and be clean to the touch. If these conditions are met, primer and paint will behave predictably. If not, even the best paint products cannot hide preparation mistakes.
For reference when selecting replacement or upgrade fairings, review compatible model categories to ensure you are working with the correct fit and initial surface. A helpful resource for sourcing is the Kawasaki fairings category, which provides a variety of parts suited to different bikes and should be inspected before prep. https://ultimatemotorx.net/product-category/kawasaki-fairings/
For further reading on prepping motorcycle plastics and to cross-check techniques, consult this practical guide. It offers additional tips on cleaning agents and adhesion strategies for different plastic types: https://www.carinterior.net/how-to-prep-motorcycle-plastic-for-paint/
With sanding executed correctly, the fairing moves into priming with the best possible chance for a long-lasting, flawless finish. The time spent here is an investment. Good sanding saves time later by preventing sanding-throughs, primer lifts, or paint failures. Treat each stroke as deliberate. When the light catches the finished fairing, you will see the advantage of meticulous sanding.
Primer Precision and Final Inspection: Preparing Motorcycle Fairings for a Lasting Paint Job

A flawless paint finish on motorcycle fairings starts well before the first spray of color. The primer stage and the final inspection are the bridge between raw plastic and showroom-quality paint. Getting this stage right ensures adhesion, flexibility, and a surface free of defects that would otherwise show through the base coat and clear. This chapter walks through the nuanced steps of applying adhesion promoters and primers, how to manage flash-off and cure, and what to look for during the final inspection so the fairings are truly ready for color.
Begin by confirming the surface is completely clean and uniformly abraded. Any leftover wax, grease, or fine dust will compromise the primer’s ability to form a consistent film. Use a dedicated plastic cleaner or high-purity isopropyl alcohol and a lint-free cloth, working in small areas and replacing the cloth frequently to avoid recontamination. After cleaning, the next tactile step is sanding. For modern thermoplastic fairings, a very light scuff with 1200 to 1500-grit paper creates the necessary micro-texture without cutting through the substrate. Sand gently, keep strokes even, and avoid aggressive pressure that could create low spots or heat the plastic. After sanding, remove every particle of dust with a tack cloth or a clean, dry microfiber, and consider blowing remaining particles away with compressed air held at a safe distance to avoid moisture or oil contamination.
Applying an adhesion promoter is a critical, often overlooked mid-step that dramatically improves long-term durability. Fairings made from polycarbonate, ABS, or other modern plastics often have surface chemistries that resist conventional primers. An adhesion promoter formulated specifically for plastics bonds to the substrate at a molecular level and provides a receptive surface for primer. Apply the promoter in thin, even passes from a consistent distance. Follow the manufacturer’s instructions for flash time—this is the short drying period when solvents evaporate and the promoter establishes its bond. Too short a flash time and solvents can remain trapped; too long and the promoter may cure to a non-tacky surface and hinder primer wetting. Aim for the sweet spot specified on the product label and maintain consistent ambient temperature and humidity where possible.
When you move to primer, choose a flexible 2K plastic primer designed to accommodate the movement and vibration motorcycle fairings endure. Flexibility prevents future cracking or delamination as the fairing flexes. Mixing and activation must be precise with 2K systems: measure hardener accurately and mix thoroughly to ensure even curing. Use thin, controlled coats rather than heavy passes. Thin coats reduce the risk of runs, orange peel, and solvent entrapment, and they allow each layer to flash off properly, creating a uniform foundation.
Spray technique is as important as product choice. Hold the gun or can at a steady distance—typically 6 to 8 inches for handheld equipment—and move your wrist, not your whole arm, to keep the pattern even. Overlap each pass by about half the spray width to prevent striping and ensure full coverage. Allow 10 to 15 minutes between light coats to achieve a proper wet-to-wet build. This flash-off interval helps solvents evaporate and prevents solvent popping later. Depending on conditions, two to three light coats will usually provide good filling and adhesion without obscuring fine detail. If you need more build to fill minor imperfections, add one additional thin coat rather than one heavy coat.
After the final primer pass, don’t rush to sand or inspect. A 2K primer generally needs adequate time to crosslink and achieve handling strength. While some primers allow light sanding after a short flash, full cure often takes longer—check technical data for the manufacturer’s recommended cure window. A typical schedule is waiting 24 hours for full cure at room temperature, though warmer conditions accelerate curing and cooler conditions slow it. Avoid moving or stacking fairings during this period to prevent marring.
Once the primer is fully cured, carry out a systematic, disciplined inspection. First, view the surface at multiple angles under good lighting. Use a daylight-balanced lamp or position the fairing so you can see reflections; raking light is especially helpful to show orange peel and minor surface texture differences. Look for runs, sags, or areas where the primer pooled or thinned. Run your hand lightly over the surface to feel for dust nibs or high spots. If you detect high areas, address them immediately with a very fine 2000-grit wet sandpaper. Keep sanding light and localized to avoid removing too much primer. After sanding, always wipe with a tack cloth to remove the slurry and any remaining particles.
Pinholes and porous areas can appear after primer cure. These small voids will telegraph through base coats, creating tiny pits in the finished paint. To find pinholes, hold the part against a bright light or use oblique lighting to reveal them. Small pinholes can be corrected with an additional targeted primer misting or a spot application of a light sealing coat. If pinholes are widespread, consider a light overall scuff and another thin primer application. Avoid heavy buildup when filling pinholes; instead, use controlled, light applications allowing proper flash between passes.
Surface texture is another critical consideration. Orange peel—an uneven, dimpled finish resembling the skin of an orange—can be minimized by proper spray technique and correct solvent balance in the primer. If orange peel is present after primer cure, you can level it by wet-sanding with very fine wet paper (1500 to 2000 grit), followed by a final wipe with a tack cloth. For larger imperfections, a light block with 1200 to 1500 grit may be necessary before reapplying primer sparingly. After any sanding, ensure the surface is perfectly clean because even fine dust or oils will show when the color coat goes on.
Edge treatment matters. Primer has a tendency to build and create ridges at panel edges or around molded features. Those ridges can become visible through the topcoat if left unchecked. Feather edges with very light sanding, or apply the primer in thinner passes at edges to avoid pronounced build. If an edge ridge forms, sand it smooth carefully and reapply a thin coat to bring the edge to the same level as the surrounding area.
Temperature and humidity control play a significant role during priming and inspection. High humidity can trap moisture in primer layers, creating blushing or poor adhesion. Low temperatures slow cure and increase the chance of dust attraction. Wherever possible, work in a climate-controlled area or at least choose the most stable time of day for priming. Avoid direct sunlight on plastic parts; uneven heating can cause differences in how the primer flashes off and cures.
After all visible defects have been corrected and the surface texture is uniform, perform a final wipe-down using a fresh tack cloth. This final pass removes microscopic dust and fibers. Handle the fairing by clean, lint-free gloves or a soft cloth to avoid leaving fingerprints or oils on the prepared surface. Re-mask any areas that require protection before painting, ensuring tape edges are snug and films are smooth. Good masking prevents overspray and protects adjacent components like mounting points, vents, and logos.
A careful walkaround before painting is helpful. Stand back and visually inspect the entire piece from several angles. Look for consistent sheen and texture, and check that all previously repaired areas match the surrounding primer. If you identify any inconsistencies, now is the time to correct them. Addressing issues now will save time and materials compared to correcting defects after base coat and clear coat have been applied.
The final inspection should also include a functional check of mounting and fastener areas. Primer applied too heavily in screw bosses or along mating surfaces can interfere with fitment and torque specifications. Remove primer from threads and contact surfaces where necessary, or plan to trim those areas after paint. If the fairings will be reassembled using fasteners with tight tolerances, ensure the primer is not creating binding points.
Record the conditions and steps taken during priming for reference. Note ambient temperature, humidity, primer batch, activation ratio for 2K systems, and flash times between coats. These details help reproduce results and troubleshoot issues should they arise during the color stage. Consistent records become invaluable when refining technique over multiple projects.
The last practical step before applying color is to stage the fairings in the spray area for a short period outdoors or in a clean room to ensure no new dust settles. Ideally, allow a few hours of rest so any minor solvent odours dissipate and the surface stabilizes. This pause also gives you a final chance to verify that everything remains perfect.
Finally, remember that primer is more than undercoat—it’s a structural layer that must be properly bonded, flex-compatible, and smooth. Treat it with the same care you would the color and clear coats. Successful primer application and a thorough final inspection set the stage for a base coat that looks deep and even and a clear coat that bonds and polishes to a durable sheen.
If you need replacement or upgrade fairings to practice on, a focused selection for specific bike models can help. For example, if you work on sportbikes often, sourcing model-specific pieces makes the process predictable and consistent; explore Kawasaki fairings to find compatible parts and reference pieces before painting. (https://ultimatemotorx.net/product-category/kawasaki-fairings/)
For an extended technical reference and additional step-by-step instructions covering the full workflow of prepping motorcycle plastics for paint, consult this comprehensive guide: https://www.motorcycle-maintenance.com/how-to-prep-motorcycle-plastic-for-paint/
With primer correctly applied and a disciplined final inspection completed, the fairings are ready for the base coat. The time spent here pays off in a smoother application, fewer corrective passes, and a finish that stands up to weather, vibration, and the demands of the road. Continue to the next chapter for color application and clear coat techniques built on this solid foundation.
Final thoughts
In conclusion, mastering the preparation of motorcycle fairings for paint involves careful attention to detail at every stage. From the initial cleaning to sanding techniques and applying primer, each step plays a pivotal role in achieving a finish that not only looks great but also withstands the test of time. As a business owner, ensuring quality in this process will not only enhance customer satisfaction but also strengthen your brand’s reputation in a competitive market. By adhering to these practices, you can ensure that your motorcycle fairings are beautifully finished, giving your customers a product that truly stands out.