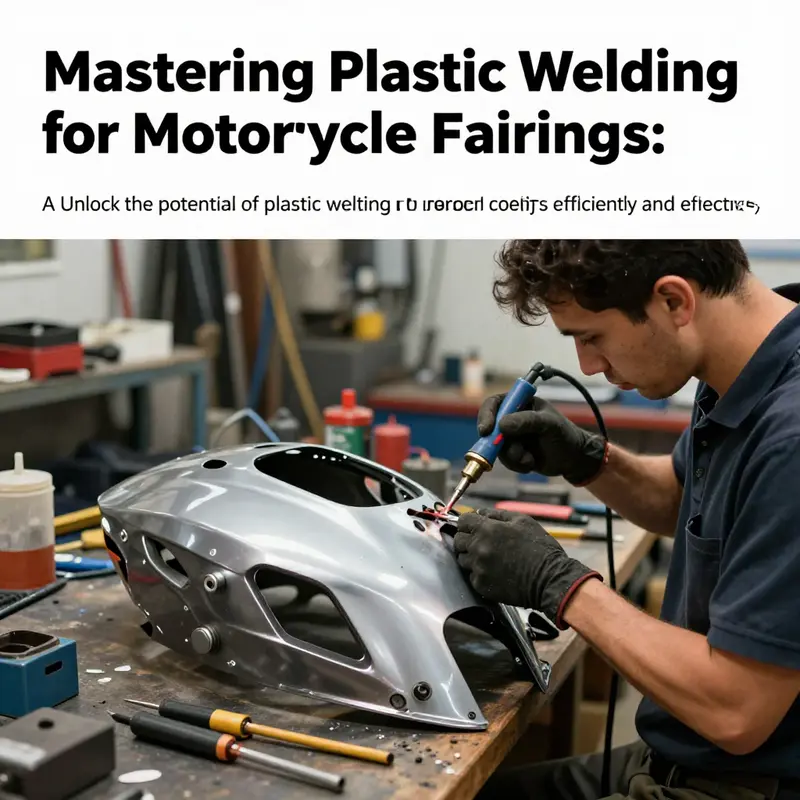
Plastic welding offers an efficient solution for motorcycle fairing repairs, ensuring that cracked and broken body panels regain their original structure and aesthetic. As a business owner in the repair industry, understanding the intricacies of this process can significantly enhance your service offerings and customer satisfaction. This guide unpacks the essential stages of plastic welding, from assessing damage and preparing surfaces to selecting the appropriate welding methods, and finishing post-weld processes. By mastering these techniques, business owners can provide high-quality repairs that keep riders back on the road quickly and safely.
Assessing Damage Before Plastic Welding: A Pragmatic Guide for Motorcycle Fairings

When you set out to repair a cracked or broken motorcycle fairing with plastic welding, the most crucial step isn’t the weld itself. It’s the honest, systematic assessment that precedes it. A careful appraisal charts the feasibility, guides the chosen method, and sets the expectations for strength, appearance, and longevity. Rushing straight to heat and rod can turn a small, fixable flaw into a brittle repair or a failed cosmetic job. The assessment is the bridge between damage and a durable, rider-safe result. What follows is a cohesive approach that blends visual inspection, material sense, and functional judgment into a practical decision tree. It isn’t a rigid protocol but a method to gauge whether plastic welding is the right tool for the job and how to prepare for the work that follows.
Begin with a patient, but deliberate mindset. The fairing is a thermoplastic shell that balances aesthetics with aerodynamics and, in many cases, some structural duty. A repair must respect that balance. The first pass is an orientation survey: what kind of damage is present, where it sits, and how large or deep it is. A clean, linear crack on a flat panel is conceptually simpler to weld than a jagged tear that crosses a curved surface or skirts a rib or mounting boss. The exact diagnosis will influence both the method and the expected outcome.
The initial visual and tactile inspection should be thorough but calm. Light matters here. Natural daylight or a bright shop lamp helps reveal hairline fractures and the true extent of a break. Run a finger along the seam and along the edges to detect any hidden threads of separation. A crack that propagates along a seam or through a junction may indicate sub-surface stress or an internal fracture that isn’t obvious from the outside. Marking the damage with a light pencil line makes it easier to measure and reference during preparation and welding.
Next, quantify the damage. Measure the length of cracks with a ruler and estimate depth by probing with a thin tool or calipers. Small, linear cracks—think a few millimeters to a couple of centimeters—are commonly more amenable to welding than larger, irregular fractures. Note the shape: clean fracture lines, a shallow split, or a circular hole formed by impact each tell a different story about the underlying material behavior and the repair strategy. The location matters just as much as the size. A crack running through a flat fairing skin is not the same as a crack that travels across a curved edge, a mounting point, or an area that bears load when the bike is fastened to the stand or strapped to a trailer.
Alongside the surface, scan for secondary damage. A small surface crack can be a symptom of deeper internal damage. Warping near the crack edge, softened or cloudy areas, or yellowed or chalky spots can signal aging plastic or compromised polymer integrity. These signs aren’t just aesthetic flags; they portend how well a weld will take and how the surrounding material will behave when heated. If the fabric around the crack shows brittleness or unusual softness, you’re entering territory where a weld might not be durable enough, or the material could shatter under the thermal cycle of welding.
A central thread in any assessment is confirming the plastic type. Most modern fairings are ABS, PC/ABS blends, or blends with polycarbonate content. ABS is the most common and typically welds well with standard plastic-welding practices. If the type is uncertain, the conservative approach is to assume ABS while you verify with a quick, non-destructive test or by cross-referencing markings inside the panel. Degradation matters, too. A brittle, chalky, or hazy area around the damage signals aging and a reduced likelihood of a successful weld. In such cases, replacement often becomes the more reliable option, especially if the repair would only slow, rather than stop, future cracking.
Material integrity feeds into a bigger question: how critical is the damaged area to the bike’s function and safety? A small cosmetic crack in a non-structural region may be a good candidate for a repair that preserves appearance with minimal risk. In contrast, damage near a mounting point, along a load-bearing seam, or across a channel that channels air, fuel, or electronics deserves heightened scrutiny. Even when a repair seems technically possible, its practicality hinges on whether it will endure the forces the panel faces—vibration, temperature fluctuations, and the mechanical stress of fasteners and clamps.
All of this leads to a practical decision: is plastic welding a feasible and sensible route? The answer rests on the collective read from the damage type, location, size, material condition, and functional demands. Small, clean cracks in ABS or ABS blends located away from critical mounting points often respond well to welding, provided the joints are properly prepared and the repair is executed with discipline. Large, irregular fractures, multi-layer damage, or areas that integrate with structural reinforcements frequently push toward alternatives such as adhesive reinforcement, fillers, or even panel replacement. This is not a verdict against welding; it’s a calibrated estimate of what will deliver a durable, safe result.
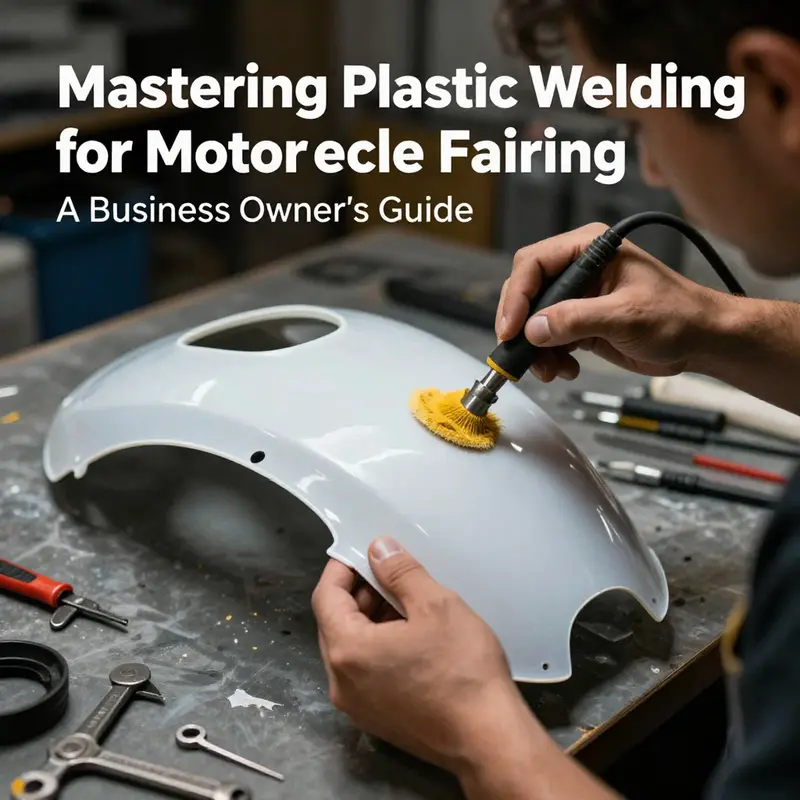
Preparation begins at the discovery stage and deepens as the assessment crystalizes into a repair plan. If welding remains on the table, the edges around the crack must be clean and dry. Dirt, grease, and wax act like barriers to adhesion and impede heat transfer, producing a weak bond or an uneven weld bead. A degreaser or isopropyl alcohol is a simple but crucial ally here. Once the surface is clean, a light, controlled sanding on the damage edges helps to create a micro-roughness that acts like a key for the molten weld to bite into, improving mechanical interlock. Between sanding and welding, ensure all dust is removed. A shop vacuum or compressed air helps keep the joint pristine and free from contamination that could undermine the bond.
Another part of the assessment-later-prep crossover is deciding on the welding approach you will take. In the workshop world, there are two broad paths. Ultrasonic welding promises speed and clean bonds but requires specialized, often expensive equipment. It’s a method that excels in manufacturing and professional repair settings, where time is a premium and panel geometry is compatible with horn configurations. The alternative for DIY repairs is hot-air plastic welding. With a controlled hot-air gun and a matching plastic welding rod, you melt the material at the interface and fuse it with careful, steady pressure. The success of hot-air welding hinges on material compatibility and temperature control—too little heat and the weld won’t fuse; too much heat and you risk warping or burning the surrounding plastic. The weld arc should be worked slowly, feeding the rod into the molten seam while maintaining a consistent pace that allows the joint to knit together without introducing new stress concentrations.
As you translate the assessment into action, the reliability of the repair aligns with how accurately you match the plastic type and how well you control the process. If a material has degraded, or the damage travels through multiple layers or across a structural seam, the odds of a durable, invisible weld diminish. This is where the assessment must stay honest: the best repair plan often involves aligning expectations with the material reality. If the assessment signals doubt about long-term performance, consider alternatives like reinforcing the area with a compatible structural insert, applying a high-grade adhesive system where appropriate, or replacing the panel to regain original strength and appearance. The goal is not to produce a flawless patch that hides a fragile base but to create a repair that behaves like the original material under real riding conditions.
Documentation is a quiet but valuable byproduct of a thorough assessment. Keeping notes about damage type, location, length, depth, material identification, observed aging, and the chosen approach creates a repair history. This record helps manage future maintenance decisions and communicates clearly with any shop you might rely on later. If you decide to proceed with welding, the preparation notes also guide your post-weld finishing. After the weld cools, smoothing the bead and applying a compatible primer and paint finish can help restore the panel’s appearance while preserving the structural integrity of the repair. In high-visibility areas, the final finish becomes part of the overall assessment’s success—the repair must not only be strong but visually acceptable.
If you’re exploring parts replacement instead of repair, the assessment framework remains useful. A fairing near the edge of a structural seam, or a large, irregular fracture that traverses ribbing, often signals that a repair may be brittle or unreliable in the long run. In such cases, replacing with OEM or aftermarket panels can be the more deterministic route to safety and aesthetics. Even when replacement isn’t the immediate path, the assessment has helped you understand where to focus repair resources, what tools you’ll need, and how to set realistic timelines and budget expectations.
To keep this chapter grounded in practical, rider-ready steps, consider a small, concluding checklist: confirm the damage type and location, measure carefully, assess material condition, test for compatibility, evaluate structural impact, and decide whether welding is viable. If welding proceeds, ensure surfaces are clean and dry, edges are prepared, and you have the right welding rod material matched to the fairing. If you proceed with welding, slow cooling and careful post-weld finishing will help the repair blend with the surrounding surface. And if the assessment points toward replacement, research compatible fairings—navigate to the Honda fairings category for options and compatibility checks that align with your bike’s year and model. Honda fairings
The assessment does not pretend to be a guarantee of perfection. Instead, it serves as a disciplined acknowledgment of what the repair must endure. It respects the fairing’s role in aerodynamics, rider protection, and appearance. It also respects your time, budget, and safety. By balancing a meticulous inspection with a realistic interpretation of material behavior, you set the stage for a repair that is not only technically sound but also durable enough to withstand the next ride, the next pothole, and the next heat cycle from sun and engine. This is the core of plastic welding for motorcycle fairings: a well-informed beginning that improves every moment that follows. And when the next chapter arrives, you’ll be prepared to choose between a hot-air weld, an ultrasonic option, or a considered replacement—the decision made not by impulse but by a rigorous, chapter-spanning assessment born from the damage you can see and the material you know.
External resource for deeper understanding of professional welding equipment can be found here: Ultrasonic plastic welding systems and their applications in repair contexts. https://www.sonic-solutions.com/
null
null
Choosing the Right Plastic Welding Method for Motorcycle Fairings: A Practical Path from Material to Finish

Repairing motorcycle fairings is as much about understanding materials as it is about handling heat and pressure with care. When a fairing cracks or breaks, the goal is not just a quick fix but a repair that restores structural integrity, preserves aesthetics, and remains durable under vibration, wind, and temperature swings. The choice of plastic welding method hinges on a few steady factors: the type of plastic, the geometry of the damaged area, the required strength, the volume of parts in play, and the finish you expect. Thermoplastics used in modern fairings are the very materials that respond to heat and pressure by melting and fusing rather than curing like an epoxy. This fundamental property guides every decision about method, equipment, and technique. The first step is to identify the material type with confidence. Most common fairings are made from ABS, PC/ABS blends, or polycarbonate. Less common but still present in some designs are polypropylene and PVDF blends. The critical rule is to match the welding method to the polymer family. ABS and PC/ABS blends are generally forgiving and compatible with several welding modalities, including ultrasonic, laser, and hot-air welding. PP and PVDF, meanwhile, behave differently in heat and melt flow and sometimes respond better to alternative joining strategies. The material type not only affects the process but also the post-weld performance, including how the seam takes paint and how it ages under sun exposure. The chapter you’re reading doesn’t merely enumerate methods; it guides you through a practical decision path that aligns the part’s geometry with the right tool and technique, so you avoid weak joints or surface blemishes that can ruin the repair’s appearance and longevity. A well-chosen method also reduces the need for extra steps such as fillers or solvents, which can complicate repairs and risk distortion of the panel shape. As you explore, you should keep in mind that the repair may be on a single damaged area or part of a larger panel, and the same logic applies whether you’re repairing one fairing or preparing a small batch for a weekend race bike. The emphasis should be on material compatibility, joint design, and the ability to control heat so that the surrounding plastic does not soften or warp. In practice, this means preparing the surface with care, selecting a compatible welding rod, and choosing a heat method that delivers reliable fusion without overheating. The steps you take before welding can determine whether the repair remains flexible enough to endure vibration or becomes brittle and prone to cracking again. Preparing the surface is the quiet work that often makes the biggest difference. Start by cleaning the area to remove dirt, grease, and wax using a degreaser or isopropyl alcohol. Dirt and grease act as barriers to adhesion, and wax residues can create a weak bond that looks fine at first but fails under heat or flex. After cleaning, lightly sand both sides of the crack with 120–200 grit paper to roughen the surface and create microtextures that increase the mechanical grip of the melted plastic. The roughened surface holds the molten material better as you apply heat. It’s essential to ensure the area is completely dry before welding, because moisture can create steam pockets that weaken the bond and cause ripples or voids in the weld. A shop vacuum or compressed air helps remove dust and particles that can mar the finish. Throughout this preparation phase, you are setting the stage for a weld that looks clean and feels solid to the touch. When you choose a welding method, you quickly realize that there isn’t a single universal answer. Ultrasonic welding is often pitched as the fastest and cleanest option, but it comes with practical limits. It excels for small to medium-sized components and high-volume production lines, where repetitive, fast cycles can justify the investment in specialized tooling. The mechanism is simple in principle: high-frequency vibrations at the joint interface melt the plastic, and pressure fuses the parts together in a fraction of a second. The appeal is not just speed; the method typically yields a strong bond with minimal surface extrusion, and it does not require filler material. It is a superb choice for a professional shop repairing multiple fairings or for manufacturers with recurring repair cycles. For the DIY enthusiast repairing a single motorcycle, however, ultrasonic welding may be out of reach in terms of equipment cost and space. The practical alternative for home shops is hot-air welding, sometimes called hot gas welding. This method is versatile, forgiving, and well suited to the irregular contours and large surfaces common on fairings. A hot-air welding setup typically uses a heat-controlled gun and a filler rod made from the same polymer as the panel. The technique is straightforward: heat the joint area and the rod to a molten state, feed the rod into the seam with gentle pressure, and smooth the bead as it flows. A skilled operator can create a seam that is nearly invisible after finishing, but the process demands a calm hand, steady heat, and careful control of travel speed. The temperature range for a hot-air weld is broad and must be tailored to the polymer. For many ABS or ABS blends, temperatures around 400–500°C (750–950°F) are typical, but you must confirm the exact melt point for your material. The rule is simple: the rod must be the same polymer type as the fairing to ensure chemical compatibility and a uniform crystalline structure as they fuse. Using an incompatible filler rod is a common cause of weak joints that fail under heat or impact. The technician’s touch matters as much as the machine settings. In addition to hot-air, laser welding offers a third route to a refined finish with exceptional precision. Laser welding concentrates energy at the joint, producing clean melt zones with minimal distortion and very tight control over heat-affected zones. It is particularly appealing when aesthetics matter, such as for high-end builds or transparent / semi-transparent shells where you want the seam to vanish under paint and clear coats. Laser welding is also highly automatable in a production environment, which can support premium or custom builds that require consistent, repeatable results. The catch is cost and access. Laser systems require investment and space, and they are not as forgiving for curved contours or heavily textured surfaces as hot-air methods. For many DIY situations, the laser option remains out of reach, while an ultrasonic unit or a robust hot-air setup can deliver excellent results. On the other end of the spectrum is hot plate welding, which brings a different set of trade-offs. This method suits large, flat surfaces or components where a heated plate can provide uniform heat transfer. It’s slower and less flexible for intricate fairing geometries, and the risk of heat-affected distortion increases if the join line is not perfectly aligned. Most motorcycle fairings rarely benefit from hot plate welding as the primary repair method, but there are occasions when a flat, thick segment needs careful restoration. In those cases, the process involves bringing the two surfaces into contact with a heated plate, allowing them to melt, and then joining them under pressure. The method’s slower pace and bulk hardware make it less attractive for typical fairing repairs, yet it can be a viable tool for certain structural repairs on larger panels. When weighing the decision factors, a simple framework helps. For high-volume or multi-part repairs, ultrasonic welding stands out as the fastest path to durability. If the objective is the highest precision and control over the weld bead to achieve a flawless finish, laser welding earns consideration, provided the budget and equipment access align. For most DIY repairs and repairs that involve larger, complex shapes, hot-air welding is the most practical and durable option. It offers the right balance of control, speed, and adhesive-free bonding, with the possibility of a strong, clean seam when performed with patience and care. Hot plate welding should be reserved for very specific scenarios where large, flat areas are involved and the process can be tightly controlled to avoid distortion. The decision should also reflect the damage’s extent and a realistic assessment of replacement versus repair. If the fracture is extensive, irregular, or involves multiple layers or structural reinforcements, replacing the fairing is often the wiser route. After selecting a method, execution becomes the defining skill. In hot-air welding, the operator should heat the joint and rod gradually, feed the filler material with even pressure, and finish with a cool-down that prevents residual thermal stress. A common mistake is rushing the process or applying the rod too quickly, which results in a bead that is proud of the surface or creates a raised line that must be sanded and repainted. Finishing matters as much as the weld itself. Post-weld finishing should include gentle grinding and sanding with progressively finer grits, typically from 320 up to 600, to smooth the weld bead until it blends with the surrounding surface. After smoothing, the surface should be primed with a plastic-compatible primer and then painted to match the original color. A controlled spray environment helps achieve a uniform color and a flawless transition from the repaired seam to the parent panel. The finishing stage is essential to ensure the repair does not stand out under bright light or in showroom conditions. It’s worthwhile to remember that the repair’s success hinges on the material match and heat management as much as the welding technique. If the plastic types are not compatible, the weld can fail under stress or degrade quickly when exposed to UV light. Therefore, always verify the plastic type, especially on older fairings where the labeling may have faded. ABS and PC/ABS blends are common and forgiving, but always confirm with a simple test cut or reference inside the panel if possible. An immediate step you can take is to examine the inside surface labeling or consult a parts diagram that might indicate material composition. This red thread—material compatibility—threads through every decision, from the choice of method to the finishing paintwork. For riders who want to go beyond DIY repairs and seek a more professional outcome, a body repair shop can offer the advantages of calibrated equipment, controlled temperatures, and professional finishing. In many cases, a professional can assess whether the repair is a candidate for ultrasonics, lasers, or hot-air welding, and can perform the joint design optimization that minimizes heat exposure to adjacent structures or finishes. When you compare the cost and risk, the DIY route with hot-air welding represents a practical balance for most riders who encounter a crack or a clean break on a thermoplastic fairing. It offers accessible equipment, the potential to repair a single panel without the overhead of a full shop, and the opportunity to learn a craft that improves with practice. Nonetheless, the final verdict often comes down to a simple, honest question: will the joint hold under the stresses of riding, heat, and vibration, while the finish remains acceptable to the aesthetics of the bike? If the answer is yes, a careful hot-air repair will deliver a durable result you can ride with confidence. For those seeking deeper dives into the methods and a broader view of how industry practices apply to motorcycles, consider exploring a dedicated resource that delves into ultrasonic welding systems and their applications in automotive components. This external reference can provide technical depth on how high-frequency vibrations create frictional heat at the joint interface and how different horn geometries affect weld quality. In the meantime, for riders focused on practical, paint-friendly repairs, the advice above emphasizes the core principles: identify the material, prepare meticulously, select a compatible welding method, manage heat with control, finish with care, and assess whether replacement may be a smarter option when the damage is too extensive. As always, prioritize safety and quality over speed, and remember that a well-executed weld can restore not just the look of a fairing but its ability to shield you from the elements and protect the bike’s aerodynamic performance. For a direct path to compatible fairing options and related parts, you can explore related categories such as the Honda fairings collection to guide your material choices and color matching as you plan repairs and cosmetic touches. Honda fairings. External resources offer further insight into specialized equipment, while your best result remains a thoughtfully planned repair that respects the material properties and the rider’s expectations. External resource: https://www.sonic-solutions.com/
null

null
Final thoughts
Effective plastic welding of motorcycle fairings not only repairs damages but also extends the life of these essential components. As a business owner, honing these skills will distinguish your services in a competitive market. By understanding the methods of damage assessment, preparation, appropriate welding techniques, and proper finishing, you can ensure high-quality repairs that enhance customer satisfaction and trust. Investing in these practices will yield lasting benefits, helping you attract and retain clientele who appreciate quality workmanship.