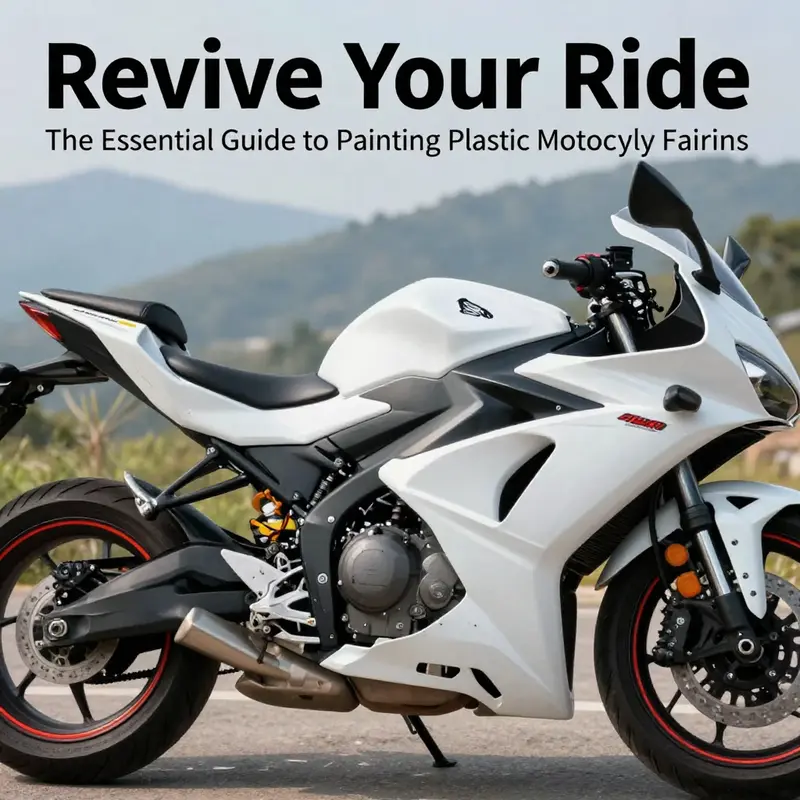
Painting plastic motorcycle fairings is not just about aesthetics; it represents a significant opportunity for motorcycle businesses to enhance value and customer satisfaction. An expertly painted fairing can dramatically transform a bike’s look, while also protecting the plastic from the elements. This guide is designed to give business owners comprehensive insights into the process, covering everything from surface preparation to application techniques. Each chapter aims to arm you with the knowledge to undertake these tasks professionally, ensuring your motorcycle restoration projects yield durable and attractive results.
null
null
Damage Control: Repairing Cracks and Dents Before Painting Plastic Motorcycle Fairings
Repairing damage before painting plastic motorcycle fairings is where technique meets patience, and where the finish you chase begins its life. The goal is not merely cosmetic concealment but a durable, seamless surface that will accept primer and paint as if the plastic were factory formed. When damage is ignored or hastily filled, you invite paint failure—peeling, cracking, and a finish that looks more like a patchwork than a true panel. The approach is methodical and layered, starting with a meticulous cleaning to remove every speck of grease and dust, then a precise assessment of the damage, followed by repairs that restore the panel’s integrity. Only after these steps should the surface be prepared for primer and paint. This sequence matters because adhesion is a chemistry problem as much as a skill problem. Clean, dry, and structurally sound material creates a foundation on which primers bite and paints lock in place, resisting chips and weathering for years of use.
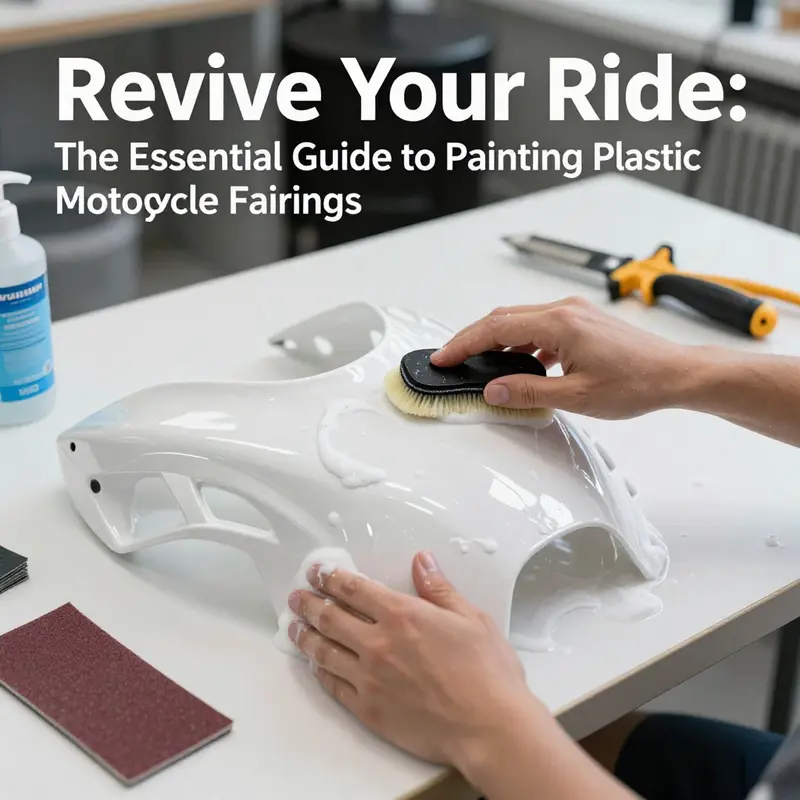
Begin with cleaning, the oft-overlooked first act of any successful repair. Plastic fairings carry the grime of rides, the waxes from cleaning, and the oils that bike enthusiasts unknowingly deposit during maintenance. A mild detergent solution combined with warm water is a good starting point. Use a soft cloth to wipe away surface contaminants, then finish with a dedicated plastic cleaner if stubborn residues persist. This isn’t just about cosmetics; the cleaner removes residues that can inhibit adhesion of epoxy, adhesives, or fillers later in the process. If any oxidation or heavy grime remains, a mild degreaser can help, applied sparingly and wiped away promptly. The surface should look clean enough to reflect your work in progress rather than to reveal hidden flaws.
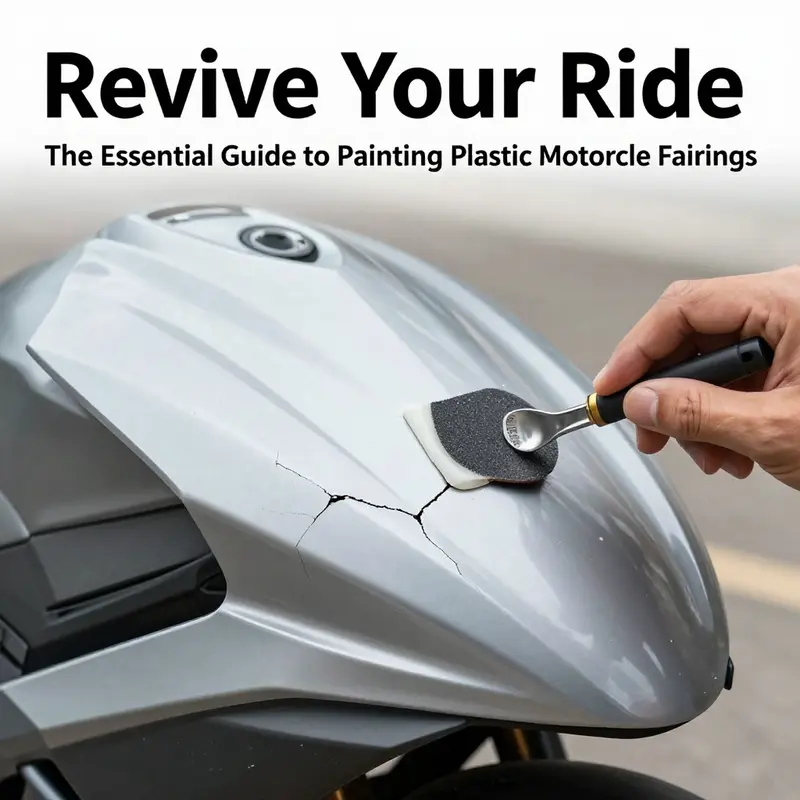
Next, assess the damage with a critical eye. Structural compromises—cracks, splits, or broken tabs—demand more than surface filler. Edges around the damaged area should be cleaned with a small brush and, if necessary, a solvent to lift any remaining oils. A heat gun or hairdryer can be used to soften the plastic slightly, making the material more pliable for shaping and for the subsequent repair operation. This warming is not about melting the part but easing its reaction to repair materials. You should be able to press the damaged area and see it settle back without visible distortion. If the fairing is ABS, polycarbonate, or a similar engineering plastic, knowing the base resin guides your repair choices because different plastics respond differently to heat, solvents, and bonding agents. The project becomes more predictable when you tailor your method to the material rather than applying a one-size-fits-all fix.
With the surface clean and the damage identified, you turn to repairs that restore structure and contour. For cracks and breaks, plastic welding is a robust option when done with care. Select a compatible welding rod that matches the base resin—ABS-based rods work well for ABS parts, while polyethylene rods suit certain polyolefin blends. The rod is applied along the crack or seam, and a plastic welding tool or soldering iron melts the rod into the base plastic, fusing the materials into a single, continuous piece. The aim is to create a bond stronger than the surrounding area, so take your time and maintain a steady hand as you move along the crack. Allow the repaired region to cool completely before proceeding; rushing this step invites warpage and a fragile repair that will telegraph through the paint.
For more minor damage or for areas where a weld would be impractical, a high-strength plastic adhesive can seal cracks and bond flaps back into place. In some cases, applying a thin patch with a compatible adhesive, and then reinforcing it with a small piece of mesh or a bonding fabric, provides an effective repair that resists further cracking. Adhesives designed for automotive plastics cure to a firm, sandable finish, making them suitable for the blend stage that follows. The key here is cleanliness of edges and a conservative amount of adhesive to avoid excessive hardening material that would require extra sanding later. Once the adhesion is set, you move to shaping. If the repair involves a recessed area or a mismatch in plane, a light application of body filler can help you achieve flushness with the surrounding surface, but this is not the point to overfill. Fill only to restore the contour and then proceed to careful, progressive sanding to blend the repair with the rest of the fairing.
Smoothing and blending are the heart of the prep phase because they determine how invisible the repair will be under the final paint. Start with coarser sanding to remove excess material and to knock down raised repair lines. An 80- to 120-grit sandpaper is often used for this initial pass to establish the general shape and remove obvious ridges. From there, progress to finer grits—220 to 400—until the transitions between the repaired area and the original surface feel like a single plane to the touch. Wet-sanding at this stage helps control dust and yields a smoother finish. It also reduces the risk of wetting the surface too deeply and creating water spots that would have to be sanded out later. After each sanding stage, wipe the area clean with a tack cloth or a lint-free cloth dampened with isopropyl alcohol to remove dust and oils that would compromise adhesion.
If the repair includes gaps, uneven thickness, or a transition that isn’t perfectly flush, a high-quality automotive body filler—specifically one formulated for plastic—can be employed. Apply in a thin, smooth layer and allow it to cure according to the manufacturer’s instructions. Then sand again with progressively finer grits, generally 600 to 1000, until the repaired region sits at the same level as the surrounding surface. It’s worth noting that the goal is not absolute perfection at this stage but a surface that accepts primer evenly without visible lines or hollows. A final wipe-down with isopropyl alcohol will remove any last residue, ensuring the surface is dry and ready for primer.
The preparation phase does not end with roughness control. It is also about ensuring the repair will hold under the conditions of painting, curing, and the possible exposure to sunlight and heat once the bike is back on the road. In this sense, temperature and humidity during drying matter. A surface that feels cool and completely dry is a sign that the materials have cured properly and won’t trap moisture beneath the primer. Any residual moisture can cause pinholes or small blisters as the paint cures, undermining the finish you have fought so hard to achieve. If you are repairing a fairing that will live in fluctuating environments, aim for a stable, indoor workspace away from drafts and drying winds that can quick-dry surfaces unevenly and cause cracking later.
After you have achieved a uniform texture and contour, the timeline shifts toward priming. A plastic-specific primer is not optional; it is essential. The primer provides the adhesive surface the paint needs and begins to unify the repaired area with the rest of the panel. If your repair involved a large section or a deeply gouged region, you may apply a light primer over the repaired zone before overall priming to test adhesion and to further refine any remaining high spots. In a full restoration scenario, you would then proceed with a standard schedule of layering thin coats of primer, allowing each coat to dry according to environmental conditions, and then a final guide coat before color application. The objective is not only to create a foundation but to reveal any remaining imperfections in the primer layer, which you would address before committing to color.
In the grand arc of painting, this pre-paint phase is the hinge that locks in the final outcome. It is where you translate your initial assessment into a measurable, repeatable set of steps that yield a consistent, durable finish. The integrity of the repair under the base color depends on the fidelity of the surface texture and the absence of deep seams, sanding grooves, or residual oils. That fidelity makes primer—when applied in the recommended light, even coats—adhere better, lay down more evenly, and offer a uniform canvas for the final color. The practice of repairing before painting, when done with patience and attention to detail, brings repairs into the very fabric of the aesthetic you are building rather than leaving them as an obvious discrepancy.
For readers seeking a practical path that ties repairs to the broader ecosystem of bike customization, the repair phase is also about that sense of continuity. If you are working with a specific model line or a particular style, you may find that certain fairings have common repair challenges—cracks around mounting points or dents near reinforcement ribs. In those cases, the repair philosophy remains the same: address the defect cleanly, restore the original contour, and reestablish a uniform surface that breathes with the rest of the panel. A practical note is to treat damaged components with respect for the resin and its limitations. Some areas may require removing a portion of the fairing to allow for a proper repair; in those cases, plan your repair around the mounting points, ensuring that anything removed can be reattached securely after finishing.
As you pay attention to these steps, you may feel a sense of continuity with other posts in this article and with the broader discipline of plastic refinishing. If you are looking to explore more on the topic, you can explore related fairings collections, such as the options available for different makes and models, and you may encounter a widely varied landscape of components like those in the Honda family. For example, a project focusing on the versatility of Honda fairings demonstrates how repair work transitions smoothly into finishing and color matching. This is a reminder that the repair phase is not an isolated chore but a bridge to the final artistry of your paintwork, where the finish will be judged not only by color accuracy but by the absence of texture and seam lines that betray the underlying repairs. When you finally step back to assess the overall panel, you should see a surface that looks and feels like an original part—an outcome that speaks to careful preparation and disciplined execution. The journey from a damaged condition to a pristine finish is lengthy, but each deliberate step adds value to the final appearance and the durability of the paint job.
Internal link for context: If you’re working with a common model and want to explore compatible fairing options, you can browse the Honda fairings category here: Honda fairings.
External resource for deeper context on repair workflows: For a broader, technically rigorous treatment of plastic repair and refinishing, see Autodesk’s overview of their design tools and workflows at https://www.autodesk.com/products/autocad/overview.
The Art of Plastic Fairings: Choosing Primer and Paint for Durable, Flexible Motorcycle Finishes
Choosing the right primer and paint for plastic motorcycle fairings is more than a matters of color. It is a careful marriage of chemistry, preparation, and technique that must withstand vibration, temperature swings, fuel exposure, and daily riding grime. Plastic surfaces demand respect because their chemistry refuses to behave like metal or wood. They flex. They absorb and release moisture. They can degrade if the wrong coating is applied. When you approach this task with a clear understanding of adhesion, flexibility, and protection, you unlock a finish that not only looks factory fresh but lasts through miles of sun, rain, and highway. The core idea is simple but powerful: begin with the right foundation, apply a paint system designed for plastics, and respect the curing process. Do that, and the result is a durable, glossy, and resilient surface that behaves like a well-made composite rather than a layer that can chip or fade with small flexing and environmental change.
Surface preparation is the bedrock of success. Start by cleaning the fairing thoroughly with a degreasing agent designed for plastics, then finish with a mild cleaner to remove any remaining residue. This may seem basic, but surface contaminants are the sneakiest enemies of adhesion. Grease and wax act like a barrier, preventing primers from bonding and creating a weak anchor for subsequent coats. After washing, inspect the surface under good light. Look for glossy areas that indicate a factory finish or residual gloss from polishing. These spots must be scuffed to create a mechanical key. Lightly abrade the surface with 1000-grit paper or finer, and consider wet-sanding to reduce dust and achieve a smoother overall texture. The goal is not to erase the plastic’s shape but to give the primer something to grip. If deeper scratches or imperfections exist, address them with a plastic-specific filler or two-part body filler, then sand again with progressively finer grits until the repaired area is flush with the surrounding surface. Dust is the enemy of a clean finish, so wipe down the entire panel with a lint-free cloth dampened with isopropyl alcohol to remove any oils or sanding residues. This sequence—clean, degrease, scuff, sand, clean again—creates the essential tooth that allows the primer to do its job instead of peeling away.
Once the surface is prepared, the next decisive step is to repair any structural issues. Cracks or breaks should be stabilized with a high-strength plastic adhesive designed for automotive plastics, and the cured joint should be reinforced with compatible filler to smooth transitions. For deeper scratches or larger imperfections, using a body filler formulated for plastics is appropriate. The trick here is to let each phase cure fully before sanding. Rushed repairs leave behind soft spots that can telegraph through paint as sags or cracks. After curing, re-sand with finer grits until the area is flush with the rest of the fairing. The objective is a seamless base that accepts primer evenly and does not show the transition from repair work once color is applied.
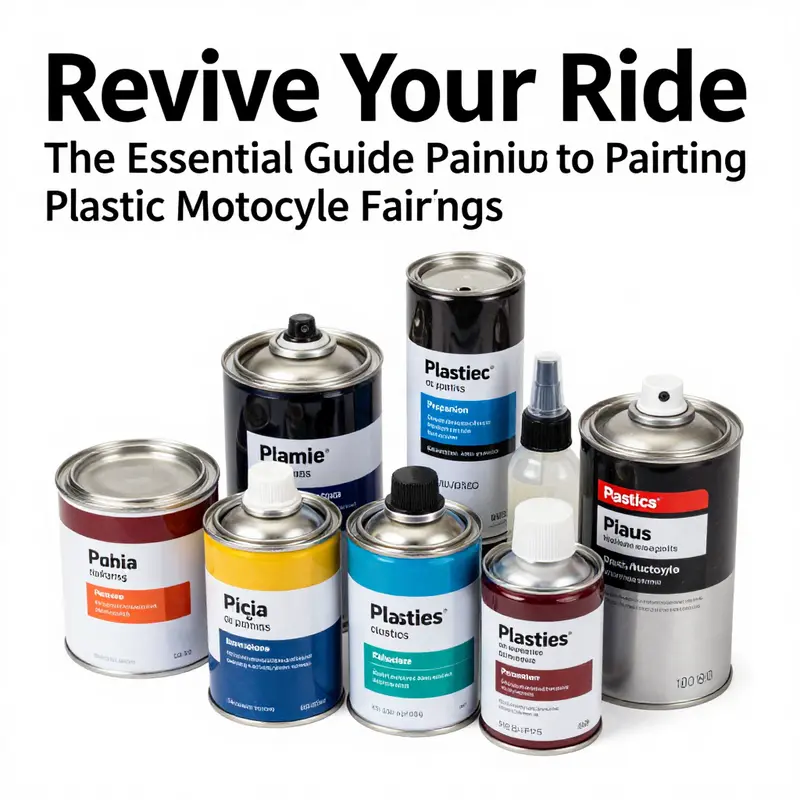
With the surface prepared and repairs complete, you turn to primer—the factor that truly holds the paint to the plastic. The choice of primer for plastic fairings is not optional; it is essential. Use a plastic-specific primer designed to bond with the common plastics used in fairings, such as polypropylene and ABS. This primer acts as a chemical bridge between the plastic and the paint system, improving adhesion, resisting lift, and reducing the chance of complex failure modes under heat and sun exposure. In practice, select a two-part epoxy primer or an adhesion promoter that is rated for plastics. Follow the manufacturer’s directions precisely: apply in a well-ventilated area, respect recoat times, and ensure the primer is sandable to a smooth, uniform surface. A good primer will disappear under the base coat, but its grip should be obvious in the feel of the surface. If you are unsure about the exact plastics used in a specific fairing, consult the manufacturer’s guidelines or seek advice from a shop familiar with plastic prep.
After priming, you can choose between two broad paint system paths: a base/clear coat system or a single-stage urethane designed for plastics. The base/clear route offers a classic aesthetic with the option to correct, polish, and add depth with a dedicated clear coat. The single-stage urethane simplifies the process by combining color and overcoat in one layer, which can be advantageous for a more straightforward job or for riders who value speed and durability over a showroom finish. Regardless of the path, the paint selected should be compatible with plastic primers and capable of accommodating some flex without cracking. When you evaluate color options, remember that a good color-matching service or a patch test on an inconspicuous area can save you headaches later. Although blending unseen areas to match perfectly is challenging, the effort pays off in a seamless appearance across the panel lines and curves of the fairing.
In a broader sense, the system’s durability hinges on choosing materials that are formulated for plastic use and that allow for some movement without compromising the finish. Standard acrylics or single-component paints often fall short under the dynamic conditions a motorcycle endures. They can crack or fade with UV exposure and temperature cycles. Instead, look for two-part urethane systems designed for plastics. These systems bring superior adhesion, elasticity, and resistance to fuel and environmental elements. The two-part chemistry creates a robust, flexible film that can handle the subtle flexing of plastic fairings without cracking or peeling. If you plan a longer-term project or expect the bike to live in varying climates, this durability becomes even more important. Your goal is to have a color job that remains bright and intact after years of rain, sun, and road grime.
Color matching deserves careful attention. The most reliable approach is to test your chosen color on a small, discreet area of the fairing or to utilize a color-matching service that can reproduce a precise shade. A close color match matters not only for aesthetics but for the perceived quality of the finish. A slight mismatch may be noticeable under certain lighting or at certain angles, especially on curved surfaces where highlights can exaggerate differences. If you are contemplating a custom finish or a restoration with original tones, budget extra time for this step. It is worth the effort to achieve a harmonious result that looks balanced across the entire fairing assembly.
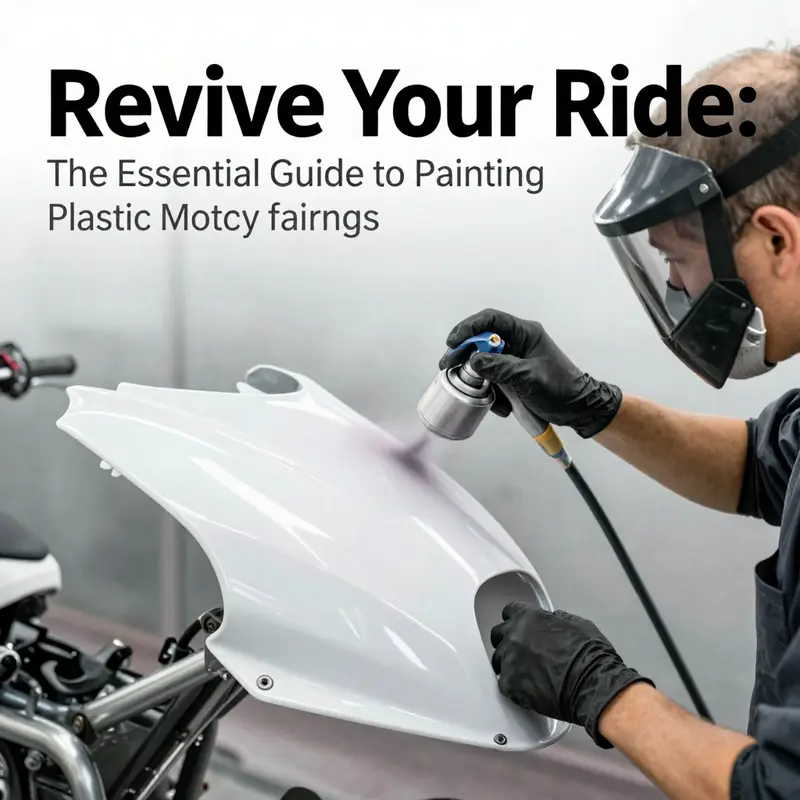
Once the primer and paint base are in place, the application technique becomes the decisive factor in achieving a smooth, glossy, factory-like result. Work in a well-ventilated, dust-free space and avoid direct sunlight or extreme temperatures that can cause premature solvent loss or blooming. Hold the spray at a consistent distance, typically around 25–30 centimeters (about 10–12 inches), and move with a steady, even motion. Use a deliberate, methodical “Z” pattern to ensure even coverage and to minimize runs. The key to success lies in multiple thin coats rather than a few heavy layers. Begin with a light tack coat to establish a foundation, followed by two to four additional coats, each spaced by the recommended recoat window. Between coats, allow the finish to set just enough to prevent immediate dragging, but not so long that dust becomes a problem. In most cases, 15–30 minutes between coats is sufficient, though you should always follow the paint manufacturer’s guidance. A well-executed sequence reduces the risk of orange peel, dry spray, or sags, and sets the stage for an even, glassy surface once fully cured.
The curing window for the base color depends on the product and environmental conditions. In many scenarios, you should plan for a full cure of at least 24–72 hours before handling, and longer in humid or cool environments. This timeframe ensures that solvent evaporation completes and the film reaches its intended hardness. A rushed handling or a coat that has not fully cured can lead to fingerprints, marring, or solvent-entrapment that interferes with subsequent layers.
At this stage, many riders choose to install a clear coat to protect the color and add depth and gloss. The clear coat, like the primer and base, must be compatible with plastics and formulated to deliver UV resistance and abrasion protection. Apply the clear coat with the same care as the base color: several light coats, each separated by a short dry window. The goal is a protective, high-gloss layer that resists chips, fading, and dulling. If you plan to polish or buff later, wait until the clear coat has cured fully, then proceed with the appropriate, plastic-safe polishing compounds and techniques. The polishing process can bring out a showroom shine, but it should never be performed while the clear is still forming its film to avoid marring or haze.
For those who seek customization, the period after the final clear coat has cured offers a broad canvas. Decals, airbrushed details, or vinyl wraps can transform a plain repaint into a unique design. If decals are used, ensure they are compatible with the clear coat and that they are applied within the recommended curing window to prevent silvering or lifting. When you opt for airbrushing or more complex artwork, consider a light hand to preserve the integrity of the underlying paint and to avoid overworking the clear layer. Finish with a final polish to blend edges and restore a seamless overall appearance. The result is not just a colored surface but a carefully engineered, multi-layered finish that embodies the resilience of a well-crafted plastic paint system.
As a final reminder, always follow the manufacturer instructions for every product you employ. The wrong combination of primer and paint, or neglecting proper curing times, undermines adhesion and longevity. Environment matters too. Avoid painting in direct sun or in extreme heat or cold, and maintain a dust-free area during both sanding and coating stages. If the task feels overwhelming or if you are working with high-value fairings, consider professional detailing or a shop that specializes in plastic finishes. A skilled professional can navigate tricky plastics, ensure consistent adhesion, and deliver a durable, factory-like finish that stands up to years of use.
For readers wanting a concise reference on the strategic logic behind choosing primers and paints for plastics, a detailed overview from a respected industry resource emphasizes the critical steps: dedicated surface preparation, plastic-specific primers, and a two-part or high-quality urethane system designed for plastics. This sequence is the backbone of a successful, long-lasting result. If you are exploring specific fairing models or repairs, you might explore Honda fairings to see how different shapes interact with paint and the practical implications for prep and finish across styles and curves. The shape and contour of each fairing piece influence how you apply paint and how the film settles, so understanding the underlying form is part of achieving a flawless result.
In all of these steps, the craft lies in discipline and patience. A finish that looks great in the first hour may reveal its compromises after exposure to sunlight, fuel vapors, or temperature swings. By investing in careful surface preparation, selecting a plastics-specific primer, choosing a compatible two-part or urethane topcoat, and applying in controlled, methodical passes, you create a finish that endures. It is a practical art form—one that blends chemistry with meticulous technique. The payoff is a durable, vibrant result that preserves the motorcycle’s lines and identity, while resisting the environmental and mechanical tests of the road.
External resource for further reading: https://www.motorcycle.com/tech/choosing-the-right-paint-for-motorcycle-fairings/
From Primer to Gloss: Mastering the Art of Painting Plastic Motorcycle Fairings
Embarking on a paint job for plastic motorcycle fairings starts long before the first can is pressed. It begins with a clear understanding of adhesion, durability, and a finish that can shrug off sun, rain, and the grit of the road. The journey is a dialogue between you, the plastic, and the pigment you coax into life. The opening truth is surface honesty: anything hiding beneath the paint will reveal itself later as a flaw. Cleaning becomes a ritual, and the lightest touch of abrasion becomes the handshake that invites the color to stay. The goal is not merely color but a finish that behaves like factory work, even when it’s done in a home garage or a shade-covered shop bay. With that mindset, the rest of the steps fall into place as a logical sequence rather than a series of guesswork moments.
Surface preparation is where durability begins. Start with thorough cleaning, using a degreasing solution or a dedicated plastic cleaner to strip away oils, waxes, and dirt. Plastic surfaces are notorious for hiding slick residues that can sabotage adhesion, so this step matters as much as any primer later on. After cleaning, I move to a controlled abrasion. A fine sanding approach—think around 1200 to 2000 grit—removes the gloss and creates a micro-rough surface that the paint can grip. If the fairing has deeper scratches or minor dents, you should start with a coarser grit to smooth the irregularities, then progressively move to finer papers. Wet-sanding helps control dust and yields a smoother texture, but it requires a bit more patience and water management. Once sanding is complete, wipe the surface with a clean lint-free cloth dampened with isopropyl alcohol to remove any lingering dust or oils. In practice, this sequence makes the difference between a finish that looks good for a season and one that endures.
Repairs come next. If there are cracks or breaks, they should be stabilized with a plastic-compatible adhesive designed for automotive plastics. Let the adhesive cure fully before proceeding. For larger imperfections or deeper scratches, use a plastic putty or body filler designed for flexible substrates, then sand flush with the surrounding area using progressively finer grits. The aim is a surface that is smooth, level, and free of probing marks that could telegraph through the paint. This is not a cosmetic step alone; it’s the structural groundwork that supports adhesion and a consistent color laydown.
Once the surface is prepared and repaired, the next stage is priming. A plastic-specific primer or an adhesion promoter proven for plastics is essential. Primers act as a bridge between the resin’s chemistry and the pigment’s chemical properties. They increase adhesion, reduce the risk of solvent attack on the plastic, and help the color lay down evenly. The primer should be chosen with your plastic in mind—polypropylene, ABS, or other thermoplastics each have their own quirks. After priming, lightly scuff the surface again to ensure a fresh, receptive layer for the base color. Allow the primer to cure fully according to the manufacturer’s instructions before moving on.
Color selection and base color application follow. Use a high-quality automotive- or plastic-compatible paint designed for applications on flexible plastics. The emphasis here is on the base color’s compatibility with the plastic and the long-term stability of the pigment under environmental exposure. Color matching can be tricky when you’re working on a panel that may not have a perfect reference. A test spray on a small, inconspicuous area is prudent to verify both color and how it interacts with the primer. When you apply color, the technique matters nearly as much as the pigment. Thin, even coats are the rule; thick coats invite runs, sags, and uneven color build. Allow each coat to flash, or dry just enough to feel tacky to the touch, before applying the next. Multiple thin coats—typically three to four—build depth and evenness while preserving surface integrity. Distance consistency is crucial; keep the spray at about 20 to 30 centimeters from the surface and use a steady, even motion to avoid heavy buildup. A Z-pattern helps to distribute paint evenly and minimizes the risk of pooling at edges and corners.
Drying and curing are the quiet workhorses of the project. After the final base coat has been applied, give the paint ample time to dry and cure as recommended by the paint supplier. In many cases, a minimum of 24 hours is necessary before handling; some coatings demand up to 72 hours for full cross-linking. This window is when micro-movements of the plastic and ambient humidity can subtly shift the final appearance, so patience here pays off. During this period, resist the urge to inspect too closely or expose the surface to direct heat or sun, which can alter the film’s path as it cures.
A clear coat follows, and it is the second pillar of the finish. A plastic-safe clear coat adds UV protection, increases resistance to impact and chipping, and adds depth to the color. The application approach mirrors the base color: thin, even layers with proper flash times. Multiple coats are preferred to a single heavy coat, resulting in a smoother, more even gloss and a stronger protective film. Between coats, the ambient temperature and humidity should remain steady to avoid solvent entrapment or uneven curing. In practice, you’ll refine the surface with a progressive sequence of light layers rather than a heavy, single sweep. After the final clear coat cures, you’ll likely be tempted to admire the depth and gloss. Resist the rush to polish immediately; a careful curing period and controlled handling ensure the finish remains flawless as it hardens.
The finishing touches are where the look truly comes alive. A well-executed clear coat invites the paint to glow with life, and a light wet-sand with very fine grit—around 1500 to 2000—can eliminate any micro dust nibs and micro-roughness, creating a glassy, seamless surface. Polishing after the wet-sand step enhances the shine and emphasizes the depth of the color. At this stage, decals, custom graphics, or vinyl accents can be added if desired. The clear coat acts as a sacrificial shield for these later adornments, preserving the integrity of both color and graphics. If you plan to customize with designs, spray patterns, or decals, ensure those elements are fully dry before proceeding with any final polishing steps.
In the event of damaged areas after priming, there are still corrective options. Cracks or splits in the plastic should be addressed with a repair method that targets the substrate first—using a plastic welder or heat-based repair technique can restore structural integrity. Repairing before priming helps ensure that the subsequent layers do not trap movement or flex that could reopen the defect. When you rework areas, re-sand and re-clean before applying primer to guarantee uniform adhesion. This approach keeps the repair invisible under the paint and maintains the overall smoothness of the finish.
A note on environment and safety cannot be overstated. Work in a well-ventilated area, with appropriate protective gear such as a respirator or mask, gloves, and eye protection. Positive outcomes in finish quality require careful control of dust, temperature, and humidity. The plastic surface itself can interact with solvents, so following manufacturer instructions for primers, paints, and clear coats is essential to avoid unintended reactions. It is also prudent to consider a dedicated workspace or a temporary booth setup to minimize dust and environmental contaminants that can ruin a perfectly prepared surface.
In practice, the process is both technical and artistic. The best results come from planning, patience, and a willingness to adjust on the fly. If you are unsure at any point, take a step back, review the surface, and test a small area again. A single well-executed trial can prevent a cascade of issues on the main panel. Throughout the project, remember that color matching is not a static goal but an ongoing conversation with the surface. The choice of primer, the quality of the base color, and the clarity of the finish will determine whether the final result reads as factory-like or simply well-painted. If you want a reference point for how brands or lines of fairings are approached in practice, a quick look at the BMW fairings catalog can offer a sense of how panel characteristics influence preparation and color decisions. That internal resource helps you calibrate expectations for texture, edge definition, and compatibility across different fairing styles. BMW fairings catalog.
When you step back to evaluate your work, the most meaningful questions are practical: Do the edges transition cleanly into adjacent surfaces? Is the color even in all lighting conditions? Do the corners and seams show any evidence of adhesion failure after dryness? Are there any micro-scratches that catch light in an unappealing way? If the answers are affirmative to these questions, you’ve achieved a professional-grade result. If not, most often the remedy lies in revisiting the preparation stage before committing to a new paint cycle. A patient approach, guided by the principle that preparation determines performance, will deliver a durable, factory-like finish that not only looks good in photos but holds up under rigorous road use. For readers seeking deeper practical nuances, a practical guide from a well-regarded industry resource offers extended guidance on technique, safety, and troubleshooting. External resource: https://www.bikeexif.com/how-to-paint-motorcycle-fairings-a-practical-guide/.
Final thoughts
Successfully painting plastic motorcycle fairings requires meticulous attention to detail, from the initial cleaning and repair stages to the final application of paint and clear coat. By following the outlined steps, businesses can deliver professional-quality finishes that not only enhance the appearance of motorcycles but also extend the longevity of the fairings against wear and tear. Emphasizing quality and expertise in these processes can set a motorcycle service apart in a competitive market, ensuring customer satisfaction and loyalty.