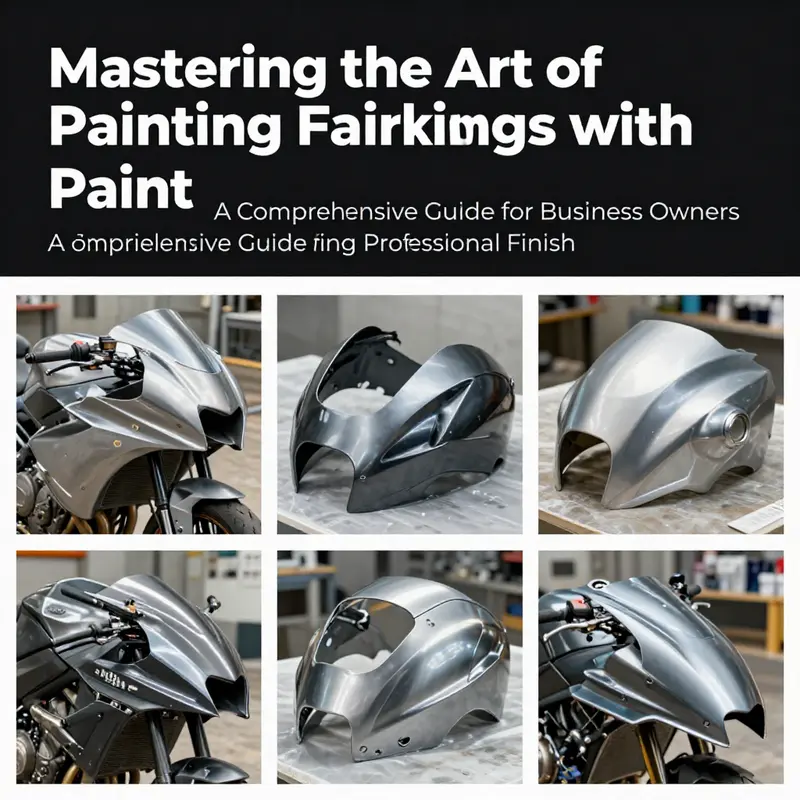
Painting motorcycle fairings requires expertise and precision, especially for professionals in the automotive industry. Understanding the step-by-step process of painting fairings not only enhances the aesthetic appeal of motorcycles but also contributes to customer satisfaction and business reputation. This guide will cover essential chapters on preparation, primer application, base coating, and clear coating, providing you with valuable insights to ensure a successful paint job.
From Clean to Committed: The Preparation Ritual for Painting Motorcycle Fairings with Spray Paint
The moment you decide to transform a motorcycle’s appearance with spray paint, the most decisive work happens before a single color is sprayed. Preparation is not a mere prelude; it is the foundation that determines whether the finish will look sharp, stay durable, and resist the elements. In practical terms, it is a quiet, methodical ritual that aligns surface, tools, and environment into a single purpose: to give the color something truly stubborn to cling to. When you approach preparation with care, you set a tone for the entire job. The fairing becomes less a canvas you rush to decorate and more a surface you earn the right to alter. The outcome depends on what follows, but the outcome is built on the integrity of every preceding step. If you treat the surface as if you were inviting a new skin to grow, the result will feel inevitable: clean, even, and lasting color that echoes the bike’s lines rather than fighting against them.
Preparation hinges on a sequence that is straightforward in theory and demanding in practice. It begins with surface cleaning, a step that transcends mere wiping. Dirt, oil, wax, and dust are not cosmetic nuisances here; they are barriers. They form a barrier to adhesion. A decal would peel, a color would dull, and a clear coat would fail to lay down evenly if the surface still carries residues. The rule is simple: any contaminant that could migrate to the paint layer must be removed from the moment you wipe the surface down. To do this well, you’ll want to work with dedicated automotive or motorcycle cleaners that are designed to cut through grease and grime without attacking the plastic or composite material of the fairings. A clean rag—preferably a microfiber cloth—helps prevent reintroducing micro-scratches or leaving fibers behind. The goal is a surface that feels smooth to the touch but, more importantly, feels uniformly dry and free of slippery film.
After the initial cleaning, the surface needs a controlled touch with abrasion. The sanding step is not about removing old paint or creating a surface that feels rough; it’s about creating the perfect micro-roughness, a slight tooth that helps the primer and the subsequent coats bite in. The guideline calls for fine-grit sandpaper in the 400–600 range, though some painters go up to 800 or higher for a smoother final feel. The sanding should be light and even, executed in a single direction. Scratches from rough tools or repeated back-and-forth motions can create cross-hatching that becomes visible under the paint. When you finish, wipe away the dust with a tack cloth until the surface feels almost velvety to the touch. If you encounter areas where old paint is peeling or chipping, those corners require extra attention; feathering the edges with a lighter hand and a finer grit can help these sections blend before you apply primer. This is not about erasing the past but about preparing the past to accept a new layer cleanly.
Masking is where respect for the other components of the bike becomes practical. You are not just protecting the fairing; you are preserving the entire aesthetic of the motorcycle. Mask off the headlights and taillights, the mirrors, handlebars, and any other parts that should not receive paint. If the fairing is near components like the fuel tank, seat, or wheels, these areas deserve protection as well. The masking job is an exercise in precision as well as patience. Tape should lay flat, edges must be sealed tightly to prevent overspray, and any potential gaps must be identified before you begin spraying. The aim is to create a boundary that is as clean as a shoreline after a calm tide. If you find that tape is peeling or curling on an edge, resecure it or re-mask; a small seam can become a channel for paint to creep into places you don’t intend. In this step, the calmer you are, the more confident your finish will be.
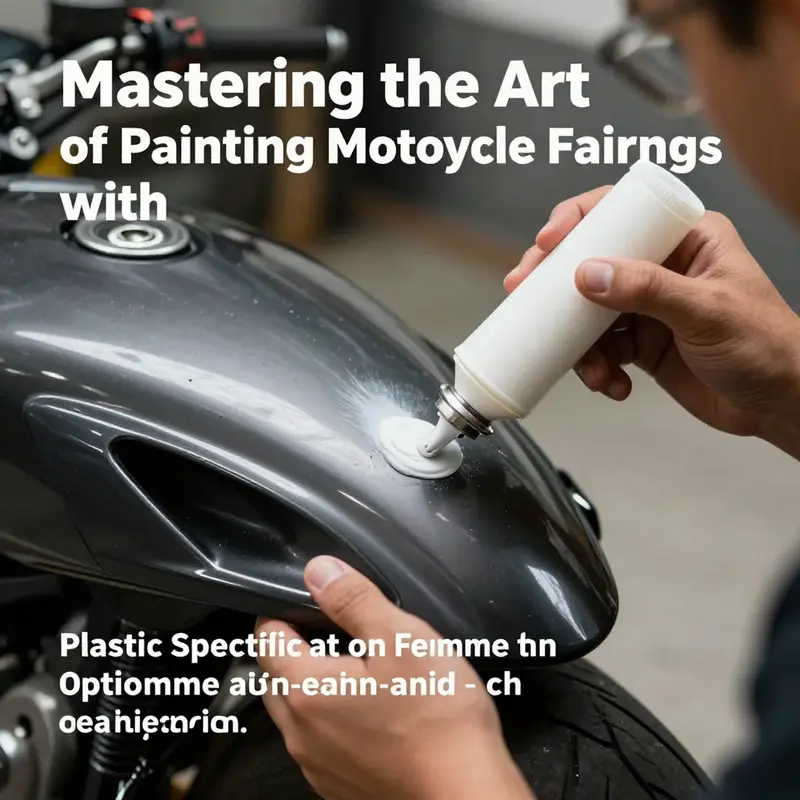
A robust primer is the bridge between the prepared surface and the color you want to apply. The primer’s role is twofold: it fills minor imperfections and it provides a consistent, porous bed for the topcoat to adhere to. For plastic or composite fairings, you’ll want a primer formulated for those materials. The method of application matters almost as much as the primer itself. Apply in thin, even coats, held at a measured distance to achieve a light, even mist that covers without pooling. Overlaps should be slightly staggered with each pass to build a uniform layer rather than a heavy, concentrated edge. Drying times depend on the product, but a typical cycle runs in the neighborhood of 15 to 30 minutes between coats. If the primer is not completely dry, any dust or debris you wipe onto the surface while handling the next coat can become a defect in the finish. When dry, you may lightly sand again with a very fine grit if the primer shows a defined texture or if you notice tiny nibs; this step is about achieving a smooth, uniform base rather than chasing perfection after the color has gone down.
Before you step into base color, there is a final cleaning that often gets overlooked. After sanding the primer, wipe the surface with a tack cloth or a lint-free cloth lightly dampened with isopropyl alcohol. The goal is to remove any last trace of dust, oils from your hands, or stray particles that could magnify when the paint is laid on. This final wipe-down is a quiet, almost ceremonial moment. It costs you nothing and buys you protection against a morning of frustration later in the project. With the surface clean, all that remains is to lay down the color with a careful hand, and then lay down a clear coat for protection and gloss. But those steps belong to the next phase. For now, the focus is what happens here: the surface, the mask, the primer, the last clean—each one building toward a bond that won’t fail under sun, rain, or heat.
In practice, preparation should feel almost ritualized. The process teaches you to listen to the surface: its temperature, its texture, its moisture level. If you attempt these steps in a space that is too humid, too dusty, or too cold, the adhesion can falter and the color can misbehave. A well-ventilated room that stays relatively dust-free is ideal. If your environment fluctuates in temperature, you must time your coats with the curing windows of the products you are using. Spray paint, even when intended for plastics, does not forgive rushed drying or uneven ambient conditions. Patience matters as much as technique here. It is easy to think that the preparation is tedious, but remember that every minute spent in the right way reduces the chance of a repaint or a repair later. If you are unsure about a step, test it on a scrap piece of plastic. It gives you data you can trust and a tangible reference for what the layers should feel and look like.
As you consider the broader scope of your project, you may be choosing a particular fairing style or model to revitalize. You might browse model families to understand contours and angles you will work with. For example, if you are looking into options for a specific line of bikes, you could explore the Honda fairings category to get a sense of how the shapes meet the paintable surfaces. Exploring such categories can help you think about edge lines, panel transitions, and how masking will behave on tight radiuses. The goal is not to imitate a factory finish but to respect the lines of the bike and ensure the final paint job harmonizes with every curve. For readers who are curious about how to approach a bike-specific paint job, visiting online catalogues and image galleries—like the Honda fairings section—can offer practical inspiration while still keeping the project grounded in sound preparation practices.
These preparation steps—surface cleaning, precise sanding, meticulous masking, thoughtful priming, and a final, exacting clean—are non-negotiable if you want a professional-grade result. Skipping any one of them invites trouble later: adhesion failures, solvent entrapment, or a finish that looks milky or uneven under lighting. If you think of the fairing as a living surface, preparation is how you invite the paint to become part of its story rather than a rough sticker slapped on top. When you build these steps into a calm routine, you reduce the chances of anomalies such as dust inclusions or edge feathering becoming permanent features of the finish. The patience you invest now translates into confidence when you apply base color and the protective clear coat. And while the subsequent steps—base color and clear coat—will define the final aesthetic, the quality and longevity of those steps rest on the strength of the preparation that preceded them. In that sense, preparation is not just a stage; it is a philosophy about the relationship between surface, paint, and environment, a philosophy that makes the difference between a touch of paint and a durable, museum-worthy finish.
For readers who want to keep the momentum and ensure the preparation remains as purposeful as possible, consider how you structure the workday and the workspace. A clutter-free zone reduces the risk of dust and stray particles becoming embedded in the layers. A dedicated, well-lit surface helps you spot imperfections you might otherwise miss. If you must pause between steps, cover the work area to preserve the dust-free environment rather than leaving it exposed. The more you treat preparation as its own craft, the more predictable and satisfying the final result will be. In the end, quality paint results begin with a quiet, rigorous respect for the surface you are painting and the conditions in which you work. When done with care, the fairing’s first impression—clean lines, even texture, and a surface ready to accept color—speaks to the rider’s pride and the painter’s craft.
External resource: This chapter leaves you with a clear sense of how preparation functions as the bedrock of any spray-paint project. For further discussion and tips drawn from community experiences, you may consult this external resource that discusses practical approaches to painting motorcycle fairings: https://www.britishmotorcycles.com/forums/topic/how-to-paint-a-motorcycle-fairing/ .
Primer as the Gatekeeper: Unlocking Durable, Flawless Spray Paint on Motorcycle Fairings
Primer is more than a preparatory step on the path to a showroom finish. On motorcycle fairings, it acts as the gatekeeper between bare plastic or composite substrates and the final layers of color and clear coat. The goal is not merely to cover the surface, but to forge a durable bond that can withstand vibration, road debris, temperature shifts, and exposure to sun. The fairings themselves are usually made from ABS plastic, polyurethane, polycarbonate, or fiberglass. Each material presents its own set of challenges when it comes to adhesion, porosity, and surface energy. Without proper priming, even the most careful topcoat can peel, chalk, or lose luster after a few rides. Primer helps to level those differences, sealing micro-pores and creating a uniform canvas that the color coats can grip securely. In practical terms, primer improves adhesion, seals the surface to prevent pinholes and uneven absorption, and adds a protective layer that resists moisture and UV exposure. When chosen and applied correctly, a primer tailored for plastics and composites becomes the foundation of a professional, durable finished paint job. The science behind this step is simple but essential: you are engineering a chemical bridge between the plastic and the pigment, a bridge that can endure the harsh realities of riding and weather. The process begins with careful preparation, continues with deliberate application, and culminates in a gentle cure that readies the fairing for base color and clear coating. Attention to these details pays dividends in long-term durability and a finish that remains vibrant through the miles ahead.
The primer’s role begins long before the spray comes out of the can or gun. It must first interact with a surface that has been thoroughly prepared. Cleanliness is nonnegotiable because oils, wax, and dust act like barriers, preventing the primer from making the intimate contact required for adhesion. A high-quality degreaser or dedicated plastic cleaner is used to remove every trace of oil, grease, wax, and dirt. The goal is a surface so clean that the primer can settle evenly, with no ridges or oils rejected by the substrate. Once the surface is clean, the next hurdle is the texture. Plastics and composites respond best to micro-abrasions created by light sanding. The recommended range is typically 600 to 800 grit for a typical primer job, with finer work (like 800+ grit) yielding an even smoother foundation. The key is to sand in one direction to reduce cross-scratches and then wipe away dust with a tack cloth. If you’re aiming for an ultra-smooth finish or you’re working with very glossy or nonporous plastics, you might consider a fine wet sanding step after the primer dries. The aim is to create a slightly roughened surface that the primer can grip, not to remove material or flatten details.
Masking off pieces that should not be painted is the quiet counterpoint to sanding. The best results come from planning ahead. Use high-quality masking tape and protective sheeting to safeguard headlights, taillights, mirrors, and any other components that should stay in their original finish. Edges should be sealed tightly to prevent overspray from creeping under the tape, which would force you to redo work later. The masking step might seem tedious, but it is the difference between a crisp line and a blurred edge that requires clean-up. The careful separation of painted and unpainted areas is a discipline that separates a professional finish from a casual one.
With the surface prepared and masked, the primer itself begins its work. For plastics, a primer formulated specifically for automotive plastics is essential. These primers include adhesion promoters and resin systems designed to chemically interact with ABS and similar substrates. The purpose is not just to provide stick but to forge a durable bond that resists separation under stress and temperature changes. A plastic primer also helps seal the surface, reducing the chance of pinholes or uneven absorption that would otherwise appear once the topcoat is applied. Sealing is particularly important on new or repaired fairings where the substrate may have minor variations in texture or absorbency. The primer layer also adds a level of protection against moisture and minor environmental insults that would otherwise begin the wear process at the micro level.
When it comes to application technique, the method mirrors the base coat approach in precision and restraint. A spray gun or high-quality aerosol can is used to lay down thin, even coats. The recommended distance is typically around 12 to 18 inches from the surface, with overlapping passes to create a uniform film. The first coat should be light, aimed at saturating the surface just enough to cover without pooling. After each pass, pause briefly to allow the solvent to ventilate and the surface to begin to tack, which helps the next layer bond more effectively. The result of the first coat is a uniform but slightly translucent layer that reveals any remaining surface imperfections. The second coat should be applied with the same care as the first, but with slightly more coverage to achieve a robust base without creating runs. Each coat is followed by a brief drying period, typically 15 to 30 minutes depending on the environment and the product used. Humidity and temperature greatly influence curing time, so it is wise to follow the manufacturer’s guidance and adjust for local conditions.
Drying and curing are where the science of primer meets the art of patience. The surface should dry thoroughly before any sanding or the application of the next layer. In a space kept at a comfortable room temperature, the typical drying window falls in the 2 to 4 hour range for primers. If you are in a cooler or more humid environment, you may need a longer window. During this time, it is crucial to avoid drafts that can cause dust to settle on the still-curing surface. A dusty environment will chase you down later with buffing compounds and swirl marks. If you see orange peel, nibs, or tiny bumps after the primer dries, a very light sanding with fine grit paper — often in the 1000 to 1500 range — can help flatten the surface before you proceed to the base coat. Wipe away the dust with a tack cloth before moving forward.
Some modern primer formulations go beyond adhesion and sealing. Advanced plastic primers may incorporate UV-stabilizing and thermal-expansion-resistant properties. This means they help minimize yellowing from sun exposure and accommodate the micro-expansion and contraction that happens as a motorcycle heats up and cools down on long rides. While these features are not strictly necessary for every project, they can be a meaningful advantage for fairings that see a lot of sun or high-temperature swings. The practical effect is a more uniform base that remains visually consistent over time, reducing the need for frequent touch-ups and rework.
Choosing the right primer is also about the exact substrate you are treating. ABS, polycarbonate, fiberglass, and even certain premium composites respond differently to primers. Some plastics have lower surface energy, which means they can fight adhesion more than others. That is why a dedicated plastic primer is recommended rather than a generic filler or a metal-oriented primer. The primer acts as a chemical interface, a bridge between the substrate and the topcoat that accommodates the inherent properties of the plastic rather than fighting against them. For riders who care about a perfect color match, there is also value in testing the primer on a small, inconspicuous area or a scrap piece of similar plastic. This faster feedback loop helps you tweak workflow before committing to the entire fairing. A scrap test can reveal if the primer has a tendency to lift, wrinkle, or fail to level evenly, allowing you to adjust spray technique, drying times, or sanding steps before committing to the full surface.
The narrative of primer ends where the base color begins, yet the transition is a moment of opportunity. After the primer has cured and any necessary light sanding is completed, you move into the color layer. The color base coat should be applied in thin, even passes that avoid heavy buildup. The distance from the surface generally remains within the same 12 to 18 inch window used for primer, with overlapping strokes to maintain uniform coverage. The goal is to achieve a solid, even tone without sags or runs. Two to three coats are often sufficient for good color depth, though more may be required for particular colors or to correct coverage issues revealed by test panels. As always, small test patches are invaluable for verifying color lift, gloss, and adhesion in a controlled way before tackling the entire fairing.
An equally critical part of the priming narrative is the link between primer and clear coat. The primer creates the path to a glossy, protective finish because it provides a uniform base that topcoats can bond to without absorbing unevenly or reacting to surface variability. A well-executed primer job minimizes subsequent issues such as orange peel, solvent clouding, and micro-cracking once the clear coat is applied. The characteristic gloss you want in the final finish is best achieved when the underlayers are free from defects that can telegraph through to the top layers. The interplay between primer quality, sandability, and subsequent coat smoothness is subtle but significant, and it often determines the perceived quality of the final result much more than the topcoat alone.
For readers who want a concrete example rooted in practical catalogues of fairing options, consider a common touchpoint on the rider community: a range of Honda fairings designed for CBR bikes. These components illustrate how a shared primer philosophy translates across different shapes and profiles. If you’re curious about a specific set of fairings for a popular model, you can explore this category for reference and context: Honda fairings for CBR. The example is not about a single product but about the way primers interact with the surface geometry, edges, and contour lines that define a fairing. The goal remains the same: create a uniform, sealant-friendly base that accepts the color layer evenly and resists micro-movements that could compromise adhesion.
As you plan your workflow, remember that the primer stage is also a moment to reinforce safety and studio-like discipline in your shop. Work in a well-ventilated space, shield yourself with a proper respirator, and keep dust to a minimum. An ideal environment minimizes the risk of contamination and allows solvents to off-gas without creating hazardous build-ups. Temperature and humidity are not mere afterthoughts; they actively shape drying behavior and surface finish. If the atmosphere is too humid or too cold, you may experience longer cure times and the potential for moisture entrapment, which can show up as hazy patches or reduced gloss in the finished product. A small heat source or a dedicated climate control setup can help stabilize conditions, but never apply heat directly to a wet surface. The best cure is patience and consistency, followed by a light, careful hand in subsequent steps.
To close this thread, think of primer not as a decorative layer but as a carefully engineered interface. It is the difference between a color that clings and a color that shines. It is the buffer against mismatches in the substrate and the unpredictable realities of outdoor riding. It is, in essence, the gatekeeper that permits the subsequent coats to perform at their best. With the right primer chosen for plastics, properly prepared surfaces, one or two light, even coats, and a disciplined drying and sanding plan, you set the stage for a topcoat that remains vibrant and protected over the long haul. For those ready to proceed, the base coat awaits, carrying color into the nerve center of the fairing and establishing the final aesthetic that riders seek.
External resource: https://www.ppgautomotive.com/en-us/resources/surface-preparation-guide
The Layered Path to Perfect Color: Mastering the Base Coat on Motorcycle Fairings with Spray Paint
Color is not merely what you see; it is the quiet commitment you make to the plastic, the light, and the air around your ride. The base coat is the backbone of a durable, even finish. It forms the color field you want and creates the reliable foundation for the top clear coat that follows. In the careful world of spray painting motorcycle fairings, layering the base coat is a choreography of cleanliness, patience, and precise technique. Rushed coats and careless handling will betray you with runs, orange peel, or dull, uneven color. The goal is a smooth, uniform field that lies flat against the curves and edges of the fairing, ready to accept a transparent shield of clear that will protect and amplify the color. Achieving this result begins long before the trigger is pulled. It begins with respect for the surface and a plan for how many layers you will actually apply, how you will move the spray, and how you will control the environment to keep dust and moisture at bay.
The journey into a perfect base coat starts with surface preparation. Fairings, often made from ABS plastic or composites, welcome a clean, slightly roughened surface. You begin with a thorough cleaning to remove oil, wax, and residue that can prevent adhesion. A high-quality degreaser or dedicated plastic cleaner is your first ally. Once the surface is spotless, you lightly abrade the area with fine grit sandpaper. The aim is not to remove material but to create microscopic pathways for the primer and the base coat to bite into. A directional sanding pattern helps reduce swirl and makes the subsequent sanding easier. After sanding, wipe the dust away with a tack cloth and inspect for any shiny spots or remaining residue. If you find them, give the area a quick re-clean and re-sand the tiny region. The goal is consistency across the entire surface rather than patchwork areas with different textures.
Next comes masking, a step that deserves equal attention. Your fairings are not a blank canvas where color can wander. Mask off all non-painted areas with high quality masking tape and protective film to protect lights, sensors, fasteners, and edges. The seal at the mask line is essential; a loose edge invites overspray and feathering that will require more corrective work later. In a controlled environment, you can avoid surprises by double-checking the fit of the mask and running a light pass with clean, low-pressure air to ensure the masking edges are truly sealed. The more meticulous you are here, the better the outcome when you begin to lay color on the surface.
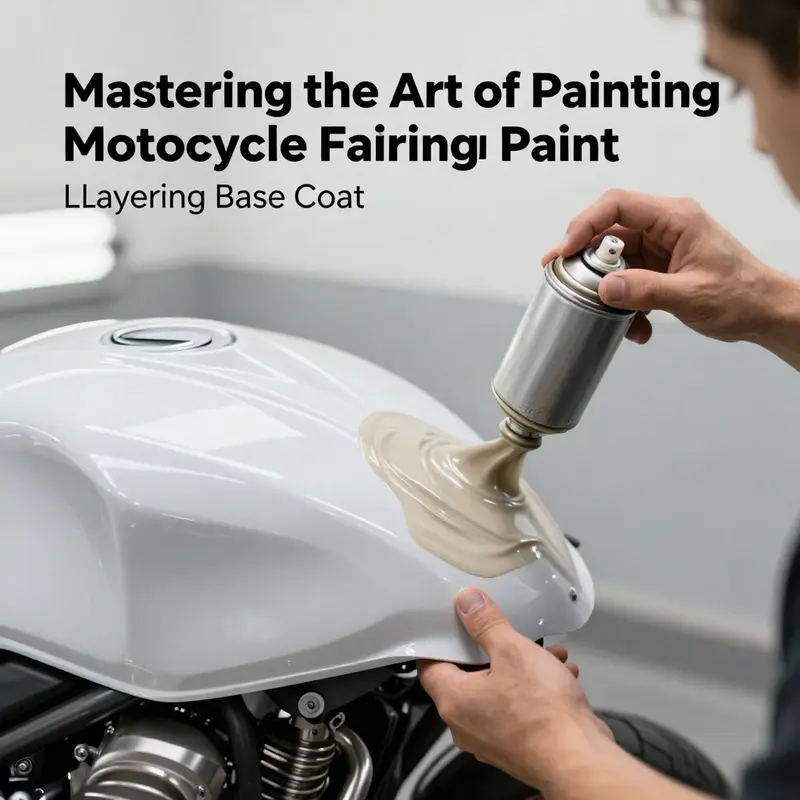
With the surface prepared and the critical masks in place, the primer goes on. A plastic-specific primer provides the best bond to polyurethane and ABS or other common plastics used in fairings. The primer is not a cosmetic layer; it is a bonding layer, a moisture barrier, and a filler that helps to even out imperfections in the substrate. You apply the primer in thin, even coats from a comfortable distance, typically 12 to 18 inches for a spray can or a controlled spray gun. Each coat should dry according to the manufacturer’s instructions, usually 15 to 30 minutes, before you apply the next. If the layer accepts the color with less resistance and you see minor imperfections, you can lightly wet-sand with very fine grit between 1000 and 1500 for a smoother next layer. The important idea is to avoid heavy builds on the primer coat and to let each layer dry fully so you are not trapping imperfections beneath the color.
Now the base coat—the heartbeat of the chapter. A careful base coat sets the tone for the overall appearance. For color uniformity and depth, you want multiple thin, overlapping coats rather than one thick pour of pigment. The detailed results emphasize a 3 to 5 coat approach, each coat designed to layer color evenly and to allow moisture and solvents to escape without trapping them. The distance you hold the spray at matters. A consistent 6 to 8 inches from the surface helps you maintain control and get the fine balance between coverage and overspray. You want smooth, steady strokes that cross over previous paths, never pausing in mid-stroke or lingering too long over one area. If you do pause, you risk a heavy buildup that can lead to runs or sags. Think of painting as mowing a lawn: you want even, sweeping motions that wet the surface uniformly from edge to edge.
The base coat should be applied in a layered sequence, with drying time between coats to let the solvent evaporate and the pigment to settle. The guideline is approximately 3 hours per coat, allowing you to build color gradually while maintaining control. This interval may seem long, but it pays off in color consistency; you avoid orange peel and heavy texture that come with rushed drying. If you are working with a temperature-stable shop, the finishing surface will feel dry to touch between coats, and you should not be concerned about tackiness on the following pass. Each pass should be a light, even veil of color that contributes to a uniform thickness across the entire fairing. Overlap slightly on each pass to minimize visible seams, and use a consistent sweep that travels in straight lines when possible, then cross the area with another pass. The discipline of coverage matters as much as the color itself.
Color matching, a quiet but essential concern, deserves a brief note here. When you choose your base color, you must consider the existing hue of the bike and the final finish you want. It is often wise to test the color on a small scrap piece of plastic that matches the fairing texture and thickness. This test panel should be kept in the same lighting as your project area to gauge how the color will appear under natural and artificial light. If you are seeking a deep, rich result, you may find that additional coats are necessary beyond the minimum to achieve opacity without sacrificing smoothness. Remember, the color you see in the can is not always the color you end up on the fairing after coating and curing. A patient approach here will save you from rework later and will enable you to foresee how the shade will interact with the clear coat that follows.
Between coats, you may encounter very small imperfections—tiny dust nibs, a minor dusting of residue, or a barely perceptible edge glow where two coats meet. The recommended strategy is to avoid aggressive sanding while the color is still soft. If the surface shows modest texture, you can perform a very light wet sanding with 1500 to 2000 grit after the final color coat has flashed and dried. The intention is to remove only the sharpest texture without compromising color depth. Wet sanding keeps the solvent from micro-etching the surface and reduces the risk of friction heat that can cause dulling or hazing. After you finish the light sanding, you should wipe the surface clean again and inspect for uniformity. If any patchy areas remain, you can apply a final very light coat to bring the entire panel back to even color, then re-evaluate before moving on to the clear coat.
The environmental conditions in which you work are not a luxury but a necessity. A clean, dust-free environment is essential. If you can, set up in a space designed for painting or a clean room where airflow is controlled. Temperature stability matters more than many realize. The recommended range for base coat work is roughly 60 to 75 F (15 to 24 C). Humidity should be managed to prevent excessive solvent evaporation or moisture interfering with film formation. A simple fan can help maintain air movement and speed drying times, but do not direct hot air at the wet surface, which can cause bubbling, uneven drying, or dust blow-off. In short, you want a calm, controlled air environment that reduces the rate at which free-standing solvents evaporate and increases the chance of an even, smooth coat.
As the final base coat dries, you prepare for the clear coat. The base coat must be fully dry before layering the protective topcoat. The guideline is a drying window of at least 2 hours after the final coat is applied, though complete surface hardening continues in the following days. The clear coat is your armor against UV light, abrasion, and weather. It needs a similar care pattern: thin, even coats, 12 to 18 inches away, and careful overlap. A typical approach is 2 to 3 clear coats, each allowed to dry before the next. The clear coat not only adds gloss but also increases durability and resistance to chemicals, road salt, and weathering. After the clear coats have cured for the recommended period, usually in the realm of 24 hours to handle safely, you may begin the long curing process. Full curing can take several days or longer, and during this period you should minimize washing and avoid exposure to harsh elements. You want the layers to harden into a strong, cohesive shell that resists chipping and retains shine across a broad range of temperatures and conditions.
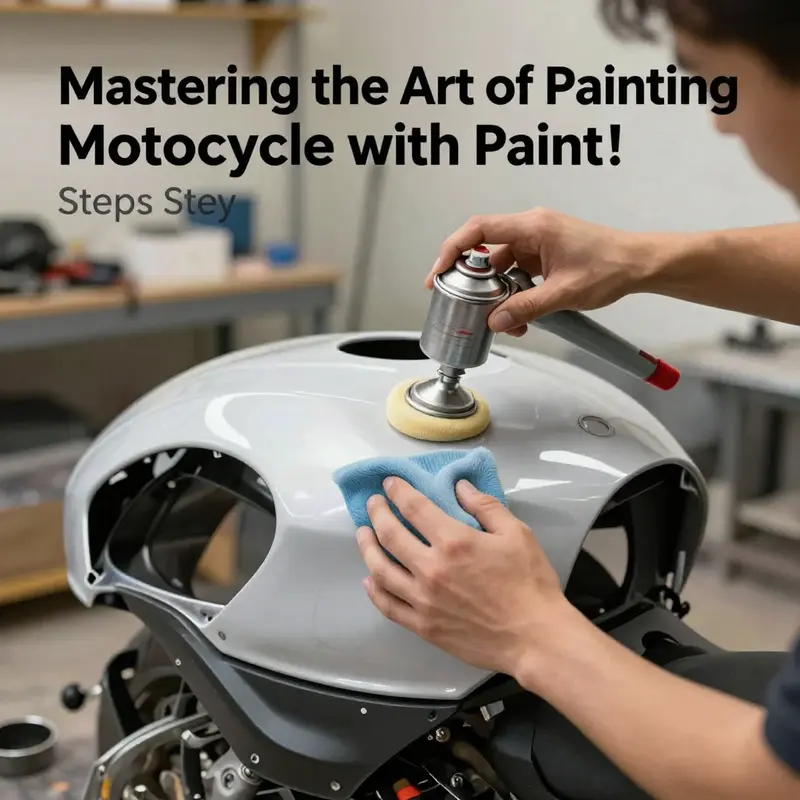
A final finishing touch, optional but highly recommended, is a careful polish after the clear coat has cured to remove minor swirl marks and restore a showroom shine. Start with a fine abrasive polish and a soft foam pad, using light pressure and a rotating motion. A dual-action polisher helps keep heat to a minimum and reduces the chance of burning the clear layer. A gentle pass with a polishing compound will lift micro-scratches and bring the gloss to a higher level. This last step is not just cosmetic; it also makes it easier to maintain the finish as the bike is wiped down and treated with protective sprays. When you are satisfied with the look, you can reassemble components masked earlier and prepare for the next ride, knowing the color beneath is stable, uniform, and protected against the hazards of the road.
If you are seeking context outside your own workshop, you can explore broader examples and perspectives through relevant fairing categories that align with your bike’s make or model. For example, the Honda fairings category offers a wide range of examples that illustrate different curves, panels, and attachment points, helping you visualize how the base coat will perform on various shapes. This kind of reference can be valuable when you are choosing color depth, considering the way light plays across the fairing, and planning your masking strategy for curved surfaces. Honda fairings.
In sum, layering the base coat on motorcycle fairings with spray paint is a deliberate act of balance. It requires clean, prepared surfaces, disciplined timing between coats, and a careful, even hand. The thickness of each coat should be controlled through technique, not force. The distance from the surface, the direction of the spray, and the coverage pattern all contribute to a finish that looks smooth at a glance and wears well under use. When you combine the principles of gentle, consistent application with an environment that minimizes dust and moisture, you set the stage for a base coat that not only looks good today but holds up under riding conditions for years to come. After all, color is not merely decoration; it is the first line of defense against the elements and the foundation on which your entire paint system rests. For those who want to go beyond the basics, the final clarity and depth will be the reward of a thoughtful, patient process, a process that respects both the material and the craft of motorcycle customization.
External resources can provide additional depth if you want to see how others approach the same challenge. A detailed guide on painting motorcycle fairings like a pro offers a broader, practical perspective on the steps described here and can be a useful companion as you refine your technique. https://www.motorcyclecustomizing.com/how-to-paint-motorcycle-fairings-like-a-pro/
The Final Layer: Mastering a Lasting, High-Gloss Clear Coat for Sprayed Motorcycle Fairings

The final clear coat is more than a cosmetic finish; it is the shield that translates depth of color into lasting gloss and real-world durability. When you’ve built a fairing paint job from spray colors, the last step is where preparation, technique, and patience come together to create a professional result. A quality two-component clear coat, formulated for plastics and tuned for the flex and heat cycling of motorcycle components, delivers UV resistance, chemical protection, and scratch resistance that single-stage or one-component clears simply cannot match. The goal is a finish that not only gleams but endures through sun, rain, fuel splashes, and the occasional contact with a rider’s knee or a bag brimming with gear. To achieve this, you must respect the curing state of the base coat, the specific requirements of a 2K system, and the exacting technique that keeps the surface glass-smooth and free of flaws.
First, confirmation that the base paint is truly ready for the clear is essential. While the base color may feel dry to the touch, 2K clears rely on a cured, stable surface to bond effectively. The general guideline is to wait at least 24 hours in a dust-free environment, ensuring the color has fully set and hardened. In practice, you should perform a gentle surface inspection: a light drag of your gloved finger should leave no transfer, and an inspection under diffused light should reveal no micro-scratches or blotches. If any hue shift or texture appears, allow a bit more cure time and re-check before proceeding. This patience pays off in the form of a clear coat that adheres uniformly and resists clouding or haziness that can occur when a cured but outgassed base is topped with a fresh layer.
Choosing the right clear coat is a decision that aligns with both the surface material and the environment you intend to ride in. For plastic fairings, a two-component (2K) clear coat is the standard for premium protection. The two components—resin and hardener—react chemically to form a tough, cross-linked film. This chemistry yields superior UV protection, enhanced scratch resistance, and better adhesion to plastics such as ABS and polyurethane blends common in modern fairings. It is crucial to select a formula designed for plastics; these clears are formulated with greater flexibility to accommodate the slight flexing that occurs with wind loads, heat cycles, and road vibrations. Avoid generic one-component clears for this stage; the extra performance of a 2K system is worth the extra preparation, mixing, and ventilated working space.
Once you’ve chosen the right clear, read the manufacturer’s instructions for mixing ratios, pot life, flash-off times, and recoat windows. These details vary between products, and following them precisely reduces the risk of runs, orange peel, or solvent pop. The mixing process should occur in a clean, well-ventilated area with appropriate PPE. Blue haze in the spray booth and a well-functioning exhaust system can dramatically reduce the chances of a compromised finish due to solvent cooks or moisture condensation. The preparation of the mixing area is as important as any step in the application itself. Keep the mixed batch within its pot life, which is the time you have to apply the clear before it begins to gel. If you work in a humid environment, you may notice longer flash-off times; conversely, a warm, dry space tends to accelerate drying. A controlled environment, even a temporary paint booth, helps you reproduce a consistent result across the entire surface.
Application technique is where precision matters most. Use a high-quality spray gun suited for automotive clear coats and ensure the nozzle and needle are clean and free of debris. The goal is to lay down ultra-thin, even passes that build a uniform film without tipping or running. Maintain a consistent distance from the surface—typically within the manufacturer’s recommended range, often around 6–12 inches for spray guns used in repair or refinishing work—while applying overlapping passes that ensure every inch of the fairing receives equal attention. Start with a very light tack coat to establish a uniform layer and minimize the risk of an initial welt or sag. Move steadily, avoiding pauses that can interrupt the film formation or create micro-dust traps in the drying coat.
The first full coat should be applied with even pressure and a smooth sweep, covering the surface in a misty veil that dries quickly to a dry film. Do not attempt to achieve full coverage in a single, heavy coat. Instead, follow up with two or three additional thin coats, allowing the specified flash-off time between coats—usually 15–30 minutes, though your product’s instructions may mandate a shorter or longer interval. Each pass should be consistent in speed and distance, with a slight overlap to ensure complete coverage without blotches. The objective is a uniform, glossy film with no texture variation or orange-peel, which can be especially noticeable on flat panels where light catches the surface differently than on contoured shapes.
Temperature and airflow play subtle but decisive roles in how the clear coat settles. Excess heat can cause the coating to dry too quickly and trap solvent beneath the surface, leading to small craters or bubbling. In contrast, a chilly room slows solvent evaporation and can increase dust settling if the space isn’t properly controlled. The sweet spot is a clean, dust-free environment maintained in the realm of comfortable room temperature or the manufacturer’s recommended range. Do not spray in direct sunlight or near a heat source, and keep fans directed away from the surface to avoid drying disturbances and debris being blown onto the still-wet film. A mild, steady airflow helps carry away solvents without creating a gust that unsettles the coat.
After the coats have been applied and have reached a proper initial cure, you’ll move to the critical window where inspection begins. Under diffuse light, inspect for orange peel, dust nibs, or a slightly uneven surface. A well-applied 2K clear coat, even in the most complex fairing geometries, should show a glassy, mirror-like finish with subtle but vibrant depth. If you detect minor imperfections, the recommended approach is not to sand immediately but to allow the coat to cure to a firmer state and then perform light corrective steps. Some technicians perform very fine, controlled sanding with grits in the 800–1200 range to flatten peaks, followed by another molt of clear coats. However, this is a delicate procedure that risks reducing gloss or creating new imperfections if not executed with care. In many cases, a second round of ultra-thin clear coats is sufficient to remediate small flaws without requiring aggressive surface abrasion.
The curing phase, often underappreciated, deserves careful attention. Full cure for a 2K clear, particularly on plastic, typically requires several days. The surface becomes increasingly resistant to fingerprints, chemical attack, and mild abrasion as the solvents finish their outgassing and the film cross-links completely. During this time, avoid washing or exposing the fairings to harsh cleaners that might compromise the film. Dust-free storage and minimal handling reduce the chance of dust nibs or micro-scratches forming while the coat reaches full strength. Patience at this stage translates to a finish that remains pristine for years, not months.
Polishing and finishing are optional but can yield an extraordinary final appearance. If the goal is a high-gloss, nearly flawless mirror finish, you can perform a gentle abrasive-free polish once full cure has occurred. In some cases, a light wet sand with very high-grit paper (2000–3000) can be used to remove minor imperfections that survived the coating process. This step should be performed with water and a soft pad, counting on careful pressure and slow, even strokes. Follow with a fine polishing compound and a soft buffer or dual-action polisher to restore that deep, wet look without introducing swirl marks. The key is to keep the pressure light and the strokes even, allowing the soft pad to do the work rather than applying brute force that might burn through or burnish the clear.
A practical mindset for finishing is to think in layers and in time. Each coat adds depth, a more uniform color, and a stronger barrier, while each moment of curing brings you closer to a surface that can endure the realities of riding—road grit, UV exposure, damp weather, and the occasional fuel splash. The gloss you see in the final result is a function of the clarity and smoothness of the film, the evenness of the clear’s thickness, and the absence of micro-defects that scatter light. The long-term durability also hinges on proper adhesion between the base color and the clear layer. When the two are chemically compatible and properly cured, you’ll notice that the surface responds to cleaning without dulling or fogging, and the color beneath remains vivid without bleeding or hazing.
Incorporating the broader painting workflow, the final clear coat becomes a capstone that ties the entire project together. It’s worth noting how the process links to the broader care of the motorcycle’s surface: regular washing with pH-balanced cleaners, avoiding abrasive pads that can wear through the clear, and promptly addressing any impact damage to prevent crazing or micro-cracking in the protective layer. The end result is a finish that not only looks professional but performs under heat and weather conditions that would previously degrade color and clarity. If you’re considering upgrading the look of a specific model or planning a long-term aesthetic investment, a properly executed 2K clear coat provides a platform you can build upon with future color updates or graphic accents without compromising base adhesion or long-term durability.
One practical reference for achieving the highest possible gloss and clarity is to study external guidance on high-gloss clear coats, which covers theory and technique that translate well to motorcycle plastics. A reputable external resource outlines the steps for maximizing gloss through controlled flash-off, careful layer building, and finishing polish, all within the context of clear coats designed for automotive plastics. While the specifics of each product may differ, the underlying principles—cleanliness, adhesion, proper curing, and gradual build—are universal across brands and formulations. This guidance can complement your practice, especially if you are striving for a showroom-like finish that remains durable in the sun and rain. See the recommended external reference for a deeper dive into achieving a high-gloss finish: https://www.carinterior.com/how-to-achieve-a-high-gloss-clear-coat-finish-on-your-motorcycle/.
If you’re looking to connect this chapter to practical resources within your site, you may want to direct readers toward model-specific or brand-specific fairing offerings where bodywork enthusiasts often seek compatible panels or replacements. For readers focusing on particular bodywork, you can point them to the Honda fairings category as a starting point for understanding compatibility and reinforcement details in aftermarket plastics and coatings. This internal link provides a context for readers who want to explore how fairing variations can influence the painting and finishing approach on different chassis. Honda fairings provides a gateway to the kind of panels readers might encounter and consider as they plan fresh paint jobs or touch-ups for specific models.
Ultimately, the decision to use a 2K clear coat on sprayed motorcycle fairings balances the desire for an impeccable, glassy finish with the realities of working in a garage or a shop environment. The two-component system is inherently more forgiving of minor missteps in the color layer, offering greater resilience against the elements once cured. The finish you achieve with this approach is a blend of scientific principle and meticulous craft: a stubborn yet crack-resistant shield that preserves color depth, resists UV fade, and preserves the smoothness you feel under your fingertips. When done correctly, the final clear coat elevates not just the appearance of your fairings but their longevity, ensuring that the investment in time and care remains visible for miles to come. The path to that result begins with proper curing, continues through disciplined application, and ends in a patient cure that finalizes a professional-grade finish worthy of the track, the show, or the daily ride.
In sum, the final clear coat for motorcycle fairings painted with spray paint is a synthesis of materials science, precise technique, and environmental discipline. By respecting the base’s curing state, using a plastic-appropriate 2K clear, applying in thin, controlled passes with proper flash-off times, and allowing adequate curing, you create a durable, high-gloss surface that preserves color depth and resists the rigors of real-world use. The finish becomes not just a protective shield but a striking, durable aesthetic that makes the entire effort feel worthwhile every time you park and step back to admire a gleaming fairing that looks as though it just rolled off a showroom floor.
Final thoughts
In conclusion, the process of painting motorcycle fairings involves meticulous planning and application to achieve a professional finish. Each chapter of this guide emphasizes the importance of preparation, proper primer application, skilled layering of base coats, and the essential final touch of a protective clear coating. By following these steps, business owners can enhance the appearance and durability of motorcycle fairings, leading to increased customer satisfaction and loyalty.