
Proper installation of motorcycle fairings plays a critical role in both safety and performance, making it crucial for business owners in the motorcycle industry to understand the best practices. A thorough installation not only enhances the aesthetic appeal of the motorcycle but also contributes to the overall safety and efficiency of the riding experience. In this guide, we will cover the essential steps for installation, including preparation, cleaning, detailed installation procedures, and final inspections. Each chapter builds upon the last to ensure a comprehensive overview that equips business owners with the knowledge to execute fairing installations correctly and confidently.
From Bare Frame to Sleek Shield: A Practical, Integrated Path to Installing Motorcycle Fairings
Installing motorcycle fairings is as much about disciplined preparation as it is about careful fitting. When the motorcycle starts as a bare frame and the fairings arrive as an array of panels, brackets, clips, and gaskets, the process reveals itself as a craft rather than a chore. The goal is not merely to attach plastic to metal; it is to create a body that protects, channels airflow, and reduces vibration without compromising steering feel or rider control. The route from unassembled pieces to a smooth, protective silhouette is paved by a steady rhythm of methodical steps, a clear respect for torque values, and a readiness to adjust for the exact geometry of your bike. In this chapter, the flow of work is treated as a continuous narrative rather than a checklist, because the most durable, vibration-free, and visually cohesive fairings come from a mindset that blends attention to detail with a calm, problem-solving approach.
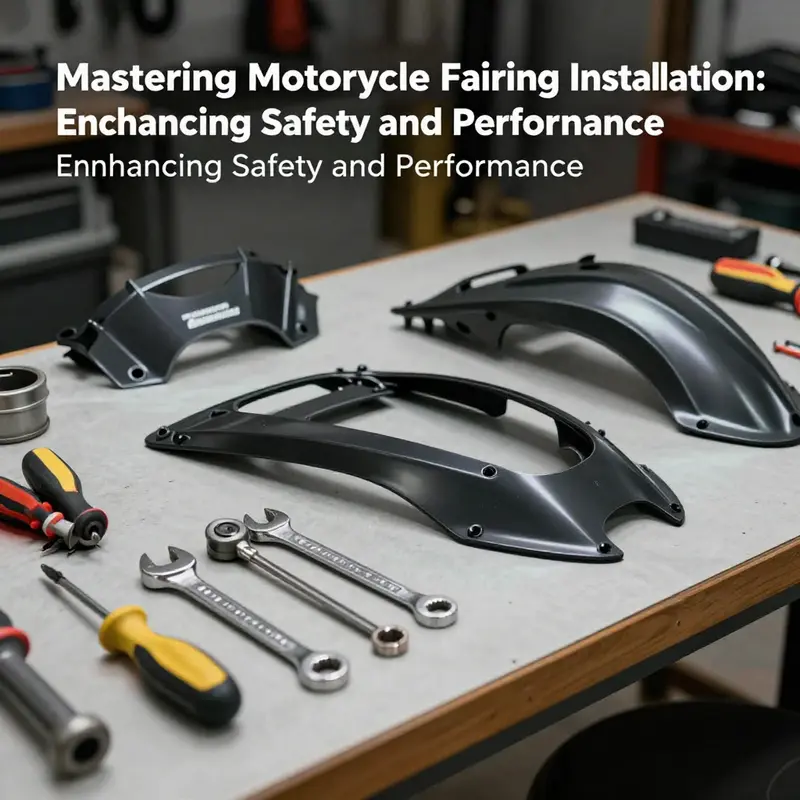
Preparation begins long before any tool touches metal. The first duty is to gather the tools and materials you will rely on for the entire installation. You need a basic set of screwdrivers, an array of wrenches, and a torque wrench capable of delivering precise fastening within the manufacturer’s specified range. The torque figure is not a suggestion; it is the line between secure mounting and damage to components. With fairings shaped to fit specific models, mounting points are not interchangeable. An up-to-date, model-specific instruction sheet from the manufacturer is essential because the sequence of steps and the exact hardware can vary. This is not a place for improvisation. Attention to compatibility prevents misalignment and the kind of stubborn fit that festers into rattles and heat-induced panel distortion after a few rides.
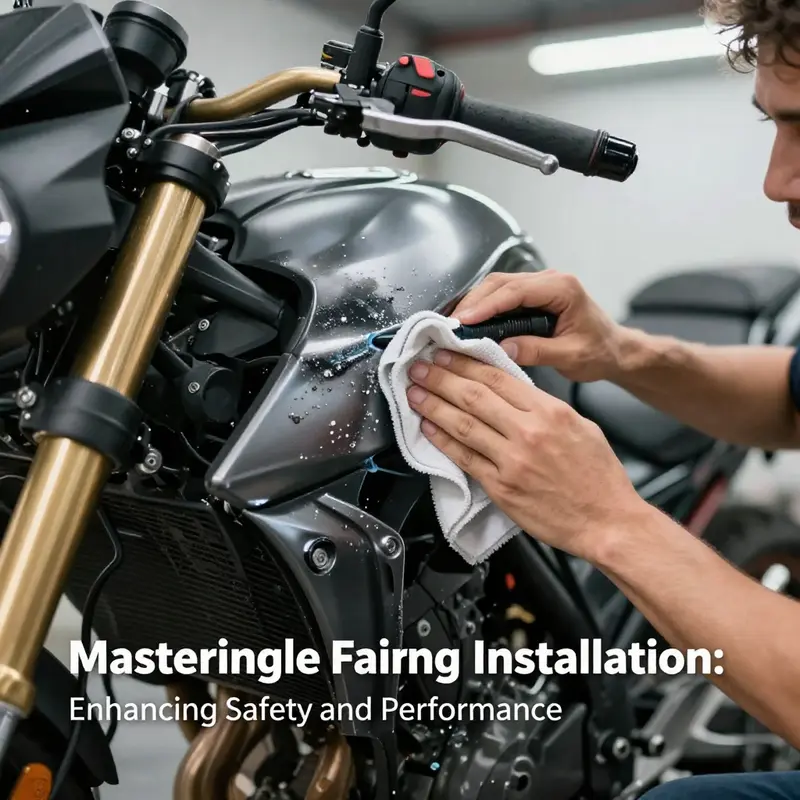
The workspace matters as much as the toolkit. A clean, well-lit, and stable environment reduces the chances of scratching surfaces or dropping a screw into a hard-to-reach corner. Dust and debris, if left to accumulate on mounting surfaces, can create subtle misalignments that become visible only after the bike is fully assembled. Clean mounting surfaces with a mild cloth and, if needed, a gentle detergent to remove oil, grease, and road grime. Dry thoroughly to prevent moisture from creeping into the joints or inside foam gaskets. Cleanliness here translates into precision later, when each piece must seat flush against its mating surface without forcing a panel into an awkward angle.
The comprehensive inspection of components is a quiet, almost ceremonial act that pays dividends in the long run. Inspect every fairing part for hairline cracks, warping, or any sign of damage that could compromise structural integrity. Check all hardware—clips, brackets, screws, and fasteners—to ensure nothing is missing or bent. If a bracket is bent or a clip is deformed, the fairing may not bracket evenly and could produce vibrations or gaps that defeat the purpose of the panel. In the same moment, ensure that the mounting points on the bike match the kit’s expectations. A mismatch here can require awkward workarounds that degrade fitment and could invite fatigue under load. When everything looks sound, you have established a solid foundation for what follows.
Having prepared the scene, the next phase centers on the frame or support structure that carries the fairing body. For most fairings, you begin by attaching the support brackets or a dedicated frame to the motorcycle’s chassis or fork tubes. The trick is to work gradually, tightening bolts in a crisscross pattern rather than tightening one point to full torque and then moving to another. This approach prevents warping of brackets and uneven seating of panels. A careful, incremental tightening helps ensure the frame remains true and the fairing aligns with the bike’s geometry. Do not rush this part. Even a slight misalignment now can magnify into visible gaps and misfit at the upper edges when the panels are finally screwed down. If you have access to a torque wrench, use it to meet the exact manufacturer specifications. The difference between a secure mounting and a loose, rattling fairing often hinges on those incremental turn-by-turn adjustments that occur in the first few joints.
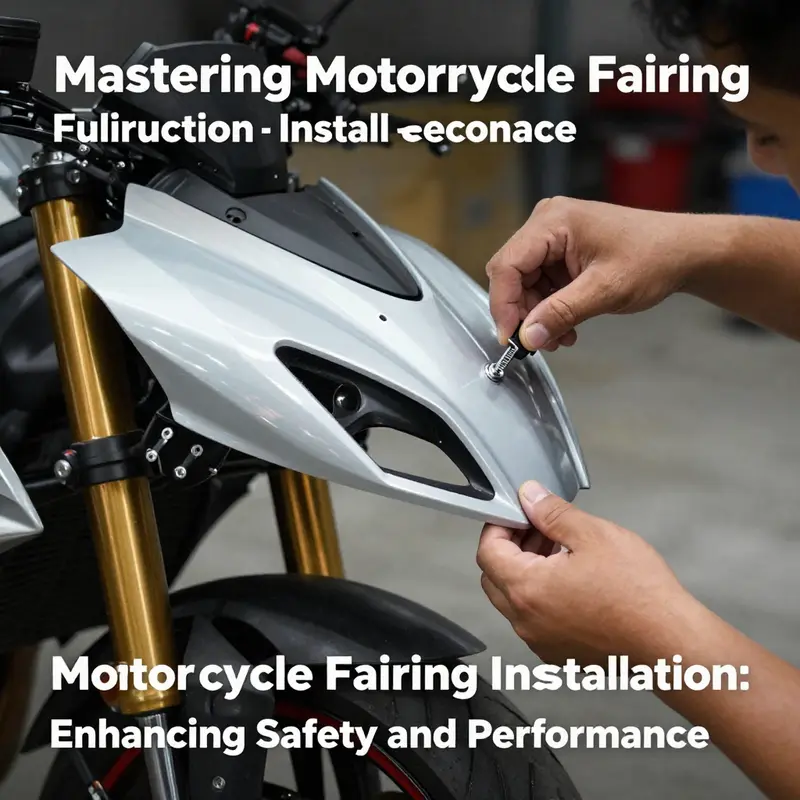
With the frame in place, the process turns to attaching the fairing body itself. Alignment is the moment where design intent meets practical handling. Begin with the central or upper sections and then work outward toward the edges. Carefully align each panel with its corresponding brackets and clips, watching for even spacing around the edges. The presence of rubber gaskets or foam pads between the fairing and frame is not merely a comfort feature; it reduces vibration, dampens noise, and helps the panels maintain a steady, uniform contact across the surface. If a gasket is mispositioned or a pad is missing, the fairing can sing or chatter at higher speeds, undermining the very performance you sought to improve. In this stage, take your time to test-fit before fastening. The goal is to achieve a continuous line that looks like a single, purpose-built shell rather than a mosaic of separate pieces.
Once the components are anchored, the eye returns to the question of fit. Alignment checks should be performed from multiple angles—front, side, and rear—to ensure symmetry and uniform gaps. A fairing should not move or rattle when gently tapped or pressed. If slight play remains, re-check the fasteners and the position of any rubber pads or gaskets. Even minor shifts in one panel can cause a cascade of misalignments in adjacent sections. This is the moment to re-check the mounting points, confirm there is no binding on the steering axis, and ensure that the fairings do not contact critical components when the front wheel oscillates under braking or over a bump. The rider’s perception of a smooth shield often depends on these subtle checks, which prevent wind lift and vibration at speed.
A thoughtful finish is more than cosmetics. After the initial install, a final inspection helps catch issues that a first test ride might reveal. Tighten all screws and clips to their specified torque, and then perform a cautious, low-speed ride to listen for new noises or feel for vibrations that were not present in the static checks. The sense of a stable, vibration-free fairing is earned at this moment, and it is validated when the panel remains true after the bike is ridden at a moderate pace. Pay attention to wind behavior as well. If a fairing begins to lift subtly at speed, it may indicate a misalignment, insufficient clamp force, or a need for additional gaskets in the area where airflow concentrates along the bodywork. After riding, re-check fasteners again. The least dramatic fixes—re-tightening a clip, repositioning a gasket—can prevent more involved repairs later on.
Of course, the path to a reliable installation is not universal. Motorcycle fairings cover a range of shapes, mounting strategies, and mounting point counts. Always reference the official installation manual supplied with the kit or the motorcycle’s service manual for model-specific guidance. Some bikes require distinct step sequences for wiring harnesses, integrated lighting, or sensor connections. In practice, this means you approach each project with a plan that respects the bike’s unique architecture. A thoughtful plan prevents improvisation from turning into improvisation with consequences—like wiring harnesses routed over hot engine components or panels that press against moving parts.
As you consider the broader landscape of fairing options and the wide range of model-specific kits available, a practical path emerges. Model-specific compatibility is not merely a marketing claim; it is a guarantee of alignment with mounting points, harness routes, and edge profiles intended by the manufacturer. When you encounter questions about which kit fits your bike, the safest approach is to verify compatibility against the manufacturer’s instructions, and when possible, consult the service manual for the exact torque ranges and seating requirements. In parallel, it is reasonable to browse reference materials or category pages that show general fitments or common configurations. For instance, if you are exploring options in a category that curates fairings by model or brand, you can refer to the Honda fairings collection to get an intuition for typical panels, spacings, and retaining hardware. For a direct reference, explore the Honda fairings catalog: Honda fairings.
This integrated approach—careful preparation, meticulous cleaning, thorough inspection, precise frame mounting, intentional panel alignment, and disciplined final checks—forms a cohesive pathway from an unassembled set of parts to a protective and aerodynamically cohesive body. It is a workflow that respects both the mechanical realities of fasteners and the tactile feedback that comes from a well-fitted shell. It is, at heart, a craft that rewards patient work, repeated checks, and respect for the bike’s engineering. For readers seeking deeper technical drill-down, an authoritative external resource can provide step-by-step procedures that complement the broad guidance offered here. See the detailed guide from the Motorcycle Mechanics Institute for a deeper dive into the installation procedures: https://www.motorcycle-mechanics.com/installing-motorcycle-fairings/
From a Clean Slate to a Tight Fit: Mastering Surface Prep for Safe Motorcycle Fairings
Preparing to install motorcycle fairings begins long before the first screw turns. The surface you work with—frame rails, mounting brackets, and the cheeks that cradle the bodywork—will determine not only how well the fairings sit, but how they perform under vibration, weather, and wind. A fairing that looks right but doesn’t fit snugly is a symptom of poor prep earlier in the process. When you treat the mounting surfaces with care, the alignment becomes predictable, the gaps stay even, and you reduce the risk of rubbing, chafing, or forceful flexing when you ride. The path from a clean slate to a tight, quiet fit is straightforward in concept but exacting in practice. It rests on three pillars: meticulous cleanliness, thorough inspection, and disciplined preparation of hardware and mating surfaces. By honoring these, you set the stage for a mounting that not only looks right but behaves well in the real world where speeds, shocks, and road debris constantly challenge the shell you fasten to the bike.
Begin with intention. Gather the tools you’ll need and the correct fairing kit for your model. A torque wrench matters here, because you will tighten fasteners to manufacturer specifications. The instructions that come with your fairings, plus the service manual for your model, are not mere suggestions; they are the map for how this bike was engineered to hold its panels. If you skip this step, you risk over- or under-tightening, misalignment, or even frame damage. Visualize the finished assembly in your mind and let that image drive your method. The goal is consistent, repeatable mounting that resists movement in all normal riding conditions. With preparation in hand, you can turn attention to the actual contact surfaces—the places where paint meets metal, and where plastic meets metal—without fear that hidden blemishes will betray you once the fairings go on.
The cleaning phase is more than cosmetic. It is a crucial reliability step. Dirt, grease, and old wax create a slick film that can hide corrosion, micro-scratches, or small pits in the metal beneath. Begin with a mild detergent and a soft brush or sponge, paying careful attention to frame rails, mounting brackets, bolt holes, and the contact surfaces where a gasket or foam pad will sit. The objective is to remove every trace of dust and oils without stripping color or removing protective coatings that are essential to rust resistance. Harsh chemicals and high-pressure sprayers may seem efficient, but they can breach paint layers, force moisture into electrical components, and leave behind residues that undermine adhesive bonds. Patience matters more than speed here. A calm, deliberate approach protects both the aesthetics and the integrity of the bike.
After washing comes the drying phase, a step that should not be skipped or rushed. Surface moisture is the enemy of accurate measurement and proper fit. Dry the frame with a lint-free cloth and give the area time to air-dry in a shaded, well-ventilated spot. Direct sunlight can cause rapid drying that leaves water spots or micro-areas still damp beneath plastic pieces. The aim is a dry, neutral surface, free of streaks, oils, and fingerprint residues. Once dry, inspect the surfaces in good light. Look for rust, corrosion, or warping along the mounting points. Rust is more than a cosmetic issue; it can compromise the structural integrity of brackets and threaded holes. Warping indicates prior heat exposure or physical stress that has altered tolerances. Neither is acceptable in a mounting surface that will bear the weight and wind loads of a fairing. If you detect imperfections, address them before proceeding. Small rust spots can be treated with appropriate rust inhibitors and light sanding, while warped brackets may require replacement. This is not a place to shortcut; it is where the long-term durability of the finish begins.
With the surfaces clean and dry, shift focus to the hardware that will anchor the fairings. Inspect every fastener and clip for burrs, nicks, or signs of previous sealant residue that could hamper a clean bite. Old thread sealant can mislead torque readings and create uneven clamping. Clean fasteners thoroughly, removing any old material that could affect thread engagement. If metal surfaces show minor roughness, a light pass with fine-grit sandpaper (800–1200 grit) can promote adhesion and help fasteners seat properly. The idea is not to remove material but to create a uniform, clean surface that the threads can bite into cleanly. For plastic or composite fairings, use cleaners formulated for those materials. Generic cleaners may contain additives that can soften plastics, cause hazing, or promote micro-cracking over time. The guidance here is simple: treat metals and polymers with cleaners designed for their chemistry, and avoid anything that could introduce micro-damage or discoloration.
Surface preparation also involves the subtle art of touch and feel. After you’ve cleaned and dried, give each mounting point a careful inspection for alignment guides, access holes, and the structural edges that will bear load. The goal is a faithful, stable seating of the fairing that respects the bike’s geometry. Where gaskets or foam pads are involved, position them exactly as the manufacturer intends. These components, though seemingly secondary, reduce vibration, dampen noise, and improve heat transfer around the joint. They also help prevent galvanic corrosion between dissimilar metals and plastics. The moment of truth arrives when you recheck each mating surface for levelness. A surface that appears flat may still be slightly bowing; a little misalignment can become a visible gap once the fairing is in place. An attentive eye, supported by a quick test fit, can reveal these subtleties before the final mount.
A disciplined approach to hardware preparation helps you translate the human hand’s intent into a precise mechanical engagement. Start by removing any dirt that remained in the bolt holes. Debris here can skew alignment and introduce play once the fairing is attached. When you reinstall, do not force fasteners through misaligned holes. Misalignment is a symptom of a deeper issue—either surface contamination, a warped bracket, or a misoriented part assembly. Correct the root cause before continuing. If you notice any burrs on the edges of metal brackets or on the back of mounting clips, remove them gently with a final pass of fine sandpaper or a deburring tool. Burrs can mate with the soft plastics or paint, causing cracks or finish damage during installation and during vibration while riding. You want a clean, smooth bite where threads engage and clamps clamp evenly.
The final touch in the preparation is the crucial wipe-down. After you’ve cleaned, dried, and inspected, wipe the surfaces with a lint-free cloth dampened with isopropyl alcohol. This step removes any remaining oils, fingerprints, or water-spot-producing residues. It also prepares a clean, oil-free canvas for any adhesives or sealants that may be used in certain fairing configurations. Even if your installation relies primarily on mechanical fasteners, that last wipe helps ensure that no invisible film remains that could cause gloss variations, adhesive failures, or micro-delamination under heat and sunlight. A small, precise effort here pays dividends in long-term appearance and the integrity of the bond between parts.
As you proceed through these steps, keep the wider objective in view: a mounting system that remains rigid and quiet under the stresses of riding. A fairing that looks perfectly aligned in the workshop should not shift at highway speeds, and it should not rub the paint from the subframe or frame rails. The alignment becomes a practical test when you recheck the bike in daylight and from multiple angles. Visually confirm even gaps around the fairing edges, symmetric spacing along the midline, and a consistent line where the front fender or lower panels meet the radiator shroud or frame rails. If you see a wobble in the panel or a noticeable flex at the joint when you gently press the fairing, you may be staring at a misfit that needs rework of brackets or adjustment of the mounting points. It is better to take a moment longer to address it now than to live with a rattling, purring problem on the road.
This chapter’s emphasis on cleanliness, inspection, and careful hardware handling serves as the backbone of a reliable, visually pleasing fairing installation. The steps are simple in isolation but demand attention in aggregate. Clean surfaces, free of oil and dirt, set the stage for fastener engagement that is precise and repeatable. Thorough inspection catches imperfections that can escalate into gaps or structural weakness. Thoughtful hardware preparation—removing burrs, using correct cleaners for the material, and appropriate surface finishing—ensures that threads bite cleanly and that clamps hold without over-torquing. Finally, the disciplined wipe-down with isopropyl alcohol makes certain that no residual oils compromise adhesives or bonding surfaces. The lines between good fit and great fit are drawn in these preparatory moments, and the results show in how smoothly the fairings finally seat and how quietly they ride.
If you want a practical point of reference that connects these general practices to a specific model family, consider reviewing model-specific guidelines in the Honda fairings collection. For example, you can explore various Honda fairings and their mounting philosophies at: Honda fairings. This resource illustrates how different fairing lines and bracket configurations address identical material challenges and fitment needs, reinforcing the idea that surface prep must be attentive to both material properties and geometric realities. While each brand and model might present unique features—such as slightly different bracket patterns or gasket placements—the core principles of cleanliness, inspection, and hardware readiness remain universal.
When you approach the task with those universal principles in mind, the actual installation feels like a continuation of the preparation work rather than a separate, abrupt act. You are not simply screwing panels onto a bike; you are integrating a line of components that must harmonize with the frame’s tolerances, the rider’s needs, and the bike’s dynamic behavior. The effort you invest in this chapter pays off in a fairing that looks right, seals effectively against air and moisture, and contributes to the bike’s aerodynamic efficiency. That is the essence of surface preparation: it is the quiet intelligence behind a bold visual statement and a consistent, predictable ride. As you move forward to the mounting phase, the faith you place in clean surfaces and verified fit will translate into confidence on the road and a broader sense of control when the wind picks up. For the next steps, you will build on this foundation with careful frame and bracket installation, then precise body panel alignment that respects both aesthetics and function. And when the bike finally leaves the stand with fairings in place, the quiet certainty of a well-prepared base will be evident in every straight line, every contour, and every glide through air at highway speeds.
External reference for deeper technical validation and model-specific cautions can be found in professional shop manuals, such as the Harley-Davidson service manual portal, which provides detailed procedures, safety precautions, and torque specifications relevant to fairing installation and surface preparation: https://www.harley-davidson.com/service/manuals.html
From Frame to Finish: A Precision-First Journey Through Motorcycle Fairing Installation
Installing motorcycle fairings is more than a cosmetic upgrade. It is a precision task that affects safety, aerodynamics, and ride quality. The path from bare frame to a securely mounted shell is a sequence that rewards preparation, patience, and method. The best outcomes come from treating the process as a carefully choreographed routine rather than a rushed set of fastenings. The core idea is simple: mount the right parts in the right order, respect the material’s limits, and verify alignment at every step. To begin, you should approach the job with a clear plan and the right tools laid out in a bright, well-lit workspace. Gather a socket set, wrenches, screwdrivers, and an Allen key of the sizes commonly used on fairing kits. A torque wrench is highly recommended because plastic and composite components can crack or strip if overtightened. Most manufacturers publish torque specifications for each mounting point; when in doubt, err on the side of caution and tighten gradually to the recommended value. Before you touch a single bolt, confirm that your fairing kit matches your motorcycle’s make, model, and year. The mounting points are not universal. Cross-check the part numbers and, if available, consult the service manual. It sounds simple, but overlooking even a small mismatch can lead to misalignment that echoes through the entire bodywork later on. In practice, the preparation phase becomes a ritual of verification, not a mere checklist. While you prepare, you also set the stage for a clean, precise installation. A well-lit workspace reduces the chance of misplacing screws or dropping clips. A tidy bench keeps small parts from rolling away and makes the sequence easier to follow. The preparation mindset matters just as much as the steps themselves. There is also value in thinking about the bike’s handling and riding posture during installation. The fairings will inhabit a frame that flexes and vibrates at speed, so the installation must account for movement, not just static fit. In other words, align for real-world conditions rather than perfect, still air on a workshop table. When you begin, remember that the goal is not to achieve a flawless look alone, but to preserve the integrity of the chassis, the steering axis, and the rider’s comfort. With that prescribed approach, you move into the first tangible phase: preparing the mounting surfaces. The frame and the points where the fairings will anchor themselves must be spotless and dry. Dirt, grease, and grime trap debris between the fairing and the mounting points, creating tiny gaps that can amplify vibration and looseness as the bike moves. A damp cloth to remove grime, followed by a thorough dry with a clean rag, is enough to establish a clean contact surface. In a well-executed installation, there is no room for residual oil or dust that can compromise grip and alignment. A clean surface also makes it easier to notice any imperfections in the frame or the clips that might cause misalignment later on. It is worth taking a moment to inspect each component as you go. Look for cracks, warps, or damaged hardware. Even a tiny clip can fail at speed, causing the fairing to detach or flutter. Lay out brackets and screws in the order you plan to use them; this reduces the chance you will drop a piece or reach for the wrong part during a critical moment of alignment. With a solid, clean starting point, you proceed to the most crucial structural phase: attaching the fairing frame or supports. For most full or half-fairings, the first task is to secure the support brackets to the motorcycle’s chassis, fork tubes, or mounting points. Start by loosely fastening the brackets with the provided bolts. The rule of thumb is to tighten gradually in a crisscross pattern. This approach distributes pressure evenly and helps prevent warping of the frame or distortion of the mounting holes. Do not over-tighten too early; you will refine the torque as you reach the final stage. If you have access to a torque wrench, consult the manufacturer’s specifications and set your wrench to those values. The idea is to create a secure scaffold for the fairing body to attach later. Once the frame is anchored, you move to the fairing body. Align the main body with the supports and begin at the upper or central sections to establish a true reference point. This is a critical moment because even a minor misalignment in the centerline can cascade into visible gaps or uneven edges along the sides. Some fairings incorporate rubber gaskets or foam pads between the fairing and the frame to dampen vibration and reduce noise. Check these components as you go and ensure they sit properly against the mounting surfaces. When the fairing is perched on its support, you can gradually fasten more clips or screws from the center outward. Do not rush this step; a calm, methodical tightening helps preserve the fairing’s geometry and minimizes the risk of cracking the plastic or deforming a clip. After the main pieces are attached, you examine the overall fit and alignment. A visual check from multiple angles—front, side, and rear—helps detect asymmetries that might not be obvious from a single vantage point. Gently tap or press on the fairing to test for stability. There should be little to no movement and no rattling when you apply a light, deliberate pressure. If you observe gaps, adjust the fasteners incrementally, loosening and retightening as needed. In some designs, the fit may require more precise handling, such as aligning a slot with a post or ensuring a seam lines up with a contour on the bike. The next phase is careful final tightening. Use a crisscross sequence that begins from the center and moves to the outer edges. Tighten each fastener a little at a time, revisiting previously tightened points to confirm there is no creeping or shifting. This staged approach creates a uniform distribution of pressure and helps prevent distortion or cracking. If you have a torque specification, follow it precisely. Plastic and composite components can become stressed if bolts are overtightened, especially at the edges of a fairing panel where stress concentrates. While you finalize the install, consider the bike’s dynamic relations: clearance to the wheels, chain or belt, suspension movements, and the interaction with handlebars, mirrors, and footpegs. The fairing should sit flush against its mounting points and should not press on any moving part during steering or cornering. A practical test involves gently rotating the handlebars from lock to lock and lightly pressing the fairing to ensure there is no interference with control inputs or windscreen movement. Depression and contact in any of these areas can signify a need to reposition or readjust a clip, a bracket, or a foam pad. The final checks after mounting are not cosmetic; they are essential safety checks. Confirm that every screw, clip, and bracket is securely fastened. Then take the bike for a short, controlled test ride at low speed in a safe area. Listen for unfamiliar noises, feel for vibrations, and assess whether the fairing remains stable at modest speeds. If you notice flutter, rattle, or wind lift, stop the ride and recheck all fasteners and alignments. You may find that a simple tightening, small re-seating of a gasket, or a minor adjustment to the outer edge remedy the issue. It is wise to ride again after a brief stop to confirm the fix has taken hold and has not created new conflicts with windstream or steering response. The stage is also a moment to remind yourself of the safety caveat: never ride with loose or improperly installed fairings. The risk is not merely a loose piece but a potential hazard to you and others on the road at high speeds. For the most reliable results, always consult the official installation manual from the fairing manufacturer or your motorcycle’s service manual for model-specific details, especially torque settings and unique attachment methods. If you are integrating newer components or replacing an entire shell, the internal harnesses and electrical connectors deserve calm attention as well. When the fairing involves a fairing-integrated light or a charging prompt, verify the wiring harness routing, connector integrity, and weather sealing. Tidy routing reduces the chance that a cable or connector is pinched or damaged as the bodywork moves during riding. A careful observer will also verify that no harness interferes with steering, suspension travel, or footpeg movement. The attention to wiring is not merely about aesthetics; it is a matter of reliability and safety in adverse conditions or during long rides. Finally, though you may feel confident after this sequence, model-specific nuances require respect. Some bikes require additional spacers, weather stripping, or fastener types that differ from the generic approach described here. When in doubt, consult the owner’s manual and the fairing manufacturer’s instructions for precise torque settings and unique methods. If you want to compare what you’ve done with a model-specific reference, the internal catalog provides a selection of compatible options for different brands. For example, if your project focuses on Honda, you can browse the Honda fairings category for kits engineered to fit precise bike timelines and bodywork contours. See the dedicated section here: Honda fairings. This resource can help confirm the fit and offer additional mounting considerations tailored to your model’s geometry. The broader lesson is to treat every installation as a careful balance among alignment, rigidity, and airflow. The fairing is not just a shell; it is a component that must harmonize with the frame, the rider’s posture, the bike’s dynamics, and the environmental conditions in which you ride. With this mindset, the process becomes less about forcing a boxy outer layer onto a bike and more about sculpting a precise, resilient envelope that protects the rider, reduces drag, and enhances the motorcycle’s overall performance. As you move from preparation to the final test, you unlock a sense of stewardship over your machine. You are not simply attaching panels; you are refining its aerodynamics, its handling, and its resilience to road imperfections. The end result is a fairing that remains true under wind pressure, that stays aligned through corners, and that contributes to rider confidence rather than distraction. If you want a deeper, step-by-step visual guide, a detailed, illustrated article from a trusted industry source offers a robust companion. For a clear, illustrated guide, see RevZilla’s How to Install Motorcycle Fairings: https://www.revzilla.com/blog/how-to-install-motorcycle-fairings. This resource complements the practical steps above without replacing the essential need to consult your specific model’s documentation and the manufacturer’s torque specifications. In summary, the approach to installing fairings rests on disciplined preparation, careful cleaning of mounting surfaces, meticulous inspection of components, and a disciplined sequencing of mounting that respects symmetry and function. The goal is not just a snug fit but a stable, safe, and aerodynamically efficient installation that will endure the vibrations and winds of real riding. The narrative of installation thus becomes a narrative of accuracy and care. When you apply it consistently, the fairing becomes a true asset to the motorcycle, complementing its lines, supporting its performance, and sustaining rider comfort across diverse riding conditions.
null

null
Final thoughts
In conclusion, properly installing motorcycle fairings is essential not just for aesthetics but also for ensuring rider safety and enhancing vehicle performance. Following a structured approach, from thorough preparation and cleaning to step-by-step installation and rigorous final checks, will enable business owners to provide exceptional service. Strong adherence to these practices not only improves the riding experience but also builds customer trust and satisfaction. Emphasizing the importance of detailed inspection and testing ensures that you deliver quality work that meets industry standards, making a significant impact on your business’s reputation.