Motorcycle fairings are crucial not only for aesthetics but also for aerodynamic efficiency and protection. As a business owner in the motorcycle sector, understanding how to effectively fix cracked fairings is essential. This guide covers everything from assessing damage to appropriate materials and techniques for repair. Furthermore, we’ll explore the pros and cons of DIY repairs versus professional services, ensuring you have the knowledge to make informed decisions. Finally, we’ll look at preventative measures to avoid future damage, keeping your motorcycles in top shape and improving customer satisfaction.
Reading the Crack: A Thorough Assessment to Guide Repair or Replacement of a Cracked Motorcycle Fairing
When a motorcycle fairing cracks, the instinct to simply patch it and ride again is understandable. The impulse is practical: fix what’s damaged, preserve aesthetics, and avoid the downtime of finding a replacement. But the decision to repair or replace hinges on a careful, almost diagnostic mindset. The cracked fairing is not merely a surface blemish; it is a potential indicator of underlying issues that affect safety, aerodynamics, and long-term durability. The path from the first glance to a confident fix begins with a methodical assessment that treats the damage as part of a larger system. In practice, this means moving beyond the obvious line of fracture and evaluating how the crack interacts with the fairing’s role on the bike, how it originated, and what the vibration, heat, and mounting geometry will do to it in the months to come. This is a chapter about reading the crack with an engineer’s eye, translating visual cues into a repair or replacement plan, and aligning that plan with safety and cost considerations that riders face on real roads, not in a shop brochure.
The first step is an honest visual and contextual assessment. Hairline cracks that barely touch the surface may be amenable to repair, but a crack that runs through a joint, extends across a mounting point, or shows deformation demands a more cautious approach. The material identity of the fairing matters just as much as the crack’s appearance. ABS plastic, polycarbonate, and composite materials each respond differently to repair techniques. ABS tends to bond well with certain two-part epoxies when the surface is properly prepared, but it can be brittle if the adhesive layer is too rigid or if the surface is contaminated. Polycarbonate offers impact resistance and clarity but can experience crazing if solvents are misused. Composites introduce a different set of challenges, where resin-rich areas, voids, or fiber misalignment can mask latent damage. The classification of damage must therefore account for material type, the geometry of the fracture, and where the crack resides in relation to load paths and mounting hardware.
The assessment then drills into the fairing’s structural context. A crack near a headlight mounting point or a mirror mount is not just a cosmetic issue; it can affect how the assembly handles vibrations, tolerances, and alignment. A crack that compromises an aerodynamic feature, such as an air intake or duct, may alter airflow in a way that compounds performance and heat management. The trade-off between repair and replacement becomes clearer when the crack intersects critical regions that bear loads or influence the fairing’s shape and function. In this light, the repair decision is not simply about patching a line but about sustaining the fidelity of the fairing’s design and its interaction with the motorcycle’s structure.
Beyond surface inspection, there is a logic borrowed from high-stakes engineering practice: damage tolerance testing. The same principles that govern aircraft structural evaluation—fatigue life, crack growth under cyclic loads, and residual strength—apply in spirit to motorcycle fairings. The fairing endures constant road vibration, temperature swings, and the flexing of mounting points as the bike moves. A crack that looks minor at rest might become more serious as it experiences cycles of bending and shear during riding. The protective assumption here is simple: if there is any reasonable doubt about whether a crack will remain stable through the next ride or the next few months, then further assessment is warranted. This is not fear-mongering; it is prudent engineering judgment for a part that leaves a rider stranded or compromises control if it fails mid-ride.
To strengthen the assessment, advanced diagnostic techniques provide a window into parts of the structure that a casual eye cannot see. Non-destructive testing, borrowed from aerospace inspection practices, can reveal subsurface delamination, internal voids, or poor adhesion that accompanies a visible crack. Ultrasonic testing can detect delamination inside the plastic layers that isn’t visible on the surface. Thermography, which maps heat flow, can expose areas where the bond between layers has weakened or where adhesive failures lurk beneath intact surfaces. Digital image correlation can measure stress concentrations around the crack and track how those stresses evolve as the bike is assembled or simulated to vibrate. UV light inspection, as recommended by industry guidelines, can uncover micro-cracks that stay invisible in normal light and help spot areas of accelerated degradation. While these tools are typically the domain of professional shops, understanding what they reveal helps a rider distinguish between a repair that stands a chance and a repair that invites repeated failures.
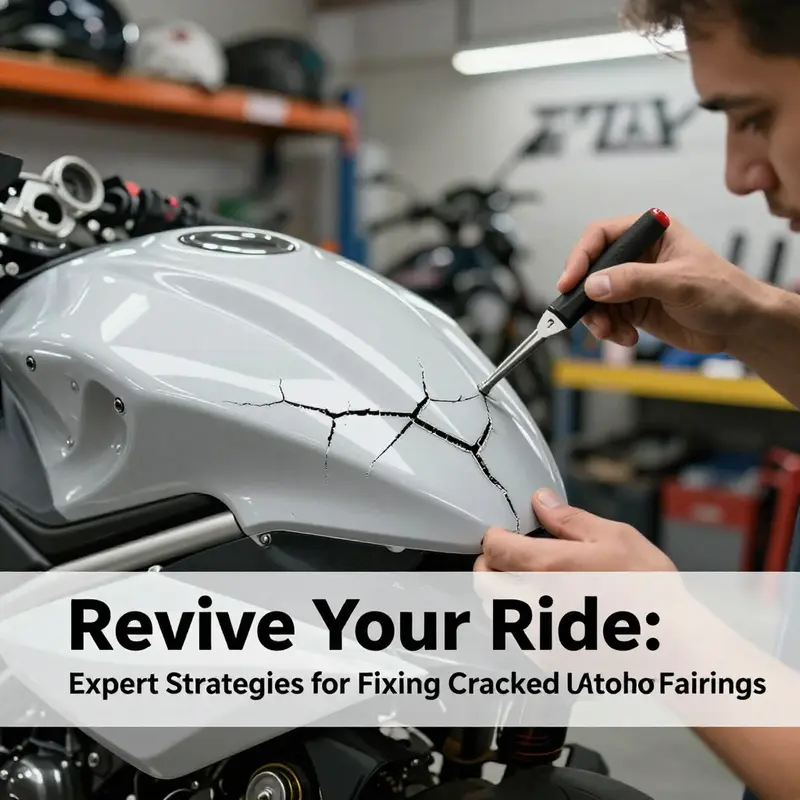
Even with diagnostic insights, practical repair feasibility remains central to decision making. For minor cracks—defined in common practice as shallow, surface-level splits confined to non-load-bearing portions of the fairing—a repair can be effectively performed with a two-part epoxy resin designed for plastics, or with a specialized plastic-welding approach. The procedure begins with meticulous surface preparation: clean the area with isopropyl alcohol to remove oils and contaminants that could hinder adhesion. A roughing, or light sanding, creates micro-mechanical keys on the surface to improve bonding. The epoxy or weldable filler is then applied with care, filling the crack and creating a bridge across the fracture that restores continuity. Curing times are critical. A typical cure window extends to 24 hours, during which the material gains the mechanical properties necessary to support subsequent finishing steps. After curing, the surface is reworked with progressively finer grits to achieve a smooth, paint-ready finish. Priming and painting follow, ideally with a color-matched base and a clear topcoat to provide UV protection and resistance to road grime. The result should be a repair that mirrors the original appearance and remains flexible enough to absorb minor strains without re-cracking.
However, repair feasibility ends where cracks threaten structural integrity or reside in high-stress regions. If the crack runs through a joint that carries load, or if it is accompanied by visible deformation, the safest and most reliable path is replacement. The risk of a repaired fairing failing in service—shearing, cracking further, or causing misalignment with mounting points—can undermine rider safety and lead to uneven aerodynamics or rattling at highway speeds. In these cases, the cost of a new or aftermarket fairing, while not trivial, is a rational investment when compared with the consequences of a mid-ride failure. The estimate often cited by riders and shops places a replacement fairing in a broad range that is affordable for many riders, typically well below the risk and inconvenience of an ongoing patchwork repair. It is not simply about the sticker price; it is about ensuring that the bike’s exterior, which plays a role in protection and airflow, remains robust under real-world conditions.
As repair plans crystalize, riders frequently consider options for replacement while keeping the bike’s visual identity. Replacement does not have to be a leap into expensive OEM parts; aftermarket fairings offer fit, finish, and color options that meet many riders’ aesthetics and budgets. A practical path is to compare the structural compatibility of the new piece with the existing subframe, mounting hardware, and any integrated components, such as windscreen fasteners, seat locks, or radiator intake arrangements. When contemplating replacement, it is prudent to verify compatibility with the motorcycle’s model and year, and to anticipate alignment issues that may arise during installation. The decision to replace invites a broader look at the bike’s overall condition and the likelihood of other components requiring attention in the near term. It is a moment to balance the immediacy of repair with the longer-term reliability of the machine and its appearance.
To bring the discussion from theory into practice, consider the tangible threshold that has become a guiding principle among riders and shops: a crack deeper than about 1–2 millimeters, or one located in a high-stress area, is a bellwether for professional evaluation. This threshold reflects a compromise between DIY accessibility and safety considerations, and it aligns with the broader ethos of repair versus replace strategies observed in aviation-inspired guidelines. If a crack lies near a critical mounting point for components such as a headlight or a mirror, or if the crack crosses a joint or causes visible deformation, the repair’s long-term performance is suspect. In those cases, replacing the fairing minimizes risk and often yields a more aesthetically pleasing outcome than a heavily repaired piece that may require repeated attention. When the decision is to repair, the curing and finishing process should prioritise resilience against daily road conditions: heat aging from sun exposure, humidity-driven swelling or contraction, and the micro-vibrations that accumulate over thousands of miles.
The economic dimension of this decision cannot be ignored. Riders often weigh the cost difference between a careful repair and a replacement, including labor, materials, and potential future maintenance. A repaired fairing saves time and sometimes money in the short term, but it must be robust enough to endure the riding season without recurring issues. A replacement, even if it requires more initial investment, can restore the visual continuity of the bike and reduce the likelihood of subsequent cosmetic or structural problems caused by an imperfect repair. The bottom line is that the safest, most durable outcome is achieved when the repair or replace choice is anchored in an accurate understanding of the crack’s depth, location, and the fairing’s functional role on the bike.
A final note on feasibility and decision support emphasizes validation after any repair. Post-repair checks are not optional; they are the last mile in the safety chain. A simple tap test—the quiet, dull ring of a sound that conveys solid adhesion versus a hollow noise indicating possible delamination—can reveal hidden weaknesses. Re-installing the fairing and monitoring for misalignment, unusual vibration, or loosened fasteners during a short ride helps confirm that the solution holds under the real stresses of moving down the road. If the fairing exhibits any creaking, rattling, or rapid movement at speed, that is a signal to stop and reassess. In such cases, rework or replacement should be considered rather than accepting an unstable repair.
For riders seeking further context as they plan their approach, it can be valuable to look at broader aftermarket options while keeping the repair standards in sight. If you are evaluating replacement options as part of a repair-versus-replace decision, a relevant route to explore is the BMW fairings collection, which can be a good reference for fitment and design, helping ensure that aftermarket replacements align with the bike’s original geometry and aesthetics. This is not an endorsement of any particular source, but a practical reminder that compatibility, fit, and finish are central to a successful transition from damaged to renewed. See here for a representative catalog that demonstrates how aftermarket fairings align with modern models: https://ultimatemotorx.net/product-category/bmw-fairings/.
In closing, assessing a cracked motorcycle fairing is not a single act but a sequence of observations and judgments. It requires identifying the material, locating and characterizing the crack, evaluating its impact on structural integrity and aerodynamic function, and then choosing a path that balances safety, durability, cost, and aesthetics. Minor cracks can be repaired with careful surface preparation, appropriate adhesives, and proper curing, followed by finishing that blends with the original paint. Major cracks, or those near mounting points, demand replacement to preserve safety and performance. The right choice is measured not just by the crack’s appearance but by its behavior under real-world use. The goal is a ride that looks right, feels solid, and travels with the confidence that the repair or replacement has withstood the kind of rough conditions it will encounter on the road. This approach keeps the rider’s safety at the forefront while ensuring the bike remains a functional, visually cohesive machine that reflects the care and attention it deserves. For readers who want to explore the topic further, professional guidance remains valuable when there is any doubt about the crack’s depth or location, and the value of a professional assessment is reinforced by the potential consequences of a poorly executed repair. As always, when in doubt, replace—the prudent route is often the most economical choice over time, and the peace of mind is well worth the investment. For formal guidelines and industry standards, consult the Motorcycle Industry Council or manufacturer repair manuals available online. See external reference: https://www.mic.org
From Fracture to Fortitude: A Cohesive Guide to Materials and Techniques for Fixing Cracked Motorcycle Fairings
A cracked fairing on a motorcycle is more than a cosmetic blemish. It can alter aerodynamics, disturb airflow around critical components, and even compromise mounting points if the damage is near those anchors. The decision to repair or replace starts with a calm assessment of how deep the damage runs. A surface-only crack, or a small split that does not breach a mounting boss or an air intake, can often be repaired with resin and reinforcing cloth. But when a crack travels edge-to-edge or into a structural pocket where the fairing attaches to the frame, replacement is usually the safer path. The guiding principle is simple: restore the strength where it matters most, preserve appearance where possible, and never gamble with safety by underestimating the crack. This chapter outlines materials and techniques technicians and DIY riders rely on to fix cracked fairings in a way that respects both performance and look, without getting lost in a maze of gear or brand names. It champions practical choices, careful preparation, and disciplined execution that culminates in a repair that can ride as well as it looks.
To begin, the initial evaluation should be methodical. Cleanliness is the foundation of any repair. Before you dip a tool into the work, wipe the area with a degreasing solvent to remove oil, wax, and grit. The goal is to see the crack clearly and understand its reach. A visual inspection should be followed by a tactile check: run a gloved finger along the crack, feel for ridges or loose material, and test whether the crack opens slightly under gentle pressure. If you discover that the crack tracks toward a mounting boss, or if you notice delamination where the fairing material detaches from its underlying structure, those are red flags. They indicate potential structural compromise, and the safest course is often to replace the panel rather than risk a repair that could fail under load. Even when the decision is to fix, it’s essential to recognize those boundary lines so the repair does not pretend strength where there is none. This mindset—truthful assessment before repair—keeps riders safer and results more lasting in appearance and function.
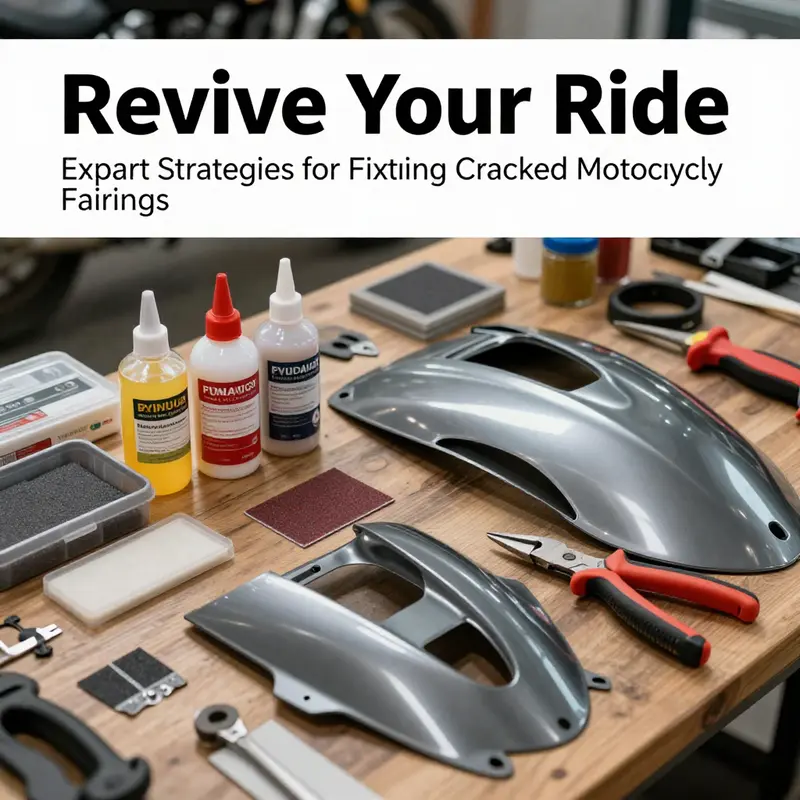
For repairs that stay within safe limits, the materials you choose set the stage for a repair that can endure the daily realities of riding. Epoxy resin is one of the most versatile tools in this kit. A high-strength two-part epoxy designed for plastics creates a bond that adheres well to many fairing materials, from ABS to various thermoplastics. The repair can begin with simply filling the crack to stop propagation, then layering in structural reinforcement to restore stiffness. A common practice is to apply a resin that cures hard and resilient, and to embed a reinforcing fabric—such as fiberglass or carbon fiber cloth—into the resin while it is still workable. The fabric acts as a secondary structure, distributing stress across the repaired area and lowering the chance that a future crack will radiate from the original fault. The approach mirrors how composite materials are built in manufacturing: resin plus fabric yields a stronger, tougher patch that remains lightweight. The technique is not about brute force; it is about distributing forces away from the crack and returning the panel to a state that behaves like a single, continuous piece. In practice, you would prepare a clean crack, dry the area, and lightly roughen the surrounding surface to create micro-anchors for the resin. Mixing the two-part epoxy to the manufacturer’s ratio is critical—too little resin and the bond won’t cure fully; too much can create a runny mess that seeps into gaps you do not want to fill. When applied, the resin should fill the crack and saturate the reinforcement fabric with no air pockets. A careful, methodical build of successive resin-and-fabric coats can yield a patch that rivals the original geometry in stiffness and durability. After a full cure period, typically around 24 hours under stable conditions, the surface is ready for finishing.
Finishing is more than skin deep. Even when the structural repair is solid, the visual continuity of the panel matters for aesthetics and, in many cases, for resale value. Sanding the repaired area with progressively finer grits creates a smooth surface that accepts paint evenly. The key is to feather the edges where the old material meets the new repair so there is no obvious ridge. If the crack went through the outer layer, it is wise to apply a compatible primer that enhances adhesion and helps the paint adhere evenly. Color matching becomes the next important step. A motorcycle needs a finish that blends with the rest of the bike, and color matching can be approached with either a precise color formula or a modern approach that uses digital matching to tint a base color. A careful spray regime—light, even coats with adequate flash time between layers—helps prevent solvent attack and runs. After the color lay-down, a clear coat adds gloss and protection from UV exposure and micro-scratches. The goal is a repair that is not only strong but indistinguishable from the factory finish at a distance; at up close inspection, the techniques should reveal a well-executed restoration rather than a hurried fix. The risk here is of over-spraying, which can create a mismatch that is more noticeable than the crack itself. Patience is indispensable, especially when you’re aiming to maintain the bike’s original look.
If the crack is larger or the repair surface is thicker, or if you anticipate heavy vibration in the ride regime, a more robust strategy may be warranted. Plastic welding is a technique that deserves its own careful consideration. It is most suitable for thicker plastics like polypropylene or high-density polyethylene, materials commonly used in larger fairing sections. Plastic welding involves heating a welding rod of the same material and feeding molten plastic into the crack, creating a continuous bond that fuses the two sides together with the rest of the panel. The process requires control of heat so that the material melts at a rate that allows a strong bond without burning or warping. A tool like a plastic welding gun can deliver this process, often with a guide to path the melt along the crack and a scraper to smooth the surface after the weld. The result is a repair that behaves like a monolithic piece, restoring the panel’s load-bearing path rather than merely filling a gap. After welding, smoothing the surface with a carefully controlled grind ensures that the repair does not stand out in the optical field. The materials you use in welding should be of the same polymer family as the base; mismatches can lead to brittle joints or delamination when the panel flexes in wind and road vibrations. For many riders, plastic welding offers a repair that is close to factory strength for larger, more aggressive cracks, especially when the mounted geometry and air-flow considerations are not compromised by the patch.
There is also a practical option for non-structural or emergency scenarios: high-strength repair tapes designed for motorcycle fairings and plastics. These tapes are engineered to adhere to curved surfaces and to resist water, heat, and mechanical stress. They can provide a temporary but effective seal that blocks water ingress and holds the crack together until a more durable repair can be performed. The advantage is speed and simplicity: no mixing, no curing, no power tools beyond the heat you use to clean and prep the surface. The caveat is durability. In the long term, tapes tend to degrade under continuous flexing, UV exposure, and abrasion, so using them as a stopgap is reasonable, but they should not be mistaken for a permanent fix. A disciplined rider will view tapes as a bridge to a proper repair, not a substitute for one. As with any repair, surface preparation remains paramount; even the best tape will fail if the substrate is oily or contaminated or if the surface is not dry and clean prior to application. It is also worth noting that the patch area should be protected from aggressive road debris once the tape is applied, as the tape can peel or wear more quickly if left exposed to grit and salt.
Beyond the repair itself, a holistic approach to care helps extend the life of the fix. After any repair, the fairing should be thoroughly inspected to ensure there are no hidden microcracks propagating from the repaired site. Re-tightening of mounting hardware is prudent to avoid introducing new stress points as the panel returns to service. It is also wise to monitor the repaired area during the first few rides and after any significant impact or a wash that disrupts the surface finish. This routine vigilance helps catch early signs of fatigue so that a rework or replacement can be planned rather than left to fail unexpectedly on the road. In some cases, the repair can reveal hidden flaws in the underlying structure or reveal misalignment that was not evident before the crack was addressed. The repair thus becomes part of a broader process of inspection and maintenance that keeps the motorcycle performing safely and looking its best.
When the damage is near critical regions—such as mounting points, air intakes, or structural seams—the more conservative choice is often replacement rather than repair. A fairing that has compromised structural integrity should be treated with the same caution a rider would apply to a bent chassis part. Even a repair that is visually convincing may be inadequate to withstand the repeated flex and vibration of riding, and the costs and time involved in a comprehensive rework can be comparable to a factory replacement. The decision is not a simple calculation of repair versus replace; it is an assessment of reliability, performance, and the rider’s risk tolerance. If you are not completely confident in your ability to execute a durable repair, seeking the hands of a professional body shop that specializes in motorcycle repairs is a prudent choice. They bring advanced tools, controlled environments, and a broader range of materials at the ready. They can implement methods such as UV-cured resins, which cure rapidly under light and create strong bonds in a streamlined workflow, or they can craft custom molds to fit the exact contour and curvature of your model. The pragmatist’s takeaway is that modern repairs exist on a spectrum—from quick cosmetic fixes to engineering-grade structural restorations—and the right point on that spectrum depends on the extent of damage and the rider’s expectations for safety and longevity.
In choosing a path, consider not only the immediate repair but the bike’s overall condition and the rider’s plans. If the fairing is already aging and brittle, a repair might only delay the inevitable replacement. On the other hand, if the bike has a special appearance or a rare color, a carefully executed repair paired with a meticulous color match can preserve both the aesthetics and the resale value. The materials discussed here—epoxy resins with fabric reinforcement, plastic welding, and the option of repair tape—each have a role. They are not interchangeable in all situations, but when applied with patience and attention to detail, they enable riders to extend the life of their fairings, reduce downtime, and maintain the machine’s visual integrity. The craft of repair is as much about process discipline as it is about the right material. It rewards careful surface preparation, measured application, and a vigilant eye for the signs that a repair has truly taken hold or that it calls for a higher level of intervention.
For riders who want to explore options beyond the workshop bench, there is a practical route to take. If you are considering replacement panels or want to know which models or years share compatible fairing shapes, you may explore the broader ecosystem of fairing options for your bike category. A well-curated catalog can help you weigh fitment, color compatibility, and panel availability without compromising the bike’s original geometry. In many cases, the path to a satisfying repair and appearance is a blend of these techniques: a solid epoxy bond reinforced by fabric for structural confidence, followed by careful sanding and color-matched paint for a seamless look, and, when needed, a measured use of plastic welding for larger or more stubborn cracks. The sum of these steps is a fairing that returns to its intended role—protecting the rider, shaping the bike’s aerodynamics, and carrying the personality that makes a machine feel like yours.
As you finish a repair, the chapter does not close with a perfect shine alone. It closes with a commitment to maintenance, inspection, and informed decision-making. The repair is not a finish line but a stage in ongoing care. The artistry of a well-executed fix lies in the precise balance between restoring strength and preserving the original material’s look and feel. When done with restraint and method, a cracked fairing becomes not a failed piece but a testament to practical problem-solving—an example of how modern materials and techniques can extend the life of a ride while maintaining its character and safety. If you are curious about compatible replacement options or model-specific fitment considerations, you can explore a dedicated category that focuses on Honda fairings. This resource can help connect the repair journey with suitable panels and styling choices that respect both form and function. Honda fairings
External reference for practical, step-by-step guidance complements the narrative here. For a detailed, technique-driven guide with diagrams and tested procedures, see the external resource that documents common repair workflows for cracked fairings. This reference aligns with the methods described above and provides additional context for readers seeking a deeper dive into the process: https://www.motorcycle.com/motorcycle-repair/how-to-repair-a-cracked-fairing/
When a Fairing Cracks: Weighing DIY Finesse Against Professional Precision
A cracked fairing on a motorcycle is more than a cosmetic blemish. It can alter aerodynamics, expose internal components, and, in some cases, compromise mounting points. The choice between tackling the repair yourself and handing the bike to a professional hinges on how deep the damage runs, how confident you feel with plastic repairs, and what you expect from the finished piece. The good news is that you can approach the problem with a clear framework: assess, decide, and execute in a way that prioritizes safety, durability, and a look that blends with the rest of the bike. A pragmatic, rational approach to repair starts with a careful diagnosis of the crack’s location, its size, and its distance from critical features such as mounting points, air intakes, or any structural ribs that bear load. A crack that starts at or near a mounting point, or one that threads through a rib or a lip that supports the fairing’s curved surface, is more than a cosmetic issue. It may undermine the fairing’s integrity and, consequently, the bike’s overall aerodynamics and protection. If the damage is limited to a shallow surface breach that does not disrupt the fairing’s geometry, a DIY repair can be both economical and satisfying. The core to success in this scenario lies in meticulous prep, careful adhesion, and a patient curing process. In practice, you begin with a thorough cleaning to remove grease, wax, and any residual oil that would otherwise sabotage adhesion. A degreasing agent followed by a wipe with isopropyl alcohol strip away most slick residues; you want a clean, slightly rough surface ready to accept adhesive. The next step is surface preparation. Lightly scuffing the area with fine grit paper—think something in the 600 to 1000 grit range—creates the micro-roughness that helps the bonding agent grip the plastic. From there, you apply a high-strength, flexible epoxy resin or a two-part adhesive designed for plastics. The emphasis here is on flexibility. A brittle bond is more likely to crack again as the fairing flexes with airflow and engine heat. You want a bond that can tolerate the small, ongoing strains that occur as the bike vibrates and as temperatures cycle with sun exposure and riding conditions. The adhesive should be pushed into the crack and into any voids so the edges are well bonded. Then comes the waiting. Adhesives of this type typically require a full cure time—often around a day or more—to achieve maximum strength. Rushing this step invites micro-movements that can reopen the seam or cause a rough, visible line once paint is applied. Once cured, the repair is (or should be) smoother than the initial crack. If the crack is shallow but there is a small depression or deeper scratch, you can level the surface with a plastic filler or body filler. This step lets you rebuild the contour so the repaired area matches the surrounding surface. After the filler cures, a careful sanding is necessary. Start with a coarser grit to flatten the repair, then progressively move to finer grits until the surface is uniform with the adjacent area. The key is to avoid creating new imprints or gouges that will show through paint. When the surface feels smooth to the touch and looks even, you prime. Priming is more than just paint protection; it’s about ensuring the patch lies flush with the rest of the fairing, even under bright sun or high-speed wind. The primer should be compatible with the plastic material of your fairing and with the topcoat you intend to apply. Color matching follows. The goal is a match that disappears in daylight, not a patch that shouts for attention. In most cases, a good match requires a test spray on a non-visible area or a small patch to confirm color neutrality before committing to a full application. A clear coat over the paint adds durability and UV resistance, helping to prevent chalking and color fading. It’s a simple step with a big payoff: the repaired area gains gloss, depth, and protection that helps the color stay stable over years of sun and weather. As you weigh the DIY route, consider the limitations. DIY repair is cost-effective and gratifying when you’re dealing with minor to moderate damage and when you’re content with a repair that looks good up close but may reveal a seam on inspection from certain angles. The more challenging part is achieving a flawless color match and a seamless finish that doesn’t draw attention. Some riders find that achieving a true factory-like appearance requires access to professional-grade spray equipment, controlled lighting, and precise color formulations that only a spray booth environment can provide. In these cases, the risk of an imperfect finish is higher than the potential savings. If you’re leaning toward a professional, you’re not merely paying for equipment; you’re paying for technical expertise, material compatibility knowledge, and a controlled process that starts with evaluating whether the material is ABS, polycarbonate, or another plastic compound. Each material has its quirks: ABS can be forgiving but may require specific primers and solvents; polycarbonate is more impact-resistant but can craze if solvents are too aggressive. A skilled shop will know which resin or adhesive works best with your plastic type and will have the right tools to ensure the repair holds up under stress. They will also bring a level of quality control to color matching that is tough to reproduce in a home garage. For repairs that push beyond cosmetic fixes, or for areas near critical interfaces, professional tools can make a real difference. Plastic welding guns, UV-cured resins, and precision mold-formed patches can fill gaps and reestablish contours with a tight, uniform surface. A pro will also check the fairing’s geometry after repair to ensure there are no warps or distortions that might alter airflow around the bike. It’s not just about making the patch invisible; it’s about preserving the airfoil quality and the way the fairing directs air around the engine and rider. This is where the decision-making becomes a matter of safety as well as aesthetics. If the crack is near a mounting point, or if the surface has been deformed by an impact, you must consider the risk of mounting misalignment or increased stress on other fasteners. In such scenarios, replacement is often the safer option. A damaged mounting area can cause the fairing to shift at high speeds, introduce wind buffet, or create gaps that funnel dirty air into the engine bay or rider compartment. Replacement may be more cost-effective in the long run when you factor in time, labor, and the potential cost of repeated repairs. It is here that the rational approach comes into sharp focus: DIY for minor cosmetic repairs, and professional services for issues that threaten structural integrity or where color and contour must be factory-perfect. This is not a judgment on skill or effort; it is a practical assessment of risk, time, and the long-term resilience of the repair. The decision is easier when you consider the intended use of the bike. A weekend rider whose fairing sustains a small surface crack in a quiet, dry climate might do just fine with a DIY repair and patch. A rider who uses their bike in high-performance conditions, or who participates in weekend track days, should lean toward a higher standard of repair. The demands of speed, wind pressure, and vibration test the durability of any fixation. In making the call, you also weigh the value of color consistency. A mismatched patch stands out, even to casual onlookers, and can undermine the bike’s overall appearance. If you take pride in your bike’s look as much as its function, the preference may tilt toward professional refinishing. And if you decide to explore options for specific models or brands, keep in mind that there are sequence and fit considerations unique to each model. In such cases, a dealership or a shop with model-specific experience can offer a more predictable outcome. Even if you stay with a DIY fix, the repair process benefits from planning and supplier awareness. For example, if you’re considering color matching and finish, you may want to explore the broader selection of fairing options for your model. See the Honda fairings catalog for relevant shapes, colors, and compatibility with your bike’s profile. This helps ensure that the repaired area aligns with the broader design language of your motorcycle and avoids a mismatched appearance that draws attention to the repair rather than the bike as a whole. If you’re curious about model-specific options, a broader browsing of fairing categories can be informative and may guide you toward a future replacement if you decide to upgrade. Honda fairings catalog keeps you connected to a catalog that aligns with Honda’s typical styling cues and helps you evaluate how a well-matched replacement might look when the time comes. When you consider the broader landscape of fairing repair, the takeaway is simple and practical: for minor cosmetic cracks, DIY repair is a sensible, economical option that can restore a smooth surface and a uniform color with patience and careful execution. For anything beyond a hairline fracture, or for cracks that threaten mounting points or the fairing’s geometry, a professional repair or replacement becomes a safer, more durable choice. A poorly executed DIY repair can lead to more damage, increased wind resistance, or even exposure of internal components—outcomes that undermine the bike’s longevity. The path you choose should reflect a balanced assessment of damage, skill, available time, and the value you place on appearance and performance. If safety and performance are your priorities, the smart move is to err on the side of professional expertise when in doubt. In all cases, the objective remains the same: restore the fairing to a state where it can continue to protect the rider and the engine, while preserving the bike’s silhouette and aerodynamics. By approaching the repair with consistent prep, the right adhesive choice, and a measured approach to finishing, you can extend the life of your fairing and keep your motorcycle looking and performing at its best. For those seeking broader guidance on plastic repairs in a general sense, there are practical resources that explore foundational techniques and safety considerations. External resource: https://www.wikihow.com/Repair-a-Cracked-Plastic
Guarding the Frontline: Preventive Wisdom and Repair Pathways for Cracked Motorcycle Fairings
The fairing is more than a shell on a motorcycle. It is a blend of aerodynamics, protection, and personality, shaping how the machine slices wind and how a rider experiences weather, noise, and debris. When a crack appears, it speaks a stubborn truth: the front of the bike has endured a stress it cannot fully ignore. Cracks can start as small hairlines, driven by temperature swings or a casual scrape, and then propagate along the grain of the plastic under vibration and heat. The question for riders is not simply whether to repair or replace, but when and how to invest attention so that safety and aesthetics stay in lockstep. The chapter that follows threads together practical preventive measures with clear repair pathways, framing a holistic approach that honors the bike’s engineering and the rider’s confidence. In time, the routine of care becomes second nature, a quiet preparation that preserves performance and peace of mind as the road unfolds ahead.
The most important premise is simple: prevention is continuous, not a one-off fix. Regular visual inspections turn into a habit that saves expensive repairs and preserves the fairing’s integrity. After rough riding, a minor impact, or even a seemingly inconsequential scrape against a curb, it is worth a careful look. A ding may be nothing more than a surface blemish, yet a hairline crack can reveal stress that will worsen with vibration and temperature cycles. The eye becomes a tool, trained to catch signs of stress—tiny chips, discoloration, or a subtle bend—before they escalate. In that sense, preventive care begins with mindfulness: knowing where the fairing is most exposed to stress, and recognizing early warning signs before they become a full-blown fracture.
The second pillar is smart storage and parking. Exposure to UV rays, rain, snow, and airborne debris accelerates material fatigue, especially when the bike sits outdoors for long periods. A secure, sheltered parking spot reduces weather-related wear and tear. A purpose-built cover isn’t a luxury; it acts as a shield against sunlight that can degrade plastics and cause color fading, while also deflecting rain and falling debris that might nick or crack the surface. If storage space is limited, a well-chosen cover can double as a guard against the occasional stray branch or icy spray that arrives with a gusty ride or a storm. The idea is simple: the fairing should live in a protective environment when the bike is not in motion, because even small environmental stress contributes to micro-cracks that grow with time.
Protective gear adds a practical layer of defense. There are aftermarket guards and shields designed to shield the front of the fairing from minor impacts that would otherwise scar the surface. These guards don’t just preserve appearance; they absorb some energy from incidental contact, reducing the chance that a scrape becomes a crack that travels. A careful rider looks for guards that complement the bike’s lines rather than fight against them, balancing protection with airflow. The goal is not to create a fortress around the machine but to soften the blows that every ride inevitably brings. When considering additions, a holistic view helps: how does the guard interact with the wind at highway speed, how easy is it to install, and how does it affect serviceability if a panel needs to be removed for access during maintenance?
Maintenance handling deserves respectful attention. Cleaning and care should be gentle rather than aggressive. Harsh cleaners, abrasive pads, or aggressive solvents can scratch or weaken plastic, inviting future cracking. A soft cloth, mild soap, and thorough rinsing are often enough to keep the surface clean without compromising integrity. When removing or reattaching panels, take care not to flex the plastic beyond its design limits. The fairing is a delicate balance of strength and flexibility; rough handling can introduce micro-stresses that accumulate over time. Even the act of washing becomes part of preventive strategy if done with a light touch and the right tools. The rider’s routine—clean, inspect, park, cover, and protect—becomes a quiet, ongoing shield against cracks that might otherwise sneak in during ordinary use.
A nuanced element of prevention is addressing minor damage promptly. The moment a small crack is spotted, the best course is not necessarily to ignore it or to assume it will stay cosmetic. Small cracks can evolve under the influence of vibration, heat, and temperature changes, spreading like a web across the surface. The repair logic is straightforward: assess whether the crack is surface-level or near a mounting point or air intake, since proximity to critical areas can evolve into a safety concern. If the crack is minor and surface-focused, a repair that stabilizes the area can be effective. Cleaning the damaged area with isopropyl alcohol removes grease and debris, creating a clean canvas for adhesion. Lightly sanding the damaged region to create a rough surface improves the bond between the plastic and filler. A two-part epoxy designed for plastics or a specialized plastic repair kit can fill the crack, following the manufacturer’s directions and allowing full cure—typically about 24 hours. After curing, the surface is smoothed with progressively finer grits, then primed and painted to match the original finish. For best results, color-matched paint and a clear coat add durability and gloss, helping to seal the repair against moisture and UV exposure. Such a repair, while not as seamless as a factory finish, can restore the aero profile and curb further crack propagation if the application is meticulous and the area was truly a surface flaw.
If the crack is more serious, or if confidence in a DIY fix is fleeting, the prudent path is to consult a professional body shop that specializes in motorcycle repairs. They bring access to advanced tools and materials that go beyond consumer repair kits. UV-cured resins and custom molds, when used by experienced technicians, can yield repairs that are nearly invisible and restore a fairing’s structural continuity. The decision to involve a pro is not a concession to weakness but an acknowledgement that some damage touches the structural heart of the bike’s protection and aerodynamics. A properly executed professional repair can reestablish the fairing’s smooth contour, maintain the bike’s aesthetic lines, and preserve critical points of attachment and airflow. In the long run, this choice can prove more economical than repeated DIY fix-ups when a crack is near mounting points or extends through multiple layers or into a panel seam.
The preventive mindset also encompasses a thoughtful approach to materials and part selection. When replacement or repair becomes necessary, the quality of materials matters. High-quality plastics or composites that are designed to withstand riding stresses, temperature swings, and exposure to road debris extend the life of the fairing after any repair. OEM-approved or reputable aftermarket parts—chosen for their fit, finish, and durable composition—can reduce the likelihood of recurrent damage. The selection process should weigh fit compatibility, color match, finish durability, and the ease of installation. A careful shopper looks for panels that align with the bike’s original geometry, ensuring that fasteners, mounting points, and air channels preserve the intended aerodynamics. The outcome is a seamless integration that supports performance and appearance, rather than a patchwork that invites new stress concentrations.
This balance between prevention and repair reaffirms a broader truth: caring for a cracked fairing is not merely about aesthetics. A well-maintained fairing contributes to rider confidence by preserving airflow, protecting vital components from debris, and aligning with the bike’s intended weight distribution. When the front of a motorcycle remains intact and well-cared-for, it translates to more predictable handling, better protection of critical components, and a cleaner, more attractive silhouette on the road. The narrative of maintenance becomes a story of respect for the machine’s engineering and a rider’s responsibility to safety. In practical terms, this means making preventive checks a fixed part of every ride routine, treating minor damage not as a nuisance but as an early warning sign deserving timely attention.
To tie this approach back to practical decisions about repairs and replacements, consider the broader ecosystem of options that riders navigate when a crack is found. If the crack is minor and isolated, and the rider’s skill and tools align with repair kit instructions, a careful epoxy repair combined with finishing work can restore function and appearance with reasonable durability. If the crack is more extensive or located near a mounting point or ventilation channel, replacement becomes a safer, more reliable route. In either scenario, the intent remains the same: preserve aerodynamics, maintain protection, and keep the rider safe. The decision to repair or replace is a measured judgment made after considering crack location, severity, and the bike’s operating conditions.
In the spirit of ongoing learning, one useful cue is to acknowledge that the repair pathway does not exist in isolation. It sits within a network of maintenance practices—careful cleaning, mindful handling, appropriate storage, and selective protection—that together sustain the bike’s performance. The repair itself is not a single action but part of a continuum. Even after a repair or replacement, vigilance remains essential. The road life of a motorcycle is dynamic, and the material endurance of a fairing reflects how well maintenance aligns with usage. For riders seeking to extend this alignment, a practical habit emerges: after every ride, regardless of distance, perform a quick visual check, ensure fasteners are snug, and re-evaluate the fairing’s surface for any new signs of stress. This routine fortifies the bond between rider and machine, ensuring that preventive care remains an active, ongoing practice rather than a distant ideal.
If the reader is considering next steps in prevention or repair, the journey begins with a clear assessment of the crack’s character and location. A minor surface crack, kept under observation and treated with careful restoration steps, presents an opportunity to preserve value and performance without drastic interventions. A deeper crack, or one that reaches critical attachments or channels, signals a boundary where replacement is often the safer choice. In this space between repair and replacement, the rider’s knowledge and a pro’s expertise converge to produce the best outcome for both safety and aesthetics. And as riders continue to ride, this chapter’s guidance remains a steady compass: inspect, protect, repair thoughtfully, and replace when necessary. If the exploration of repair options grows complex, a trusted catalog of fairing parts can be a practical companion. For example, you can explore options in the BMW fairings catalog to understand how OEM or compatible components are designed to fit a wide range of models and riding needs. This is not a paid endorsement, but a reference to the kind of structured, model-specific information that helps riders make informed decisions when repair or replacement becomes necessary. BMW fairings provides a sense of the scope and organization of options that align with a bike’s original geometry and look, offering a grounded way to compare fit and finish as part of a preventive mindset.
The overarching message is clear: to fix a cracked fairing well requires a blend of vigilance, careful maintenance, and selective intervention. Prevention reduces the chances of damage, but when cracks appear, a thoughtful approach—rooted in a firm understanding of material behavior and ride conditions—will guide the best outcome. Whether you choose a careful DIY repair for a minor crack or a professional replacement for a more serious fault, the path forward should preserve the bike’s aerodynamics, protect critical components, and maintain the rider’s confidence on every kilometer of road ahead. This integrated approach—careful inspection, protective storage, mindful handling, timely repair, and informed replacement—creates a durable foundation for riding, no matter the weather, terrain, or miles logged. External resources can extend this knowledge, and for deeper reading on the fundamentals of plastic materials and repair techniques, start with general information about plastics and their properties at reliable external sources. External resource: https://en.wikipedia.org/wiki/Plastic
Final thoughts
Fixing cracked motorcycle fairings is both an art and a science. By thoroughly assessing damage, selecting the right materials, and weighing the realities of DIY versus professional services, motorcycle business owners can enhance safety, preserve aesthetics, and maintain customer satisfaction. Additionally, implementing preventative measures will ensure that repairs last longer and minimize future repairs, ultimately contributing to a more profitable and reliable motorcycle service operation.