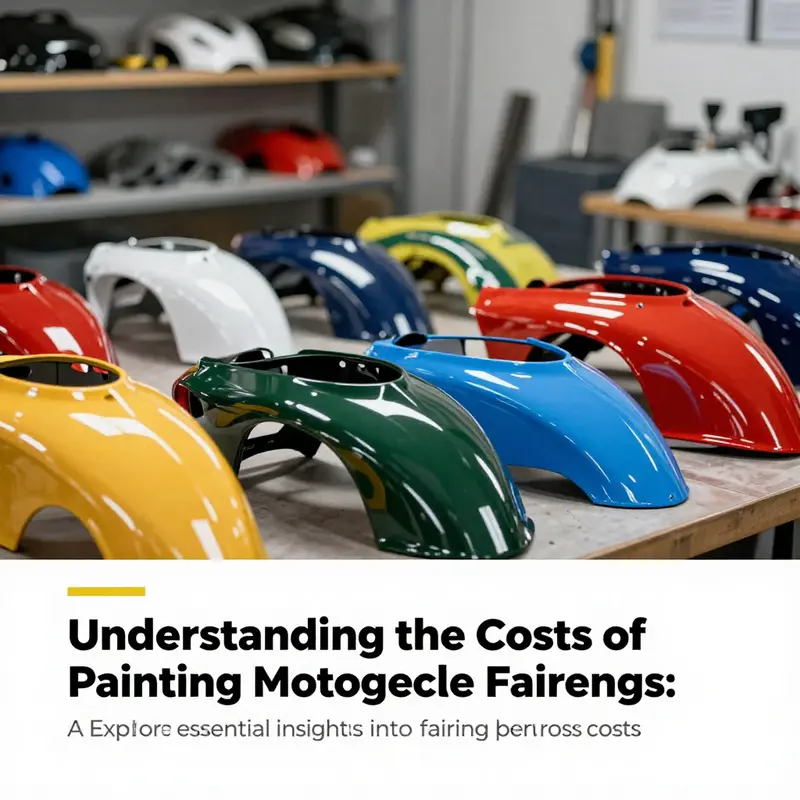
Understanding the cost of painting motorcycle fairings is crucial for business owners in the motorcycle industry. Whether you’re offering custom paint services or considering overall business expenses, comprehending these costs can lead to better planning and improved customer satisfaction. This comprehensive guide addresses three key areas vital to appreciating the financial landscape: the basic costs associated with painting motorcycle fairings, the factors that can influence those costs, and a comparison between professional services and do-it-yourself (DIY) approaches. Together, these chapters equip business owners with the knowledge needed to make informed decisions, manage client expectations, and enhance their service offerings.
Under the Paint: Decoding the True Costs of Painting Motorcycle Fairings
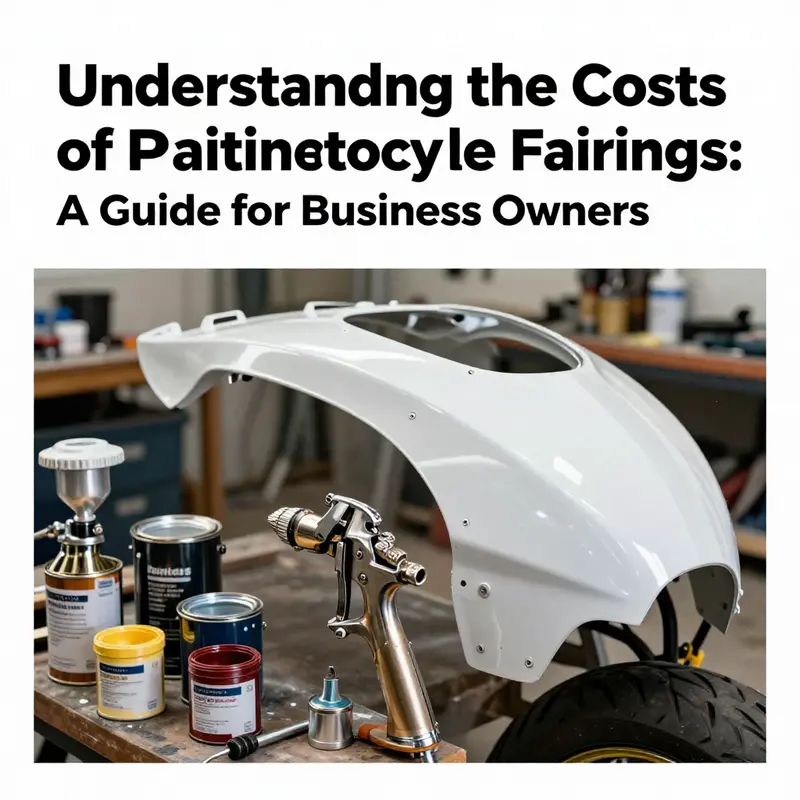
Painting motorcycle fairings is more than a mere cosmetic choice. It is an investment that touches several practical axes of bike ownership: the aesthetic lift a new color or design provides, the protection a fresh surface can offer against the elements, and the potential impact on resale value and personal pride in the machine. When riders weigh the decision to repaint, they enter a cost conversation that stretches beyond a single price tag. The basic costs, as any professional in the field will tell you, center on three core components: materials, labor, and preparation. The way these components balance out depends on a rider’s goals, the condition of the existing panels, and the level of finish desired. A clear understanding of each factor helps explain why the price range for repainting can swing from a modest investment to a substantial expenditure, and it clarifies when a repair or replacement option might present a better value over the long haul. In the following exploration, those three pillars are examined in a way that ties back to what matters most for a riding enthusiast: how the look is achieved, how durable that finish will be, and how the decision aligns with the rest of the bike’s engineering standards and overall ownership costs.
Material costs form the first hinge in this cost structure. For standard, straightforward finishes, a kit of automotive-quality paints often lands in the lower range of the spectrum, typically around fifty to a hundred and fifty dollars. These paints are reliably color-fast, weather-resistant, and suitable for the curved geometry of fairings when applied with care and the right prep. When the project calls for something more specialized—high-performance coatings, custom color blends, or metallic and pearlescent effects—the material bill can jump to three hundred dollars or more. The chemistry matters here as much as the color. Metallics and special-effect finishes require pigments, mica powders, or metallic flakes that must be precisely dispersed and calibrated to avoid graininess or color shifts after curing. The upshot is that the materials alone can become a meaningful factor, especially if the rider wants a look that shifts subtly in the light or demands a showroom finish. It is not unusual for a premium finish to push material costs higher than the straightforward repaint, and the decision often hinges on whether the rider values that extra gleam or prefers a more restrained, practical recoat that matches the bike’s existing tones.
Labor costs constitute the second large piece of the equation. Skilled shops typically quote a range that begins in the mid-hundreds and can reach two thousand dollars or more. The spread reflects the complexity of the job, the level of detail required, and the shop’s location. A single-color repaint with minimal graphics might sit toward the lower end of the spectrum, while a multi-color scheme, intricate airbrushed details, or a full-body wrap illusion will push the bill higher. Location dynamics matter as well. In regions with higher labor rates and greater demand for high-precision work, the price tends to climb, sometimes independent of the actual material costs. Conversely, shops in markets with stiffer competition may offer more economical quotes, yet the trade-off can be in turn-around times or the breadth of services included in the price. The labor piece is where the craftsmanship truly reveals itself. The painter’s technique—from how evenly the base coat lays down to how cleanly the edges are masked and how bottles of color interact with the surface—directly influences the final look.
Preparation, the third pillar, is the quiet work that makes the magic repeatable. It encompasses a thorough cleaning to remove dirt and oils, careful sanding to create a surface with correct adhesion properties, and priming to improve paint bonding and color depth. Masking is the unsung hero here; every edge that should stay unpainted must be protected with painstaking precision. Preparation also invites the use of specialized tools: the right sanders that leave no swirl marks, the air compressor that feeds consistent spray patterns, and the spray gun that delivers even droplets so the finish doesn’t appear splotchy or thin in places. The better the preparation, the more flawless the final finish, and the more likely the color will lay down evenly across complex curves, seams, and joints. This is why, even if the paint materials themselves are reasonably affordable, a layperson attempting DIY repainting might find the prep stage to be the hidden cost that surprises them most.
The story does not end with materials and labor, however. A range of additional expenses can tilt the cost curve in meaningful ways. Color matching deserves special attention. If the goal is to refresh or repair a color that already exists on the bike, a shop will often insist on color matching to ensure a seamless blend between old and new panels. In some cases, this means extra color mixing sessions, more spray passes, and, inevitably, a higher bill. The number of coats is another variable. A single clear coat can add gloss and protection with a manageable increase in cost, but multiple coats—especially those intended to ensure chip resistance and UV stability—can add both materials and labor time. Many riders want the finish to not only look good when the bike sits in a showroom-like corner but also to endure road wear, weather exposure, and the rigors of high-speed riding. Clear coats and protective topcoats contribute to longevity but also add to the price. Then there are finishing touches that ride with a delicate balance between aesthetics and price. Polishing, chrome detailing, and even subtle texture work can be added to push the final price higher while delivering a more refined appearance.
Beyond the professional route, there is the DIY path, which can be appealing for budget-minded riders who enjoy hands-on projects or who repaint frequently as a hobby. Here, the initial setup costs can be as low as a few hundred dollars for a basic spray setup and decent protection gear, but the total can climb toward a thousand dollars or more when you add a better spray gun, a small paint booth, and a respirator that meets safety standards. The allure of DIY is the potential to save money per job over time if you are willing to invest the time, learn the techniques, and tolerate a higher risk of an imperfect finish on the first attempts. It is a reminder that “cost” in this context is not a single figure but a dynamic calculation that weighs financial risk against personal capacity and the value you place on the end result.
If you pull back from the numbers and look at the bigger picture, the decision about painting the fairings becomes a calculation of return on investment. For riders who view their machine as a daily partner that needs reliable protection from the elements and a color that matches their personality or branding, the value of a durable, well-executed paint job is far from trivial. On a touring or sport-touring machine, where the fairings contribute to aerodynamic performance and overall shielding, the finish matters not just for looks but for how the panels interact with gaskets, fasteners, and the paint’s resilience against sun, rain, and road debris. The same holds true for commuter bikes, where even modest improvements infinish quality can translate into longer intervals between touch-ups and a smoother appearance for the life of the bike. In all cases, the choice to repaint involves aligning material standards with engineering considerations. The new color, the type of clear coat, and the application method can all influence how the panels fit with gaskets and seals, how the edges meet, and how long the finish will hold up under daily use.
An important nuance in this decision is the existence of aftermarket fairings as an alternative to repainting OEM panels. For riders who want a different look without engaging in a full repaint, aftermarket panels offer a potential path to both aesthetics and protection. But the trade-off includes fitment, weight, and sometimes surface finish that may not match the pristine alignment of factory pieces. In such cases, the overall cost picture shifts: you may save on the labor-intensive repaint process, but you could incur additional costs for trimming, mounting hardware, and potential refinishing that ensures the new panels cooperate with the bike’s existing engineering tolerances. If you are exploring aftermarket options, it matters to weigh not only the sticker price but also the total lifecycle cost, which includes installation, alignment with existing components, and the time you invest in achieving a seamless integration.
Against that backdrop, it is useful to consider practical approaches for budgeting and decision-making. First, obtain a clear, itemized quote that breaks down materials, labor, and preparation. Ask for a detailed description of the type of paint, the primer system, and the topcoat strategy. Inquire about the number of coats, the curing process, and whether a dedicated clear coat is included. If the project involves graphics or two-tone schemes, request a separate line item for masking and detail work, and ensure there is explicit mention of color matching, if relevant. It can also pay to compare a few quotes from different shops to gauge regional price norms, always bearing in mind that the lowest price may come with compromises either in preparation thoroughness or in the longevity of the finish. For those who are more color-ambitious, the dialogue with a shop should cover the expected final appearance under various lighting conditions and after exposure to UV light. The painter’s ability to reproduce a consistent shade across multiple panels is a key test of whether the result will be cohesive once the bike is fully assembled. A disciplined conversation about expectations helps prevent misalignment between what the rider envisions and what the shop delivers.
Color matching and multi-panel consistency can be deceptively expensive, but they are crucial for a premium result. When color shifts across panels, or when a single panel looks different under sunlight versus indoor lighting, the viewer’s eye immediately picks up the discrepancy. A skilled shop will often prepare several test swatches or run small test panels to verify color accuracy before proceeding to the full repaint. Such steps, while adding to upfront costs, reduce the risk of a costly do-over after the job is near completion. The same care applies to the finish’s durability. A glossy, glass-like surface demands careful application of a high-quality clear coat and a disciplined polishing protocol. Skimp on the clear or rush the curing stage, and you risk micro-scratches and scuffs that can dull the sheen and shorten the finish’s life cycle. All these considerations loop back to the fundamental point that painting fairings is not a one-time expense but part of ongoing maintenance and care for the bike.
In the end, the value of a repaint rests on how well the final result aligns with the owner’s goals and how resilient the finish proves over time. For some riders, a single-color refresh is enough to restore a bike’s presence and protect the panel surfaces. For others, a more elaborate scheme—perhaps with metallics, candy colors, or airbrushed accents—delivers a personal statement and a sense of pride that extends beyond mere function. The key is to approach the project with a clear set of expectations about costs, quality, and outcomes. It is equally important to reflect on the relative costs of alternative routes, such as recovering or replacing damaged fairings with OEM or aftermarket panels, and to assess how those choices influence the bike’s overall ride, protection, and value. When you factor in both the material standards and the engineering specifications involved, the repaint decision becomes a thoughtful integration of aesthetics, durability, and mechanical compatibility.
For readers who want to explore options that align with a cautious cost strategy while still preserving a modern look, there are avenues to consider. Aftermarket panels may present a lower initial price, but you should account for fitment and finish variations, as well as the potential need for refinishing to achieve a cohesive appearance with the rest of the bike. If you are drawn to a particular color trend or limited-edition look, a well-executed repaint may offer the most reliable path to a lasting finish that resists the elements without frequent maintenance. The optimum choice remains one that respects the bike’s engineering design, maintainable finish, and the owner’s expectations for appearance and protection.
As you weigh the financial dimension, you can also consider the broader ecosystem around fairings. The process of selecting materials, preparing surfaces, and applying coatings is part of a broader technical discipline that intersects with engineering standards and practical maintenance. In this sense, the cost structure mirrors the same careful balance that governs other high-precision cosmetic and protective tasks in the motorcycle domain. A chapter of budgeting that centers on paint is, after all, a chapter about stewardship: safeguarding the bike’s outer shell, extending its life on the road, and ensuring that its appearance reflects the rider’s identity and the machine’s pedigree. If you want to browse broader options or browse related fairing styles in a specific category, you can explore a catalog that curates a range of panels in the latest releases via the 2023 new category. For quick reference, you can follow this link to view a dedicated category page: 2023 new category.
The narrative above is not merely descriptive. It is a framework for evaluating cost versus value, one that helps riders decide when a repaint is worth pursuing. It also highlights a practical approach to budgeting: request a breakdown, inspect the shop’s prep practices, confirm color matching capabilities, and understand the total cost of ownership, including potential future touch-ups and refinishing. In this light, the numbers become more than abstract figures; they become anchors for decisions about aesthetics, durability, and the long-term health of the fairings themselves. Finally, the broader takeaway is that painting fairings is a technically nuanced process that blends chemistry, artistry, and engineering. It requires careful preparation, precise application, and a willingness to invest in protection and shine that remains consistent across seasons and miles. When approached with clear expectations and a well-considered plan, repainting a motorcycle fairing can deliver a durable, striking finish that not only looks right but also performs well in the weather, under the sun, and through the inevitable oil and grime of riding life. For readers seeking additional context on affordable fairings and how that option interfaces with engineering requirements, a respected outside resource offers a concise overview of standards and applying these concepts in practical settings: https://www.motorcycle.com/inside-cheap-motorcycle-fairings-key-details-standards-and-how-to-apply-in-engineering/.
Beyond the Brush: How Surface Prep, Design, and Labor Shape the True Price of Painting Motorcycle Fairings
Painting motorcycle fairings is more than a simple color choice. It is a craft that blends aesthetics with engineering, protection with style, and budgeting with reality. When riders begin to think about refreshing their ride, the first numbers that come to mind—three hundred, six hundred, perhaps more than a thousand dollars—reflect a range that often surprises newcomers and veterans alike. The price isn’t a single value; it is a living spectrum that shifts with the kind of finish you want, the condition of the panels, and the precision a shop must apply to achieve a durable, showroom-worthy result. To understand why the cost can swing so widely, it helps to follow the thread that ties surface preparation, design complexity, paint choices, labor realities, and component count into one cohesive story. The process begins long before the color is applied. It starts with assessing what the fairings are capable of becoming and what they must endure after the paint cures. Fairings are exposed to the elements, road debris, flexing under airflow at speed, and the occasional crash or tip-over that can crack a finish if preparation wasn’t thorough. The right foundation matters as much as the color itself, because a great color applied to a poorly prepared surface will fail sooner than a modest shade laid down with impeccable prep and protection. In practice, the journey from dull plastic to a glossy or satin finish unfolds through a series of steps that are rarely glamorous in the moment but are essential to long-term performance and satisfaction.
Surface preparation is the anchor of the entire project. The process often begins with a meticulous cleaning to remove oils, waxes, and any surface contaminants that could interfere with adhesion. In the same breath, technicians inspect for residual fillers, sanding scratches, or imperfections that must be addressed before any color is laid down. This stage is not a cosmetic luxury; it is a requirement for a resilient, durable finish. Sanding, priming, and sealing may occupy much of the labor hours in a paint job, and the precise level of attention required here often dictates the overall price. A fairing that has been well prepped will hold color longer, resist peeling at edges where panels meet, and accept decals or graphic layers with less risk of distortion. The more complex the surface—curved contours, deep grooves, or multi-panel junctions—the more time and care this preparation demands. When a shop talks about “blocking” and “feathering” edges, they are describing tasks that micro-level smooth the surface so that the subsequent coats appear uniform and the transitions between panels appear seamless. A high-quality finish hinges on how well these micro-operations are executed, and that truth alone explains why a simple color change can become a more costly proposition if the surface isn’t up to the task.
Design complexity is the second major driver of cost, and it unfolds in layers. A straightforward one-color, single-panel job may require fewer hours and less equipment than a project that involves multiple colors, detailed graphics, or custom artwork. The more intricate the graphics, the more labor-intensive the work becomes. Even with a skilled technician, painting a multi-color scheme with clean lines demands accuracy, masking precision, and careful color matching. Each border between colors must be crisp, which often means multiple masking steps and potentially more coats of clear to protect the artwork. Decals, stencils, or airbrushed details add another layer of labor and require time for alignment, curing, and protection. In essence, the right design is not simply about what looks good; it is a test of the painter’s patience, steady hand, and vision for how the finish will hold up on the road. The less forgiving the design—such as fine pinstripes, metallic flecks, or pearlescent layers—the more likely the final price will reflect the additional expertise and time required to achieve clean, durable results. Even when a design is modest in its color count, the alignment across multiple panels must be precise. A slight misalignment can destroy the visual impact and force rework. The value of the final look, then, is inseparable from the craft that created it, and the craft costs money—time, skill, and discipline.
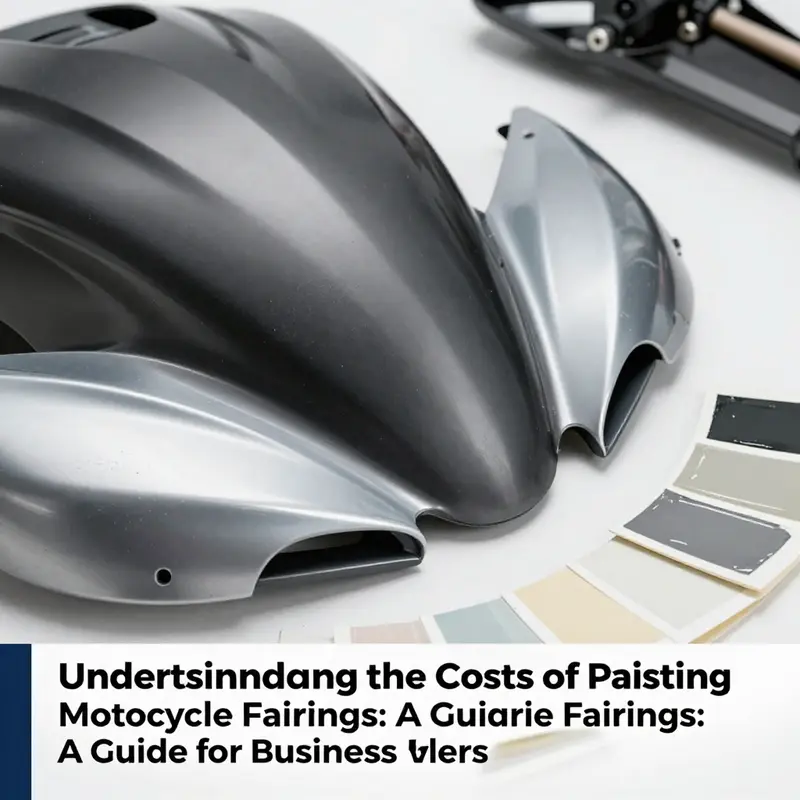
Paint type also plays a central role in the cost equation. The choice between high-gloss, matte, satin, metallic, or pearlescent finishes introduces distinct material costs and application challenges. A standard gloss finish might be more forgiving and quicker to apply, yet it still requires careful layers, a controlled environment, and effective curing. Matte finishes, coveted for their understated elegance, demand exacting control over texture and weathering resistance; any gloss spots or uneven sheen becomes immediately noticeable and hard to conceal. Specialty finishes—metallic or pearlescent sheens, for instance—add pigments and reflective components that intensify both the look and the complexity of application. These finishes may require extra coats of clear for protection and more frequent color matching checks to ensure a uniform appearance in different lighting. Each decision along this path affects material costs and the number of steps in the workflow. It is not merely about the pigment; it is about how that pigment behaves when sprayed, how it interacts with primers and clear coats, and how well it endures the vibrations and temperature fluctuations that a motorcycle experiences on the road. The interplay of color, depth, and protection matters, because a striking finish that fades or peels prematurely diminishes the entire value proposition of the project.
Labor rates are the third substantial lever. The cost of labor varies widely by region, shop reputation, equipment, and the level of supervision a project receives. In many markets, skilled automotive painters command hourly rates that can range across a spectrum, reflecting differences in living costs, demand, and the specialized nature of motorcycle work. Labor is not a single number but a function of time and expertise. The more complex the finish and the more precise the required work, the longer the job takes and the higher the bill. A competent painter will break down the job into phases: removal or secure handling of panels, surface preparation, primer application, color application, color correction and blending, clear coating, curing or baking, and final polishing. Each phase has a measurable duration, and the cumulative hours determine the total labor cost. The regional spread of rates means that what is quoted in one city can be significantly different in another, which is why a consumer might see a similar-scope project priced differently depending on where they live. Beyond raw hours, the shop’s reputation and equipment also influence the price. A shop that invests in advanced spray booths, humidity control, and temperature-stable curing environments can deliver a more consistent, durable finish, but those advantages come at a premium. The labor cost is not merely a wage line item; it is the value the shop adds through process discipline, environmental control, and the technician’s years of experience applying paint to curved, high-visibility panels that demand exacting standards.
The size and number of components being painted shape the total cost in a straightforward but significant way. When a rider has just the front fairing and a pair of side panels to refresh, the scope is smaller, the time is shorter, and the material usage is modest. Add a second set of panels, a rear cowling, a fender, or even a windscreen that can fog or scratch easily, and the complexity rises. Each piece must be carefully masked, aligned, and cured without distortion. The process of raccording panels—ensuring the color matches across seams, hit points, and joint lines—adds a layer of difficulty when more pieces are involved. The more surface area that needs to be covered, the more coats of primer, color, and clear are required, and the more potential there is for issues that require touch-ups or rework. From a practical standpoint, a rider replacing damaged panels with aftermarket options introduces a separate decision point. Aftermarket fairings can be more affordable upfront, but the fit and finish may differ from OEM parts, requiring additional adjustments or bodywork modifications to achieve a seamless look. The decision between repainting existing panels and replacing with aftermarket replacements is not simply a price calculation; it is a judgment about fit, durability, and how closely the finished bike needs to resemble its original geometry in both appearance and aerodynamics. The end result should honor aeronautical precision in the wind tunnel sense—where even minor discrepancies in contour can affect efficiency and handling at speed—and that standard, in turn, influences the perceived value of the paint job.
To understand how these factors translate into real-world numbers, it helps to anchor the discussion in a practical framework. A basic one-color paint job for a single set of fairings might hover around several hundred dollars in a market where competition is tight and the surface is in good condition. When you add a second color, some simple graphics, and a clear-coat protective layer, the price naturally climbs as more materials are used and more labor hours are required. Move toward high-gloss metallic or pearlescent finishes, with precise color matching across multiple panels, and the bill grows accordingly. If the design includes complex graphics, decals, or airbrush artistry, the cost can easily surpass the mid-range mark, especially when multi-layer protection is needed to prevent fading and chipping. The exact numbers matter less than the proportionality: the more surface area, the more colors, the more complex the graphics, and the more exacting the finishing process, the higher the total investment. The figures from broad industry surveys reflect this reality, but every project is unique. A fresh panel that has already been primed and prepped might still require careful color matching and a final clear layer to seal in the look, whereas a completely bare or heavily oxidized surface demands additional steps that extend the timeline and raise expenses.
In addition to the technical nuances, the economics of painting fairings also involve the broader market and consumer choices. Some riders seek the most economical path and opt for aftermarket fairings that fit the bike but do not guarantee the same quality or durability as OEM panels. Materials science plays a role here as well. The primer type, the adhesion promoters, and the curing method—whether in a conventional spray booth with forced air or in a more controlled environment with temperature and humidity management—alter outcomes and costs. When a rider considers the long-term wear and tear that a motorcycle endures, the value proposition of investing in a more robust process becomes clearer. A durable finish resists UV degradation, maintains color depth, and stands up to abrasion from road debris, insect impacts, and frequent washing. Protective clear coats, scratch resistance, and proper curing cycles help ensure the finish’s integrity for years to come, reducing the need for frequent touch-ups that can drive costs back up. On this point, it is helpful to acknowledge how regional pricing trends shape the decision-making process. In some regions, labor is expensive and demand for high-end finishes is strong, leading to higher quotes that reflect both skill and market dynamics. In other areas, leaner operations and greater volume can push prices downward, at least for standard finishes. Riders who are price-conscious can still achieve solid results by prioritizing prep quality and selecting finishes that balance aesthetics with practicality. The conversation around cost, then, is less about a single price point and more about a portfolio of choices—each with its own implications for durability, appearance, and the rider’s long-term satisfaction.
For riders who want a glimpse into how professionals approach these decisions, there is merit in understanding the practical trade-offs and exploring options that align with budget without compromising essential quality. One pragmatic approach is to reduce complexity: choosing a single-color finish on a well-prepped surface can deliver a resilient result at a lower price than a multi-color design with intricate lines and metallics. Another is to consider a guided, staged plan: begin with a solid color, monitor the result, and add design elements or decals in a follow-up if the budget allows. This modular approach can help manage cash flow while preserving the overall integrity of the project. It also opens up opportunities to test the finished product under real-world conditions—sunlight, rain, washing routines, and the occasional brush with gravel or debris—before committing to a more ambitious scheme. The decision to repaint or replace involves more than the immediate cost; it includes the bike’s ongoing value, the owner’s time, and the anticipated performance in various riding environments.
In the broader picture, the cost to paint motorcycle fairings should be viewed as part of a larger engineering and maintenance philosophy. The choice of replacement panels, the type of paint, and the level of surface preparation all interact with how a motorcycle behaves at speed, how easily the bike can be cleaned and cared for, and how well its protective coatings perform over time. The emphasis on proper surface prep, accurate color matching, and robust protective layers is about building a finish that lasts, not just a color that looks good in a showroom photo. For riders who want to balance cost with quality, the key is to engage with a shop that can clearly communicate the aims of each phase, explain the rationale behind the chosen materials, and offer a transparent plan for the timeline and budget. When this clarity exists, the final result tends to be more predictable and more satisfying, even if the initial quote reflects a broader spectrum of possible outcomes.
If you are exploring options for fairing finishes and want to see how a given approach aligns with your bike’s design language and performance needs, it can be helpful to browse specific category pages that illustrate the range of aftermarket and OEM options available in the market. For instance, a quick look at the yamaha-fairings category can provide a sense of fitment considerations and panel profiles that influence how color and finish are perceived once installed. This context is useful for understanding why some finishes may require more extensive prep or more selective masking to preserve contours and angles that define the bike’s silhouette. By thinking through fitment right from the planning stage, you can anticipate subtle challenges that might affect both the final appearance and the durability of the paint system. The cost, in this sense, is a reflection not only of material and labor but also of the thoughtful integration of aesthetics, aerodynamics, and long-term reliability.
For riders who pursue the most economical route, aftermarket fairings offer a cost-saving pathway, but the trade-offs in fit and finish can vary. The cost to paint aftermarket panels may be lower on the surface, but the time spent ensuring a precise fit and addressing any molding or alignment discrepancies can push the overall investment closer to the mid-range of a more tailored finish. Conversely, choosing OEM panels or carefully selected replacement parts can reduce the risk of misalignment and provide a more predictable surface for painting, yet they may carry higher upfront costs. The balance between price and predictability is a central theme in any decision about fairing painting, and one of the reasons why a preliminary inspection and a detailed estimate are essential. A good shop will walk a rider through the plan, explaining how surface preparation, color choice, and panel count interact to determine the final price, and will offer a clear path to achieving the desired outcome within the budget. This collaborative approach helps ensure that the rider’s vision remains intact while the project remains financially manageable.
In closing this reflection, the cost to paint motorcycle fairings is a convergence of artistry and engineering, with the final price reflecting choices that touch on every layer of the process—from the minute texture of a sanded surface to the precise edge where color meets color across a contoured panel, from the patience of curing times to the discipline of masking and finishing. It is a topic that rewards careful planning, an understanding of how materials perform in real-world conditions, and a willingness to invest in quality preparation and protection. If you want to explore a broader guide on the economics and regional variations of motorcycle paint jobs, the complete narrative offered in industry resources can provide additional context and detail that complements the on-the-surface decisions a rider faces. For a broader guide to regional pricing trends and the expectations you should have when budgeting for a paint job, see The Complete Guide to Motorcycle Paint Job Costs. External resource.
Color or Craft: Weighing DIY Ingenuity Against Professional Precision in Painting Motorcycle Fairings
A paint job on motorcycle fairings is rarely just about color. It is a compact fusion of material science, esthetics, protection, and a rider’s personal story on two wheels. When you weigh the decision to paint fairings, you are balancing upfront cost against long term value, evaluating skill against speed, and measuring the comfort of doing it yourself against the assurance of a professional finish. The topic is divided not simply into cheap or costly outcomes, but into a spectrum where technique, environment, and intention interact to determine what you finally see on the bike and how it behaves on the road. To understand this spectrum, it helps to start with the two most common paths riders take: a do it yourself approach that aims to transform a fairing shell with a limited budget and a tight schedule, and a professional route that promises reliability, refinement, and longevity at a higher price tag. Each path carries its own logic, its own risks, and its own kind of payoff when the ride is finished and the bike is back on the street, cruising under a sky that reflects the color you chose or the finish you crafted with care.
For many riders, the basic cost picture is a practical starting point. A basic DIY paint job, done with a full kit and the expectations of a single color, typically lands in the range of three hundred to six hundred dollars. That range embodies both the allure of affordability and the reality of what you can reasonably accomplish in a home or shop setting without professional equipment or a dedicated paint booth. It also hints at the tradeoffs you are making: a weekend’s worth of effort, some hard-won lessons in masking and sanding, and the risk of a finish that looks uneven or shows defects if the surface preparation isn’t thorough or if the technique isn’t up to the demands of modern automotive paints. The time investment mirrors the cost implication. Expect roughly eight to twelve hours of hands-on work if you are aiming for a complete, single-color refinish. That casts the project as more than a simple weekend task. It becomes an extended process that tests patience, spatial organization, and the ability to manage dust, ambient temperature, and humidity, all of which sculpt the final appearance.
The professional route arrives with a very different calculus. A full fairing paint job handled by a shop typically carries a price tag between one thousand and two thousand five hundred dollars. The wide range reflects the spectrum of complexity and customization, from straightforward one or two color schemes to highly intricate designs, multiple fades, or graphic elements that demand precise color matching and meticulous masking. When a professional undertakes the job, the charge generally includes expert surface preparation, the use of high-quality materials, and a precision application that aims to deliver a flawless, uniform finish across every contour. The advantage is not only aesthetics but durability. A professional finish is built to resist chipping, UV degradation, and weathering for a longer period, which matters a lot for bikes that endure daily riding in varied climates or for owners who keep their machines for years.
A nuance worth noting is the possibility of labor-only scenarios that still involve significant cost. If a rider replaces the entire fairing assembly, perhaps after damage that makes the original shell unviable, labor costs start at roughly one hundred to three hundred dollars and can take from three to six hours. This labor-only option can appear more affordable than a full repaint, yet it shifts the emphasis away from color and finish quality to fitment, alignment, and the structural integrity of the new shell. It is an option worth considering for touring bikes or sport touring models where the fairings are a major component of protection as well as aesthetics. In such cases, the decision might lean toward ensuring proper sealing, correct mounting points, and reliable aerodynamics as much as toward the color you approve in the end.
When you step back from the price tags, a broader picture emerges. DIY painting asks you to become a craftsman of your own bike to a degree that many riders appreciate for its independence and personal satisfaction. You wield control over the color, the gloss level, and the sequence of steps, and you gain a sense of accomplishment each time you stand back to view the finished panels. Yet this path demands attention to detail, a willingness to invest in the right tools, and a tolerance for experimentation. If you have not done a full paint job before, the risk of runs, solvent smudges, dust inclusions, and a finish that looks uneven increases. Even expert hobbyists discover that the journey to a high-gloss shine or a precise metallic blend can require more retouches and more time than initially planned. The costs accumulate not just in money but in the opportunity cost of time—hours that could be spent riding or on other projects.
A professional approach, in contrast, is a structured process. The surface preparation is methodical: the fairings are stripped if needed, cleaned thoroughly, and inspected for imperfections such as deep scratches, cracks, or resin hollows that could telegraph through the paint. The filling and sanding steps are carefully controlled, with care taken to avoid heat warping of the plastic or fiberglass. Masking is meticulous, especially when competing colors or graphics are involved. The base coat provides the color under a stable, durable layer that resists the sun’s harsh rays, while the clear coat adds a hard, protective finish ready to repel chips, minor abrasions, and road salts. When a shop talks about color matching, it signals more than just a good eye for tone; it signals the use of controlled lighting, spectrophotometry, and a climate-controlled booth that moderates temperature and humidity to avoid chemical reactions that could alter the color or cause solvent bubbles. In short, a professional paint job seeks to eliminate variability and ensure consistency across both left and right fairings, across complex curves, and across a spectrum of light angles as the motorcycle moves through different environments.
The design complexity can push the price up or down in meaningful ways. A basic single color is comparatively straightforward, while multi color schemes, metallics, candy finishes, or graphics require precise layering and more time with the gun. A two-tone finish might entail additional masking lines and color curves that demand exact alignment. A metallic or pearlescent finish introduces the need for multiple coats of base and a specialized clear to maintain the depth and shift of color as light interacts with the surface. If a rider wants custom graphics or airbrushed details, the cost soars further, but the payoff can be artistry that remains visible for many miles of riding. This is where the value of professional expertise becomes clear: once you step into the realm of graphics, depth, and color matching across panels, the margin for human error increases significantly when you work without a controlled environment and calibrated tools.
For riders who prioritize value and who are comfortable with a flexible schedule, aftermarket fairings provide a compelling alternative. These shells can be cheaper than fresh OEM assemblies but arrive with a caveat: fitment, finish, and weight tolerances vary from one supplier to another. The economics of aftermarket fairings are nuanced. In some cases, a rider might splurge on premium paints and a careful finish but still save money overall by switching to a more affordable shell. In others, the savings on the shell are offset by the labor and time needed to prepare a non OEM piece for paint, including the need to modify mounting points, reinforce brittle sections, or address fit issues around the radiator shrouds and fairing fasteners. The take-away is not simply price, but risk management. The rider must weigh the temptation of a lower sticker price against the potential for imperfect fit, misalignment of panels, or the repeated maintenance that a poorly seated fairing can require during the life of the bike. In decisions like this, it helps to look at the broader engineering context—the materials used in the shell, the way those materials respond to heat and solvent exposure, and the way a color layer interacts with the substrate under real riding conditions. For those who want to explore affordable fairing options and their interfaces with engineering standards, a resource on cheap fairings can provide a broader framework. See the discussion in this reference for more context on standards and application in engineering contexts.
The choice between DIY and professional painting is not simply a matter of cost. It is a decision about durability, performance, and the rider’s relationship with the bike. A DIY job can be deeply satisfying and financially efficient if you are motivated, patient, and prepared to invest in the right tools and proper protective equipment. It also demands a commitment to learning—to how prep, primer, paint, and clear interact, and to how environmental variables affect the chemical reactions that define color and gloss. A professional job, on the other hand, offers a different kind of assurance. It provides predictable outcomes, a lasting finish that resists common wear factors, and a level of refinement that often becomes part of the bike’s value proposition. The rider may find that the extra cost translates into fewer trips to the shop for touch-ups, more time on the road, and a finish that remains visually consistent even after a season of sun, rain, and road debris. The decision will often hinge on how long the rider plans to own the bike, how frequently the bike is exposed to harsh environments, and how much importance the rider places on color fidelity and panel alignment.
If the decision leans toward DIY, there are practical steps that can help maximize the odds of success without breaking the bank. Begin with a clean slate by removing the fairings and working in a controlled area with good lighting and adequate ventilation. Thoroughly wash and dew-dry the surfaces, then sand to a uniform matte texture that ensures the new primer adheres properly. Masking should be tight but careful, with edges sealed to prevent bleed-through of paint under the masking tape. A quality primer sets the stage for the base coat, and multiple light coats of color help build a deep, even finish. Each layer should dry fully before the next is applied, and final curing should be respected before handling or reassembly. The clear coat provides the gloss and protection that will resist minor scuffs and UV exposure, and a careful, final polish can bring out the depth of the color and the smoothness of the surface. Throughout this process, drying conditions matter as much as the chemistry of the paint. Temperature, humidity, and airflow all shape the way solvents evaporate and how pigments settle. A temperate, low-dust environment gives the best results, while a tight schedule can force shortcuts that degrade the final look. Even with careful technique, a DIY paint job rarely matches the polish of a well-executed professional finish, but it can still satisfy if the goal is to refresh a bike with a personal touch rather than to compete in the showroom.
If the path chosen is professional, the next phase products a different kind of experience. The shop’s workflow tends to be a sequence of validation and refinement: surface prep that reveals a clean canvas; masking that defines the boundary between colors; a base coat that saturates the panel with color; layers of color and effects where needed; and the clear coat that locks the work in with a durable, protective finish. Across these steps, color consistency is prioritized, and the finish is audited from multiple angles to ensure there are no orange peels, runs, or dust nibs. The result is a uniform look that remains consistent under light changes and miles of driving. A pro finish is also built to tolerate the rigors of road use. It resists chips, solvents, and minor abrasions that would otherwise mar the surface and require rework. And because professionals often have access to data-driven approaches to color matching and weathering simulations, the final look is not just attractive but resilient over time. The cost, in this sense, can be viewed as a premium for reliability, predictability, and a finish that retains its luster with less worry about frequent touch-ups.
Another dimension to consider is the broader value of the choice. Budgeting for fairing paint should reflect not only what you see on the invoice but also the longer-term implications for the bike’s value, maintenance needs, and resale potential. A well-executed professional finish can preserve the bike’s exterior integrity, making the data you pass along to future buyers—how it was painted, the materials used, the condition of the surface—more compelling. A DIY finish, particularly one that is not perfectly executed, can influence resale conversations and may spark questions about how carefully the bike was maintained, even if the ride itself remains flawless. In this sense the decision also folds into personal expectations for the riding life of the machine. A rider who intends to keep the bike for a decade or more might prioritize the durability of the finish more than someone who plans to upgrade within a few seasons.
There is value in recognizing the limitations and opportunities of each path without oversimplifying the choice. The DIY approach offers autonomy, a sense of ownership, and the potential for real savings when the rider already possesses or is willing to acquire the necessary tools and space. It rewards skill development and can yield quick turnarounds if only a panel or two require refreshment. The professional path offers a different form of value—consistency, professional-grade materials, and the assurance of a finish that with proper care should endure for many miles. For those who want to weigh these paths in a practical, decision-making frame, a simple rule of thumb can help. If you plan to ride the bike hard, expose it to a range of weather, or intend to keep it for many years, the professional route tends to justify its higher initial cost. If you crave customization and enjoy the project in your spare time, and if the finish you want is something you can achieve with careful preparation, the DIY route can be deeply satisfying and financially prudent.
In this landscape of cost, technique, and intention, the concept of value evolves beyond the sticker price. The modern market for fairings and the processes around painting reflect an ecosystem where material standards and engineering specifications matter as much as the color you see on the surface. For riders seeking affordable routes that still deliver reasonable quality, there is merit in exploring options that balance price and performance, especially when the goal is to maintain moderate protection from the elements while achieving a refreshed look. A careful assessment of needs—how long you intend to keep the bike, how much of the painting you want to DIY, and how important the final appearance is to your riding experience—will guide you toward the right balance of cost and craftsmanship.
For readers who want to explore options that address the broader engineering and cost considerations while staying within a budget, there is a resource that delves into affordable fairing options and their application in engineering contexts. This reference examines how standards and practical application influence both the cost and the feasibility of obtaining a protective, well-finished shell. It provides a broader framework for understanding how cheaper components can be integrated safely and effectively into a motorcycle platform, which is particularly relevant when you weigh the cost of paint against the structural role of the fairings themselves. The knowledge in this resource can help you set expectations about fit, protection, and performance, even as you decide on a color and finish.
Embedded within the decision-making process is a straightforward point: the cost to paint motorcycle fairings is not simply a single number but a spectrum defined by preparation, materials, complexity, and the level of finish you require. Whether you lean toward DIY or toward a professional service, you are choosing a path that will influence the bike’s appearance, its protection, and its ability to hold value over time. The simplest way to approach the decision is to map your priorities—cost, time, durability, and aesthetics—onto that spectrum and then select the option that most cleanly aligns with your riding life. If your priority is a clean, uniform finish with predictable durability and you are aiming for a long-term investment, the professional route often offers the best return. If you regard painting as a learning curve or a project that can be accomplished with careful planning and the right tools, the DIY path can deliver substantial satisfaction and meaningful savings without compromising the bike’s functionality.
Internal link for further exploration: for riders who want to explore affordable aftermarket options and how they relate to fit and function, you can browse the broader fairing categories such as this collection: BMW fairings category. This resource can help you gauge the tradeoffs between price, fit, and engineering considerations when contemplating a swap or refresh of fairing components while keeping your color ambitions in view. The discussion here connects with the broader theme of cost vs. performance that runs through every phase of painting, from initial ideation to the final gloss under road light. By acknowledging this connection, you can approach the project with a clear sense of what you are trying to achieve and how to measure success against the costs involved.
Ultimately, the choice between DIY and professional painting is part practical, part artistic, and part strategic. It sits at the intersection of engineering standards, personal taste, and the realities of time and money. The cost to paint motorcycle fairings, once viewed as a simple line item, becomes instead a measure of how you want to experience riding—the way you want your bike to look when it’s parked, the way you want it to perform on a twisty road, and the story you want the paint to tell as you roll from one destination to the next. In the end, whichever path you choose, you’ll be deciding not only how your fairings will appear but how your relationship with your bike will deepen through the act of care, attention, and eventual pride in a finish you helped create. External insights into the economics and standards of affordable fairings offer a useful counterpoint to the hands-on decisions riders make, ensuring that the color you select sits on a foundation of engineering awareness and practical expectation. For deeper context on those standards and how they apply in engineering contexts, refer to the external resource linked here: https://www.motorcycle.com/inside-cheap-motorcycle-fairings-key-details-standards-and-how-to-apply-in-engineering/.
Final thoughts
The cost to paint motorcycle fairings varies widely based on details like complexity and the finish desired. As a business owner, understanding the basic costs, the critical factors at play, and the pros and cons of professional versus DIY painting will enable you to make informed decisions for your services. By ensuring clarity on costs and quality expectations, you enhance your business’s reputation and satisfaction among your clients, ultimately driving growth in the competitive motorcycle market.