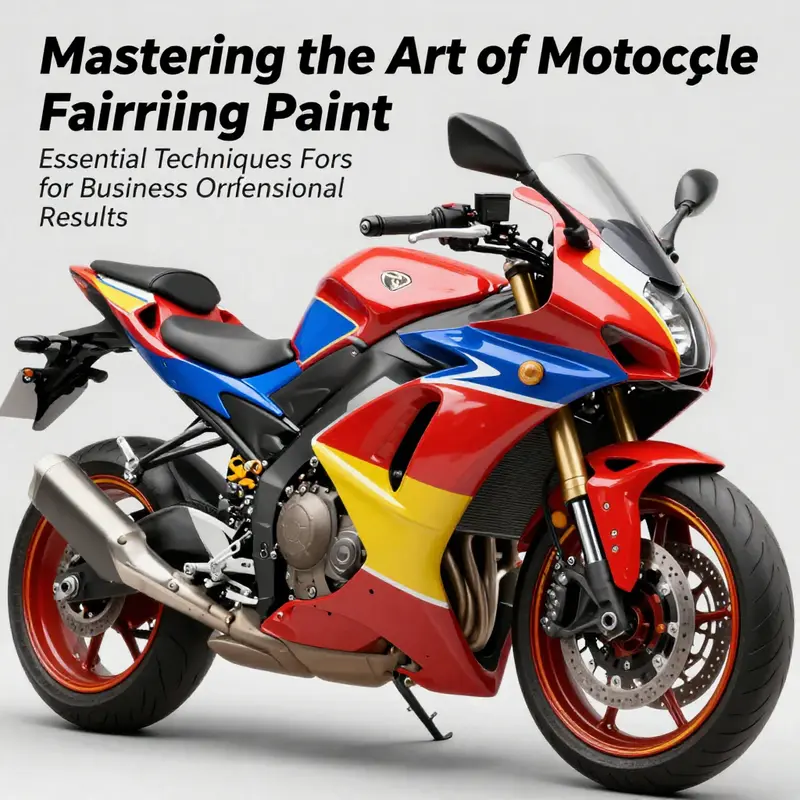
In the competitive motorcycle industry, the quality of your paint job can significantly impact customer satisfaction and retention. Understanding the best way to paint motorcycle fairings can not only enhance the aesthetic appeal of the bikes you work on but also ensure durability and customer trust. This article delves into five critical chapters that cover each vital aspect of the painting process—from meticulous surface preparation that lays the foundation for an enduring finish to clear coating techniques that provide protection against environmental damage. By the end of this guide, business owners will gain comprehensive insights into elevating their services through expert paint application methods, ultimately contributing to higher customer loyalty and revenue.
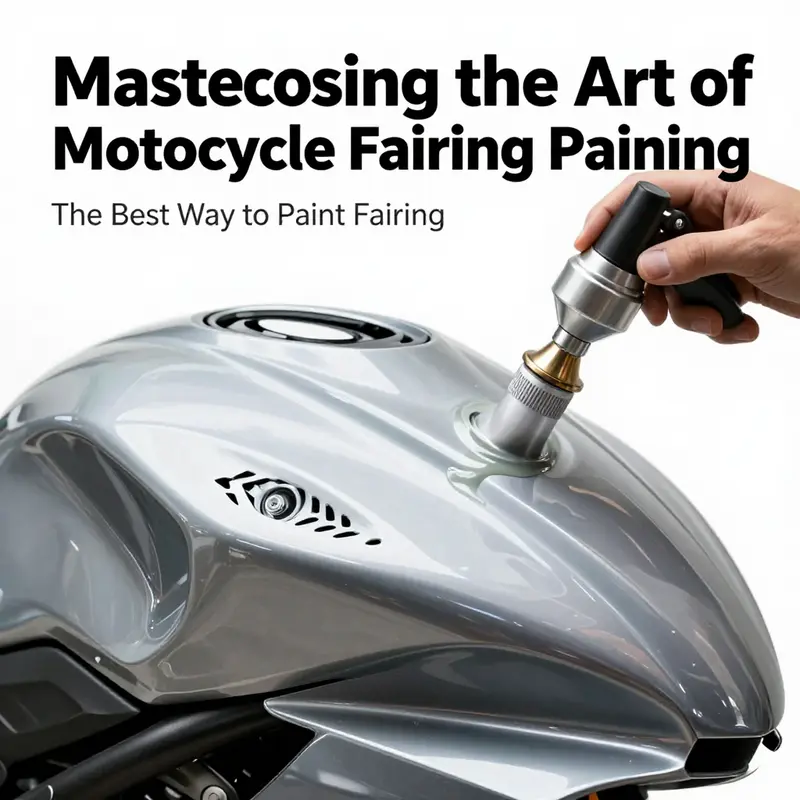
Forging a Flawless Finish: Mastering Surface Preparation for Motorcycle Fairings
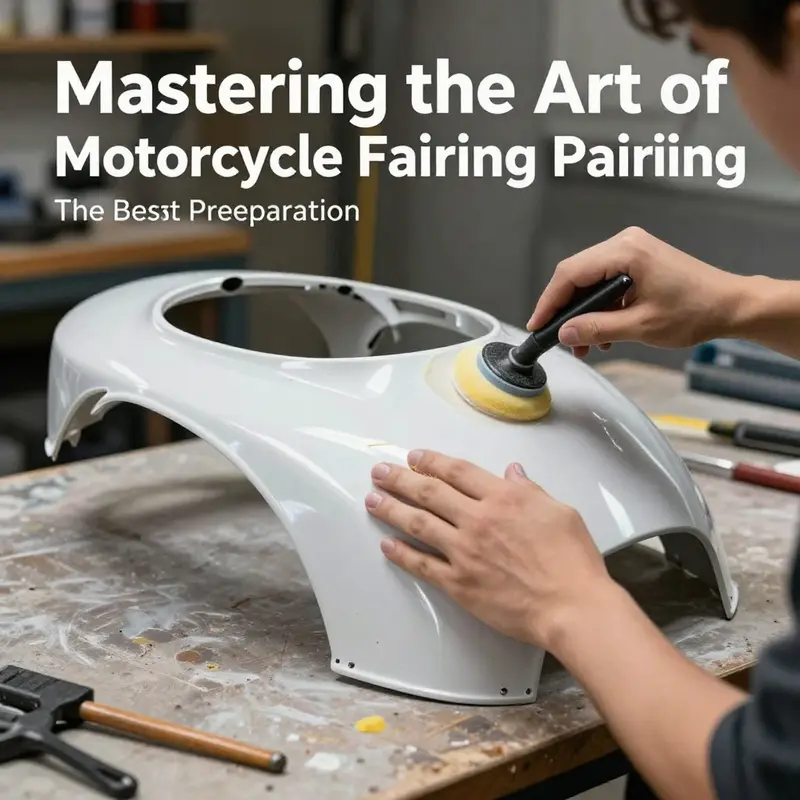
The quality of a motorcycle paint job is rarely revealed in the final gloss alone. It emerges first, almost invisibly, in the discipline of surface preparation. Fairings are made from plastics that flex and endure vibration, exposure to sun, weather, and road debris. If the foundation isn’t clean, grippy, and properly primed, even the most carefully applied color will disappoint. The preparation phase is the hinge between a good attempt and a finish that lasts. In this chapter, we move through the preparation process as an integrated flow, where each step sets up the next and where attention to detail becomes a practical habit rather than a ritual. The goal is a finish that adheres reliably, resists chipping, and maintains its clarity under the dynamic conditions of riding. A careful start will save time, money, and frustration later on, and it will give the color the true depth and vibrancy you expect from a factory-like result.
Begin with the obvious but decisive choice: remove the fairings from the bike. This affords full access to every surface and protects other components during the painting process. Once the panels are remote, you can approach each curve and edge with the respect it deserves. With the pieces in hand, turn your attention to cleaning. Use a dedicated plastic cleaner or a degreaser that is formulated for plastics. The aim is to strip away oils, wax, and any grime that may have found its way onto the surface. Oils and residues act like a barrier, compromising adhesion and causing uneven films or premature failure. After cleansing, rinse thoroughly and allow the parts to dry completely. The surface should feel dry to the touch and look uniform in appearance before you proceed.
The next move is to create a tiny, controlled texture that allows primer and paint to grip rather than skate across a glossy barrier. Lightly sand the entire surface with a fine grit—typically in the 600 to 800 range. This step removes the factory gloss and creates the microscopic “tooth” that adhesion requires. It’s important to work gently and methodically; the goal is not to remove material but to disrupt the smooth surface enough to anchor the primer. If you see any gouges or deep scratches, step back and feather the area with lighter passes. After sanding, wipe the surface with a tack cloth. The tack cloth is your final dust guard, lifting fine particles that would otherwise settle into primer and paint layers.
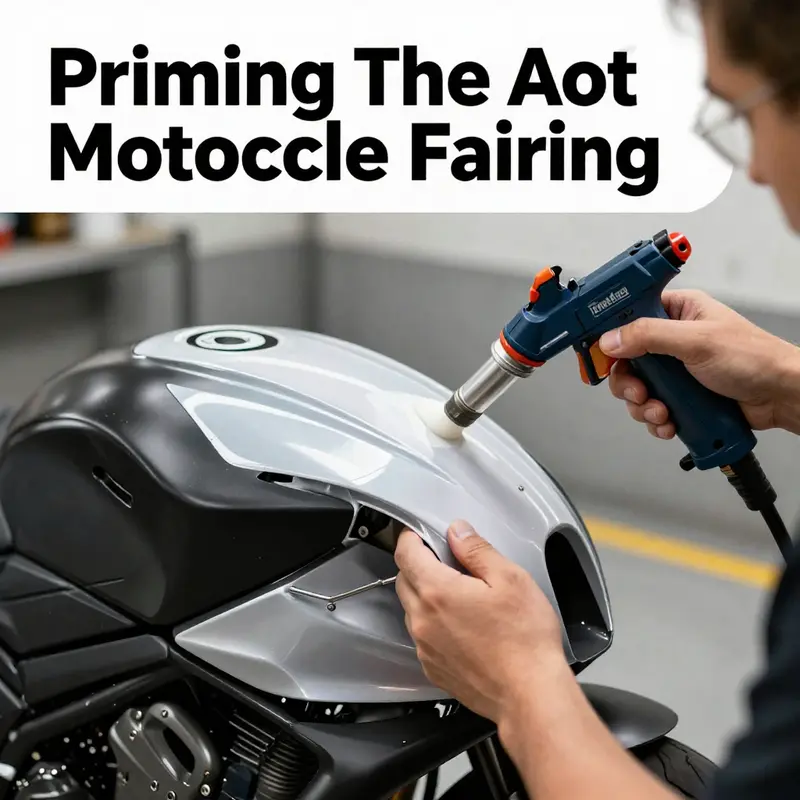
Priming is the bridge between the prepared substrate and a durable finish. Choose a high-quality plastic primer designed for the types of plastics used in modern fairings, such as polyurethane or ABS. The primer should be flexible as well as adhesive; a good reactive layer will move with the plastic rather than crack as the fairings flex during riding. Apply thin, even coats, allowing appropriate flash time between passes according to the manufacturer’s guidelines. In many cases a single, well-applied coat is sufficient if the coverage is uniform and the surface is clean and dry. If you do see pinholes or uneven texture after the first pass, a second light coat can be added, but the principle remains: less is more when dealing with primers. You want a crisp, even base that doesn’t shrink or trap moisture.
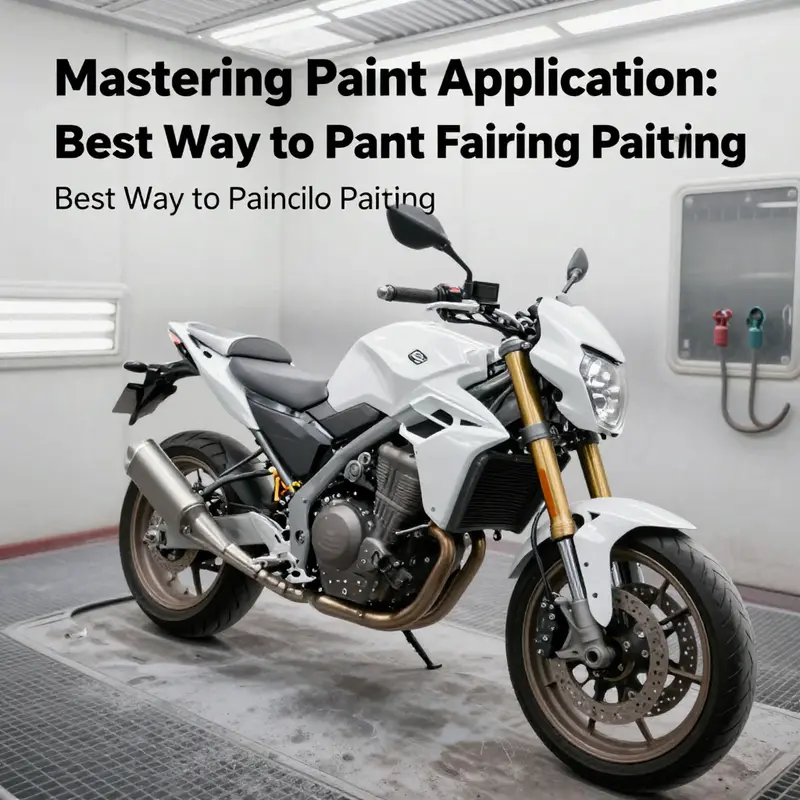
With the primer cured to a solid, compatible film, you enter the paint stage. Environment is crucial here. Work in a clean, dust-free area with a stable, moderate temperature—ideally between 65 and 75 degrees Fahrenheit (roughly 18 to 24 Celsius). A spray booth is ideal, but if you’re working in a well-sealed garage, take extra precautions to minimize dust and airflow that could kick up particulates. The paint itself should be a high-quality, flexible automotive urethane designed for plastics. Base coats in urethane systems provide durability, color stability, and the flexibility necessary to endure the repeated flexing of fairings. Be mindful of color matching; the goal is a color that integrates seamlessly with the factory or the desired custom shade. When you apply, treat the color like a film rather than a pigment: build it through many thin passes rather than a few heavy ones.
Technique is where good results emerge from good intention. Use a steady hand, maintain a consistent gun distance—commonly around 6 to 8 inches from the surface—and keep the gun moving in smooth, overlapping passes. A common guideline is to overlap each pass by about 50 percent. Heavy, wet coats invite runs, sags, and an uneven texture that will require additional corrective sanding later. Allow each coat to flash off for a period specified by the product instructions—typically around 15 to 20 minutes—before applying the next. The base color should be built up gradually, with several transparent, translucent passes that even out the color and hide any minor imperfections beneath.
After you achieve the desired color saturation and evenness, the clear coat is not an afterthought but a crucial protective layer. A urethane-based clear coat provides UV resistance, chemical protection, and a high-gloss finish that accentuates depth. Like the base, the clear should be applied in thin, even coats with ample flash time in between. Two to three light coats are generally superior to a single heavy coat, because they minimize sagging and yield a more uniform surface. Allow the clear to cure according to the product’s instructions, which typically involves several days of patience before handling or washing the bike. Curing is not merely drying; it’s a chemical process that continues as the solvents fully evaporate and the film cross-links. The result is a resilient surface that resists chipping, UV degradation, and chemical exposure from fuels and cleaners.
The final chapter of this preparation rite is the cure itself. Do not be tempted to rush. Even in a dry environment, curing can take several days to a week to reach full hardness. During this time, avoid washing, exposing to heavy rain, or storing the bike in environments that could introduce dust or moisture into the film. A properly cured finish retains clarity, avoids haziness, and preserves the vitality of the color. Flexibility remains the watchword throughout. The paint system should accommodate the mechanical and thermal movements of the fairings without cracking, peeling, or losing adhesion. If you push beyond these principles—particularly with lower-quality paints or improper primers—you risk compromising the entire project.
In the broader context of the painting craft, a few considerations deserve emphasis. Water-based paints, while popular in other applications, are typically less durable for motorcycle fairings because of their tendency to crack under flexing and temperature changes. The same applies to heavy, thick coats that seem to speed up completion but invite peel and delamination as soon as the bike is out on the road. The system as a whole must balance durability, flexibility, and color fidelity. If you’re working on a rare or high-value fairing, or tackling a complex shape with tight radii and multi-plane geometry, professional help is a prudent choice. A shop with experience in automotive plastics will bring climate-controlled booths, humidity control, and the experience of science-backed curing to bear on your project. They will recognize subtleties in surface texture, prep residues, and cure curves that a non-professional may overlook, and the overall result often justifies the investment when the goal is a flawless, showroom-like finish.
For readers seeking deeper practical nuance, there are established, professional approaches and references that expand on the concepts described here. If you’re looking to explore specific fairing categories or to consider parts from a well-known lineup, you can browse the Honda fairings collection for a sense of fit and finish in a related context. This can help align your color decisions with the contours you’ll encounter during prep and painting. Honda fairings provides a concrete example of how plastics selection, adhesion, and geometry influence preparation choices.
As you apply these principles, remember that the preparation stage is not a hurdle to overcome but the foundation of the project. When done with care, it yields a surface that holds color with depth, resists the rigors of riding, and remains resilient to the cleaning routines you’ll perform over the years. If you keep the sequence tight—clean, abrade lightly, prime properly, color in controlled coats, seal with a careful clear, and cure with patience—the final finish will reflect the consistency and discipline you invested at the start. In many cases this approach also reduces the need for extensive color correction after the fact, saving time and preserving the integrity of the design you set out to achieve. The result is a fairing that looks as fresh after a thousand miles as it does after its first test ride, with a finish that remains robust through sun, rain, and road grime.
External resource: https://www.autocar.com/article/technical-guides/how-to-paint-a-car-like-a-pro
Priming with Precision: Laying the Foundation for Durable, Seamless Motorcycle Fairings
Priming is the quiet workhorse of a flawless motorcycle fairing paint job. It may not grab attention the way a bright base color does, but it is the hinge that determines how long the color will cling, how smoothly it will lay, and how well the final clear coat will behave under sun, rain, and the daily flex of plastic skins. When you approach priming as a precise, methodical stage rather than a courtesy step, you unlock a level of durability and finish that makes every later layer sing. The core idea is simple: prepare a clean, uniform surface, apply a primer that is specifically compatible with plastics, and coax that primer to bond without creating stress points that can later crack or peel. From there, every coat you lay—base color and clear—will respond with even adhesion and predictable smoothing, which translates into fewer surprises after the ride leaves the garage. The value of this stage rises from the very first contact between plastic and primer, so it is worth gathering your mental focus and physical discipline around this process.
Begin with surface truth, even when the preliminaries have already been done in a broader prep plan. The fairing must be free of oils and waxes that would disrupt adhesion. Any trace of silicone or polishing residues can create a ghost line beneath the primer that undermines the smoothness of subsequent coats. A dedicated plastic cleaner or degreaser helps here, followed by a thorough rinse and a complete dry. The goal is not glossier treatment; it is a clean, neutral canvas. Once clean, light sanding becomes the bridge to primer compatibility. Sand the surface with a fine grit—roughly in the 600 to 800 range—and do so evenly to avoid creating visible low spots or deep scratches that could telegraph through the primer. The intent is to create a micro-roughness or “tooth” that gives the primer something to bite into. After sanding, wipe again with a tack cloth to remove all dust particles. This step is deceptively simple, yet it directly affects how evenly the primer will settle and how resistant the finish will be to chipping at the edges where fairings flex most.
The choice of primer sits at the heart of lasting adhesion. For plastic or composite fairings, a high-quality, two-part primer designed for plastics is the most reliable path. These primers are formulated to stay flexible and to form a tenacious, elastic bond with plastic substrates. In choosing—without naming specific brands—the focus should be on compatibility with plastics, on a two-part chemistry that cures to a durable film, and on a finish that can accommodate the subsequent texture of the base color and the final gloss of the clear coat. A thin, well-adhered primer film will not only lock in the color beneath it but also help hide minor surface imperfections that sanding and flawless finishing cannot fix once the base coats begin to lay down. The primer needs to be flexible enough to track the tiny movements and flexing of the fairing without cracking. This is especially important because motorcycle fairings endure constant flexing and vibration as the bike is ridden and subjected to varying temperatures.
Application technique matters as much as the material itself. Prime in thin, even coats, applied with a steady hand and a consistent spray technique. Whether you are using a spray gun or a rattle can, the objective is to deliver uniform, feathered edges with minimal buildup. Maintain a controlled distance from the surface—generally a few inches away—so the film builds evenly rather than puddling in a single spot. Light, overlapping passes are safer than heavy, dense passes that invite runs, sags, or solvent buildup. Allow adequate flash-off time between coats, which is typically printed in the product instructions—often around 15 to 30 minutes. The principle here is simple: you want each layer to dry enough to accept the next without forming a tacky, trapped layer of solvents that would create peel or crack under the weight of subsequent coats. Do not rush this step; patience in the short-term yields long-term durability.
The structure of the priming process is also a matter of layering strategy. A single, properly executed coat can be sufficient if the surface is pristine and the primer film is allowed to cure correctly. However, many detail-oriented approaches call for multiple ultra-thin coats to achieve an even, pore-free surface. The key is to observe the primer’s flash times and its guidance on recoat windows. Piling on coats too Quickly can trap solvents and cause clouding or cracking as the film cures. Conversely, waiting too long between coats can make subsequent layers not adhere as effectively due to a dry, dust-collecting surface. In this sense, the factory or the primer’s manufacturer’s instructions are not merely suggestions; they are a map for achieving the most uniform enamel-like finish on plastic.
Once the primer has achieved a full cure, the surface often benefits from one more step that is easy to overlook but crucial for an ultra-smooth final result. A light, dry sanding using very fine grit paper—think 1200 to 1500 grit—helps smooth out any nibs, dust particles, or slight irregularities that survived the initial sanding and primer application. This step minimizes the risk of texture that could distort the base color’s appearance or the subsequent clarity of the protective coat. After this final refinement, a clean wipe with a tack cloth must be performed to ensure the surface is free of abrasive dust before you proceed to the base color. The goal here is a surface that presents the base tone with a true, glassy finish later, not a rough canvas that would reflect unevenly or trap micro dust under the color.
A few practical considerations underpin this work. First, ensure a dust-free environment, ideally in a controlled space such as a spray booth or a well-contained studio area. Second, manage humidity and temperature to keep the primer film within its intended curing window. High humidity or extreme cold can extend flash times or make the film more susceptible to micro blistering as it dries. Third, recognize that working with plastics sometimes demands specialized flexible primer options and careful film thickness control to avoid cracking as the fairings flex with temperature changes and road vibrations. These considerations emphasize why priming technique is not merely about “getting a coat on.” It is about cultivating a bond so robust that the fairing moves with the bike rather than against it.
For reference and broader reading on the topic, a practical, broadly applicable approach to painting fairings can be found in professional guides that emphasize methodical steps and controlled environments. If you’re exploring context for matching certain fairing shapes or colors, you might find value in resources that discuss equivalent considerations for different brands and models. In particular, for riders who work with popular fairing categories, browsing a dedicated catalog like the Honda fairings collection can provide visual and contextual alignment as you plan your primer and paint sequence. This kind of reference helps you anticipate how the primer needs to behave across various plastic profiles and edge radii, ensuring that the finished surface remains uniform where sharp lines and panel transitions exist. https://ultimatemotorx.net/product-category/honda-fairings/ provides a useful benchmark for understanding how material behavior can influence primer choice and application technique across different model lines.
As you finish the priming stage and prepare for the base color, keep the thread of precision intact. The primer’s job is to create a bond and a level playing field for the color to come. A well-executed primer reduces the risk of micro-sags, orange peel, and adhesion failures once the clear coat is applied. It is the anchor that holds all subsequent artistry in place, making it possible to achieve a seamless transition from the base color through the topcoat to the high-gloss protection that guards against UV exposure and chemical wear. The best outcomes come from treating priming as a disciplined practice rather than an afterthought, recognizing that the health of the final finish rides on this foundation.
For further reading on practical techniques and the broader philosophy of painting motorcycle fairings, consider a detail-oriented guide that walks through the full process. This external reference complements the primer-focused approach by offering real-world, step-by-step insights into every stage of painting plastic fairings. https://www.motorcycle.com/how-to-paint-motorcycle-fairings/.
Precision Under the Mask: Mastering the Art of Painting Motorcycle Fairings
Painting motorcycle fairings requires discipline and control. The glossy shell protects the rider and handles wind and heat, so durability and a showroom finish come from careful preparation, correct materials, and patient layering. Start with a clean, oil-free surface: wash with a plastic-safe cleaner, rinse, and dry completely. Mechanically key the surface with 400-600 grit to provide grip for primer and remove gloss. Wipe with a tack cloth to remove dust. Use a plastic-appropriate etch primer, apply a light coat and let it dry per manufacturer directions. Inspect and lightly sand any imperfections with 600-800 grit, then re-clean. Apply color in thin, even coats from about 6-8 inches away, overlapping passes. Allow adequate flash-off time between coats; plan for several hours between layers. Typically 3-5 coats yield depth without runs. Finish with a urethane clear coat in light, even layers with proper flash times. Two to three coats are usually sufficient. Let the finish cure fully for several days before handling or washing. Maintain a clean, dust-free workspace and use appropriate safety equipment. If the project is high-value or you want the best possible result, consider professional booth work. In any case, the goal is a flexible, durable finish that resists cracking as the fairing flexes.
A Seamless, Show-Quality Coat: Mastering the Durable Paint Job for Motorcycle Fairings
Painting motorcycle fairings is more than color selection; it is a disciplined sequence that marries careful preparation with the chemistry of modern coatings. The goal is a finish that looks showroom perfect while remaining flexible enough to endure heat, flexing plastic, and the daily hazards of road use. When you approach the project with patience and a blueprint for durability, the result is a seamless coat that resists chips, yellowing, and dulling over time. The narrative of a robust paint job begins with surface preparation, which, in the eyes of long-term outcomes, holds the most weight.
First, preparation is the key to lasting adhesion. Start with a thorough cleansing using a dedicated plastic cleaner or degreaser to strip away oils, wax, and greases that would otherwise create a barrier under the primer. Rinse well and allow the surface to dry completely. Any lingering residue will become a cradle for imperfections once the paint goes down. Following cleaning, lightly abrade the entire fairing surface with 800- to 1000-grit paper. This step removes the factory gloss and creates a micro-rough texture the primer can grip. A dual-action sander helps keep the abrasion even and prevents deep scratches that could telegraph through the finish. After the sanding passes, wipe the surface with a tack cloth to capture all the microscopic dust particles that could ruin a smooth laydown.
Priming the plastic itself is the next decisive moment. Plastic fairings, commonly made from materials like polypropylene and polyethylene, demand primers formulated specifically for plastics. These primers bridge the chemical gap between the plastic’s surface and the paint system, promoting adhesion and providing a durable, flexible base that resists cracking as the material stretches and contracts with temperature changes. The primer is generally applied in thin, even coats, with flash time measured according to the product’s instructions. In many cases, a single, well-placed coat would suffice if it’s prepared and cured correctly. Thorough drying and a light re-sand between coats can further improve bite if the surface feels textured or if there are minor imperfections.
With a properly prepared surface, the journey moves to the color. A clean, dust-free environment with stable temperatures—ideally between 65 and 75 degrees Fahrenheit (18 to 24 degrees Celsius)—supports consistent spray behavior. A paint system built around high-quality, flexible automotive urethane is prized for its resistance to cracking, chipping, and UV-induced fading. The color should be matched precisely to the original factory shade, which demands careful color matching and, if necessary, blending tests on expendable plastic panels before committing to the final fairing. The technique centers on many thin, overlapping coats rather than a few heavy ones. Maintain a steady spray distance of about 6 to 8 inches, move the gun smoothly across the surface, and overlap each pass by roughly 50 percent. Heavy coatings tend to sag and run, especially on curved or complex shapes, so patience here is not a luxury but a necessity. Between coats, allow a proper flash-off period—typically 15 to 20 minutes—to let solvents evaporate and the film to achieve the right tackiness for the next layer.
After the base color has flashed and cured sufficiently, the clear coat step follows as the real guardian of the finish. The most effective approach is a two- to three-coat strategy using a urethane-based clear designed for automotive plastics. The clear layer adds UV protection, chemical resistance, and a glossy depth that brings the color to life. Again, apply in thin, even passes, with disciplined flash times between coats. Several light coats are superior to a single heavy one, reducing the risk of orange-peel textures and solvent entrapment. The clear coat’s job is not just shine; it locks in the color and provides a resilient topography that resists environmental and road-induced abuse.
Curing is the quiet phase of the process, where the chemistry completes its work in a controlled environment. Allow the painted fairing to cure according to the manufacturer’s guidance. In most setups, a full cure will take several days to a week, and it is prudent to avoid washing the bike during this period. Gentle handling is encouraged to prevent marring the fresh surface while the chemistry hardens and achieves maximum hardness and flexibility. This phase is as important as any spraying session, because premature exposure to water, detergents, or heat can undermine adhesion and gloss.
A core consideration in this craft is the choice of paint system. Water-based paints are generally discouraged for motorcycle fairings because they tend to lose elasticity under the flexing and heat that plastic components endure. The system chosen should emphasize flexibility, UV resistance, and chemical tolerance. The objective is a paint film that remains intact when the fairings flex with the frame and twist with heat cycling. For those seeking the most reliable results, professional help remains the prudent option, especially on complex or valuable fairings. A shop equipped with climate-controlled booths, specialized primers for plastics, and calibrated spray equipment will typically produce a more uniform result than a DIY setup that attempts to approximate those conditions.
Beyond the basics of color and gloss, the science of longevity nudges us toward certain practices that can elevate the final outcome. One pivotal choice is the clear coat technology. A two-component, or 2K, clear coat delivers superior resistance to UV damage, environmental exposure, and chemical attack compared to a one-component, or 1K, alternative. The two-component system forms a stronger, more resilient film that remains flexible yet hard, preserving the high-gloss finish over years of exposure. The depth of shine also tends to be richer with 2K clears, which makes the color beneath appear more saturated and vivid. In practice, most professionals apply two to three even layers of 2K clear after the base has cured. Each layer should be given time to flash off before applying the next. This approach minimizes the risk of runs while producing a showroom-quality depth that rewards careful layering and patience.
Of course, the materials chosen for priming and coating matter as much as technique. For plastic fairings, primers that are specifically designed for PP and PE surfaces are worth the extra cost. They improve adhesion and help prevent later cracking or peeling that can occur as the plastic expands and contracts with temperature changes. The investment in a plastics-specific primer pays dividends in a final finish that remains intact year after year, providing a more forgiving surface for color and clear coats to behave predictably. The overall workflow—cleaning, lightly abrading, priming, base color, and 2K clear—tells a story of layering where each step reinforces the next. In the end, the fairing wears a finish that is not only visually striking but resilient to the rigors of real-world use.
Reading the landscape of professional practice, one finds that the best results often hinge on a few pragmatic decisions. The finish should be flexible enough to ride the curve of the fairing’s geometry without cracking. It should resist chalking and yellowing under sun exposure. And it should maintain clarity and depth even after countless rides through dust, rain, and road spray. These outcomes emerge from disciplined preparation, measured application, and a layered finish that respects both chemistry and form. For riders who want to explore further, a practical, hands-on guide to painting motorcycle fairings emphasizes the same principles: meticulous surface prep, plastics-friendly priming, controlled environment, and a carefully sequenced paint and clear coat cycle. The emphasis remains on quality, process, and patience.
If you’re curious about how some common fairings integrate with broader customization opportunities, you can explore related parts in the industry catalog of fairings, such as the Honda fairings collection. This resource offers a sense of how plastics, fit, and paint readiness intersect with aftermarket cosmetic work, providing a useful reference point for color matching, panel alignment, and texture expectations. For a deeper dive into practical application steps, the following external guide offers a comprehensive, hands-on walkthrough that complements the studio approach described here: a detailed look at how to paint motorcycle fairings—A Practical Guide. This external resource walks through surface prep, priming, base coating, and clear coating with pragmatic tips that align with the philosophy outlined above, reinforcing the idea that success lies in disciplined execution, not in shortcuts.
External resource: https://www.motorcycle-maintenance.com/how-to-paint-motorcycle-fairings-a-practical-guide
Internal resource for reference on fairing materials and fitment: Honda fairings collection.
The Quiet Cure: Mastering the Curing Window for Durable Motorcycle Fairings
When a rider leans into the legacy of a well-painted motorcycle, the final impression often rests on what happens after the last clear is sprayed. The curing window is the quiet, unsung act that seals the journey from raw plastic to a resilient, glossy skin. It isn’t simply waiting; it is a controlled chemistry that determines how the paint holds up to vibration, sun, rain, and the constant flexing of the fairings. The cure begins as soon as the last coat flashes and the solvents begin to retreat, but the real work unfolds over a careful sequence of time, temperature, and humidity. In that window, the paint cross-links, the layers fuse with the plastic, and a durable, color-rich finish emerges that can withstand the demands of real-world riding. Rushing this phase invites compromises: soft spots, micro-scratches that reveal through the gloss, or micro-bubbles that betray a rushed job. The cure is not a conclusion; it is a foundation for everything that follows, including polish, protection, and future touch-ups. Understanding this truth changes how a painter approaches the entire project, from the first wipe-down to the final inspection under the sunlit hood of the garage.
The practical rhythm of curing is simple in theory but exacting in practice. After base color and clear have been applied in thin, even layers, the coated fairing is left in a dust-free environment whose temperature and humidity hang within a narrow corridor prescribed by the product system. For urethane, epoxy, or acrylic systems, the duration often spans from a full day to several days, with 24 to 72 hours serving as a common benchmark depending on the material and the manufacturer’s guidance. During this period, solvents fade and evaporate, while the chemical cross-linking that binds the film to the plastic proceeds in measured steps. The surface may feel firm to the touch only after the most critical solvent has departed; the true hardness typically matures as the film continues to cure in the background. This is not the moment to handle the piece casually. Any contact, accidental bump, or exposure to direct sun can interrupt the delicate balance and leave cured zones that dry with a different gloss or a subtle haze.
A controlled environment is essential for reliable results. The air should be clean, free of dust and airborne particulates that can settle on the wet film and show up as tiny specks later. Temperature stability matters as much as humidity levels. If the space swings too cool, the film slows its cross-linking; if it becomes too hot, solvents evaporate too quickly, producing a finish that appears dull or uneven. The goal is a calm, predictable arc of drying and hardening, where each stage—from initial flash-off to final surface set—occurs as the chemistry intends. In that setting, the fairing remains untouched and unexposed to direct sunlight, which can distort the drying profile and cause uneven flash or heat sag across curved surfaces. The result is a uniform depth of color and a glassy, protective layer that resists UV damage and chemical exposure.
Professional insight into curing extends beyond time and temperature. It encompasses how the surface was prepared, how the paint was laid down, and how the final coat is expected to interact with the underlayers. A meticulous cure relies on a backbone of disciplined preparation. The surface must have achieved an optimal tooth during the sanding stage, ensuring adhesion remains surface-deep rather than merely cosmetic. A clean, dry surface is then primed with a flexible, plastic-specific primer designed to endure flexing and environmental stress. Only after this foundation is in place does the curing stage begin its quiet work, letting the layers breathe and bond in a controlled atmosphere. The coating system’s compatibility—how well the primer, basecoat, and clear interact under heat and humidity—plays a pivotal role in both the uniformity of the cure and the longevity of the finish. When the cure is managed with such coherence, the fairing’s color holds its brightness across a wider thermal cycle, the gloss stays true, and the panel edges show no signs of micro-cracking or lifting that can occur when layers shrink at different rates.
The practice of curing is inseparable from the broader arc of the paint job. It links directly to the physical realities of the plastic fairing, where the curvature, seams, and fasteners create tiny zones of different interaction with the coating. Complex or intricate shapes demand extra attention during the initial laydown and during the cure. For areas where flex is greatest—around mounting points or along long, sweeping panels—thin, even coats help reduce internal stress during the cure. The climate within the curing space must accommodate these geometry-driven differences, offering a steady temperature that prevents edge-drying or sagging. Even with careful technique, the mere passage of time under controlled conditions becomes part of the finish’s character. A well-cured layer will have a uniform reflective quality, a glassy surface without orange-peel, and an edge that transitions cleanly into adjacent panels. Such outcomes are not luck; they are evidence of a cure conducted with respect for the material’s behavior and the physics of film formation.
The sequence of professional tips woven into the curing narrative reinforces how curing and technique are one continuum. Surface preparation remains the bedrock; without a clean, properly abraded foundation, no cure can fix adhesion problems later. Priming tailored for plastics is the next vital stride; it ensures the paint’s grip and the long-term resilience of the system. Spraying technique, performed with a low-pressure setup, requires a steady hand and an eye for the arc of the spray. A consistent nozzle distance and deliberate overlapping passes help produce a uniform layer that cures evenly rather than pooling into droplets. The guiding principle—multiple thin coats over fewer thick ones—not only minimizes runs but also sets up a predictable cure profile by spacing solvent release in measured steps. After the color base has flashed, the clear coat comes into play as a protective guardian. The same careful application principles apply: thin, even layers, sufficient flash between passes, and attention to edge handling. The clear coat is more than gloss; it provides UV resistance, chemical durability, and a resilient shield against abrasion that daily riding can impose on plastic panels.
Curing, in this frame, also invites a disciplined post-cure routine. During the initial weeks following a cure, the finish should be kept out of direct sunlight and away from harsh cleaning practices that can disrupt the delicate balance achieved during cure. Some riders find value in a light polish after the cure has fully set, though this must be deferred until the film has matured to a stable hardness. When carried out with the right compounds and a slow, controlled buffing technique, a post-cure polish can enhance depth and clarity, bringing out the full dimension of the color and the reflective quality of the clear. The objective is not to remove material but to refine the surface’s micro-texture and maximize optical brilliance without introducing micro-scratches that can invite future wear. The most trusted engines of this polish are the fine, professional-grade tools and compounds—used with careful pressure and clean, consistent passes—that reveal the finish’s true depth while maintaining the integrity of the cured film.
In practical terms, the curing window also defines how you plan the rest of the restoration or customization project. If a repaint is part of a broader effort, the timing of the cure will influence the sequencing of masking, color matching, and finishing steps. A patient approach reduces the likelihood of accidental damage to fresh coats and provides a stable platform for subsequent work, whether that means decal application, subtle color shifts, or the integration of protective films after curing. The rider who respects this cadence often enjoys a finish that resists the kinds of environmental stress that test clarity and bond strength. A well-executed cure translates into a surface that remains vibrant through the heat of summer days and the damp, unpredictable weather that can accompany spring rides.
For those keen on seeing how these principles translate across different fairing families, it helps to view the broader spectrum of panel types and their responses to curing. The same disciplined approach to surface preparation, priming, layering, and controlled cure yields consistent results across many makes and models. When considering the broader ecosystem of fairings, one can appreciate the shared discipline that connects a high-end, curved, composite panel to a more straightforward, flat plastic piece. The underlying rule remains: cure is not an afterthought. It is the culmination of every prior decision and the quiet engine that sustains the finish’s life.
To connect this guidance to practical examples beyond the theory, consider the way a well-curated fairing collection demonstrates durable, repeatable results. If you’re exploring a broader array of options for styling or compatibility with different bikes, you can explore product categories that highlight how fairings for various brands are designed for optimized fit and finish. For a concrete example of how quality panels are structured and prepared, you can examine the BMW fairings category, which illustrates how thoughtful panel design supports consistent preparation, curing, and maintenance over time. This broader view reinforces the idea that curing is both science and craft, a bridge between precise technique and enduring aesthetics.
For readers seeking authoritative, science-backed guidelines that reinforce these practices, consult the external technical resources offered by major refinishing programs. A comprehensive, evidence-based reference lies in the manufacturer-guided technical guides for motorcycle refinishing. These documents expand on environmental controls, material compatibility, and timing specifics that align with the curing principles described here, providing a rigorous framework for professionals and serious enthusiasts alike. External guidance can complement hands-on practice, offering deeper context for why certain temperatures, humidity ranges, and flash times yield repeatable results across different climates and shop setups. See the detailed guidance in the technical guide for motorcycle fairings, which synthesizes the core ideas of proper curing with the practicalities of real-world shop environments. https://www.ppg.com/automotive/refinishing/technical-resources/motorcycle-fairings.aspx
Final thoughts
Successfully painting motorcycle fairings requires a combination of high-quality materials and expert techniques. Each chapter of this guide highlights critical steps—beginning with surface preparation and leading through to the curing process. As business owners, mastering these methods not only leads to aesthetically pleasing results but also significantly enhances customer satisfaction and loyalty. By implementing the practices outlined, your workshop can stand out as a leader in quality motorcycle customization, ultimately driving greater business growth and customer referrals.