
Choosing the right epoxy for motorcycle fairings is crucial for durability, performance, and safety. For business owners involved in motorcycle manufacturing or repair, understanding the best epoxy options can lead to enhanced product quality and customer satisfaction. This article explores the recommended epoxy options tailored for motorcycle fairings, delves into the essential characteristics of the ideal epoxy, offers application techniques for effective bonding, and conducts a comparative analysis of various epoxy products. By grasping these insights, business owners can ensure they select the best adhesive solutions for their needs.
null
null
Bond, Flex, and Finish: The Essential Characteristics of Epoxy for Motorcycle Fairings
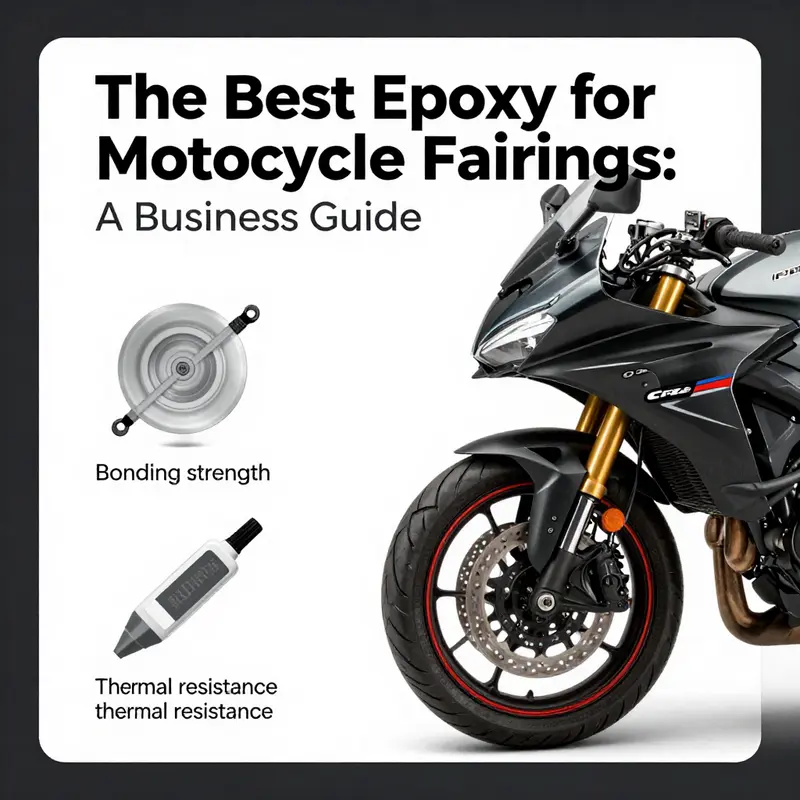
When riders choose the epoxy that will hold their fairings together, they are choosing more than a glue. They are selecting a compound that must endure the unique life of a motorcycle: constant vibrations, rapid temperature swings, relentless exposure to sun, rain, cleaning chemicals, and the occasional impact from stones and debris. The best epoxy for motorcycle fairings operates as a careful balance of bond strength, flexibility, and surface finish. It must cling to a range of substrates—from lightweight plastics to glass fiber and carbon composites—and it must do so without compromising the appearance or the long-term integrity of the panel. This means looking beyond simple adhesion strength and toward a holistic performance profile that includes toughness, UV resistance, chemical resilience, and a finish that can be sanded, primed, and painted to match the bike’s aesthetic. The right epoxy is not a single property; it is an integrated system designed for the realities of street riding and occasional track days.
A two-part epoxy system often forms the core of this balance. In automotive and light-m aerospace repair circles, these resins are prized for their formidable bonding power once cured, but they also offer the crucial ability to absorb small shocks and temperature-driven movements without turning brittle. The room-temperature cures common in many two-part formulations are particularly appealing for fairing work. They enable effective repairs and assemblies in a normal workshop or even a garage without the need for specialized heat equipment. The practical implication of room-temperature cure is a smooth workflow: clean, prepared surfaces; accurate mixing; and controlled clamping to ensure the bond forms with minimal gaps. It also means easier handling for removable or temporary fixes, where you may need to realign a fairing before a final cure.
Substrate compatibility is a central theme. ABS plastics, fiberglass, carbon fiber composites, and metal reinforcements each offer different surface energies and bonding challenges. ABS, a common fairing material, tends to accept epoxies that wet out readily and form a robust air-free interface when properly cleaned and scuffed. Fiberglass and carbon fiber bring unmatched stiffness, but their resin matrices can differ in their surface chemistry. Metals, while less common in full fairing assemblies, come into play in tail sections or reinforcement brackets. An epoxy that excels across these substrates does not merely “stick.” It forms a durable, long-lasting interface that tolerates wheel spins, road vibrations, and the heat of direct sun without lifting, peeling, or cracking. This is why formulators emphasize adhesion promoters or primers that help the resin wet out evenly across varied surfaces, followed by thorough mixing and careful application. The goal is an even, consistent bond line that resists micro-cracking and remains flexible enough to absorb routine flexing and thermal movement.
In practice, the best epoxy for fairings also delivers UV stability. A fairing lives outside, facing sun exposure for many hours. UV-light can degrade polymers, causing color shifts, chalking, and brittle surfaces if the resin is not formulated to resist yellowing and matrix breakdown. Epoxies with superior UV stability maintain their appearance and structural integrity over years of riding. To preserve color and gloss, many riders will topcoat or paint the repair area after the epoxy has fully cured. The coating then serves as the outermost shield against UV rays and environmental contamination. A high-quality epoxy should cure to a smooth, sandable surface that accepts primer and paint evenly, producing a seamless repair that blends with the rest of the panel. The smoother the base, the better the resulting finish.
A further attribute to consider is flexibility and crack resistance. Epoxy systems can be surprisingly rigid when they cure, which is precisely why many riders prefer formulations that retain a little give. Small, controlled flexibility reduces the risk of micro-cracking around stress concentrators, such as mounting points or edges where the fairing meets the frame. This resilience is particularly valuable around transition zones where the fairing’s geometry shifts and where vibrations are most intense. When a resin cures without sufficient elasticity, minor thermal expansion or impacts can propagate cracks along the surface, compromising both strength and aesthetics. The best formulations achieve a careful compromise: high shear and peel strength for hold, yet enough elongation to absorb routine loads. Practically, this means selecting a two-part epoxy designed for automotive and motorcycle body repairs, which typically balances toughness with the needed elongation without becoming overly soft or slow to cure.
Chemical and weather resistance rounds out the core requirements. The epoxy must stand up to rain, road grime, cleaning agents, and the occasional solvent splashed onto the fairing while you wash the bike. Environmental exposure includes humidity and salt air in coastal areas, as well as temperature extremes during winter storage or summer heat. A robust epoxy resists hydrolysis and chemical attack, maintaining its bond and color under these conditions. When paired with a compatible topcoat, the finished panel can shed contaminants and resist deep staining from oils or fuels that sometimes contact the fairing during maintenance or repairs. The finish should be capable of accepting paint or decals cleanly, with minimal adhesion issues between the epoxy and the primer itself. A premium combination will deliver a bond that stays intact through the life of the bike, with the surface remaining uniform and paintable after cure.
A high-quality epoxy also needs to deliver a smooth finish. For fairings, appearance matters as much as function. The cured resin should be easy to sand and feather, enabling seamless transitions between repaired areas and the surrounding panels. When properly cured, an epoxy layer can be milled into a uniform plane, then primed and painted to match the rest of the fairing. This requires selecting a system known for good film formation and low shrinkage, so the repair does not leave a noticeable low spot or ridge under the paint. A surface that polishes to a high gloss is essential when the repair is visible, because a smooth, uniform finish helps conceal the repair and restore the fairing’s original aesthetics. The synergy between a smooth epoxy film and a well-chosen topcoat is what ultimately yields a repair that feels like it never happened—unless you know exactly where to look.
In choosing any epoxy system for fairings, the practical recommendation is to work with a two-part formulation specifically designed for automotive and motorcycle body repairs. These systems are engineered to deliver the required balance of adhesion, toughness, chemical resistance, UV stability, and finish compatibility. Although many generic epoxies offer strong bond strengths, they may fall short in one or more crucial areas, such as UV resistance or surface smoothness after curing. Automotive- and motorcycle-oriented two-part resins come with performance data that targets these exact use cases, helping you anticipate how the bond will behave under long-term riding conditions.
Surface preparation cannot be overstated. The best bond starts with clean, roughened surfaces. Wipe away oils and silicone residues with a solvent compatible cleaner, then lightly sand the surfaces to create a receptive micro-roughness. The goal is to eliminate the slick surface that can push adhesive away from the substrate. After sanding, remove any dust with a clean cloth and an appropriate degreaser, ensuring the area is completely dry before applying the resin. The bond line thickness also matters. A thin, even layer helps maximize contact and reduce cure-induced stress. If you are repairing a crack or filling a gap, a precise amount of epoxy can be applied to the surface and then clamped, sometimes aided by a fiberglass or carbon fiber patch to restore stiffness. In larger assemblies, such as the fairing’s attachment to a frame or a reinforced tail section, a small patch may be used to increase shear resistance. These steps—surface prep, correct mixing, and steady clamping—dictate whether the premium resin will outperform a run-of-the-mill adhesive.
Another practical note concerns tool handling and safety. Epoxy systems require accurate mixing ratios and thorough stirring to ensure the resin and hardener react completely. Improper mixing can lead to incomplete cure, soft spots, or a tacky surface that fails under sun exposure and heat. Use a clean mixing cup and a flat spreader to blend in a consistent ratio, then scrape the sides to avoid unreacted constituents. Temperature during mixing and cure matters as well. Most resins cure fastest in a moderate room temperature, but very high or very low ambient temperatures can alter cure times and film properties. If you work in cooler conditions, you may want to adjust cure expectations, using a longer cure period or a gentle heat source that does not soften the already hardened resin. In all cases, follow the manufacturer’s instructions precisely, including recommended pot life, cure time, and recoat windows. The best results come from treating epoxy work as a precise, patient craft rather than a quick fix.
It is worth noting that OEM practices often reflect the same principles but at a scale and with materials that demand the highest levels of shear resistance and impact tolerance. When larger or metal tail wings are involved, the epoxy system chosen in production is selected for its exceptional strength, toughness, and ability to withstand high-shear loads. For the home builder or hobbyist, those OEM-grade choices offer a benchmark of performance: a cure that’s durable under vibration, a bond that remains reliable after thousands of heat cycles, and a surface capable of accepting a flawless paint finish. While you may not replicate industrial-scale bonding, you can emulate the core logic—matching substrate compatibility, ensuring robust wetting, and achieving a finished surface that looks as good as it performs.
For readers who want to explore more targeted options and a broad catalog of automotive adhesives, an overview of available products and suppliers is accessible through major regional marketplaces. A widely referenced listing can provide detailed technical specifications, including cure times, pot life, and substrate compatibility, helping you compare options with real-world data. In particular, the official product listing on JD.com serves as a practical resource for a wide range of automotive adhesives, including those suited for motorcycle fairings. This external resource can help you confirm specifications, read user reviews, and assess supplier reliability as part of a careful purchasing decision.
If you are curious about how these principles translate into specific product choices, one practical path is to explore fairing-related categories that align with the bikes most riders own. For example, a rider focusing on Yamaha fairings can find compatible panels and accessories in the dedicated Yamaha fairings category, which often features complementary products and compatible repair materials. This alignment helps ensure that the repair materials you select can be integrated with a bike’s existing components and fixtures, maintaining a coherent aesthetic and mechanical fit. Yamaha fairings can thus serve as a reference point for understanding how components are cataloged and suggested in a real-world market environment. The goal is not to replicate a single solution but to understand how substrate, cure, and finish converge to produce a durable, paint-ready repair that holds up to the realities of riding.
In closing, the characteristics outlined here—high impact resistance, superior adhesion across common fairing substrates, UV stability, a balanced mix of rigidity and flexibility, chemical and weather resistance, and a finish that is smooth and paintable—form a cohesive framework for selecting an epoxy system for motorcycle fairings. The best choice is a two-part epoxy formulated for automotive and motorcycle repairs, used with proper surface preparation and careful adherence to the manufacturer’s guidelines. The result is a bond that endures the rough life of a motorcycle, preserves the appearance of the fairing, and delivers confidence to riders who demand both performance and aesthetics from their machines. And while the specifics of every repair may differ, the underlying principles remain consistent: treat the bond as an integral part of the fairing’s resilience, not a quick fix, and you will ride with both safety and style intact. For further reading on catalog options and technical specifications, refer to the external automotive adhesive resource linked above. In the end, the right epoxy is the quiet partner that lets the bike’s design and performance shine through while keeping the shell intact through countless miles of riding.
Bonding Beyond the Surface: Mastering Epoxy Joints for Motorcycle Fairings

Epoxy adhesives for motorcycle fairings sit at a crossroads between strength and flexibility. The goal is a bond that can withstand the daily stresses of vibration, temperature swings, and minor impacts, while remaining forgiving enough to tolerate the natural movement of plastic and composite panels. In practice, the most reliable approach begins with a clear picture of the materials used in fairings—primarily lightweight plastics and fiber-reinforced composites—and the recognition that the right epoxy is not a single magic product but a carefully chosen system designed for those substrates. A room-temperature curing two-part epoxy resin adhesive, engineered for automotive and machinery assembly, has earned broad, pragmatic respect in bike shops and assembly lines alike. Its capacity to cure at ambient conditions simplifies both in-shop builds and field repairs, reducing the need for specialized equipment while delivering high bonding strength when the surfaces are prepared correctly. For larger or more complex connections in the tail or wing regions, manufacturers often rely on epoxy resin glue formulations known for excellent shear resistance and toughness. Those choices reflect a practical philosophy: prioritize a robust, load-bearing interface that can breathe with the panel as it expands and contracts with heat and sun exposure, while keeping the surface preparation and mixing discipline tight enough to prevent micro-movements from turning into a failure seam over time.
The journey to a durable fairing bond begins with surface cleanliness. The surface to be bonded must be free of oils, waxes, release agents, or any coating that might interfere with resin penetration. A dedicated degreaser is a wise starting point, followed by a careful inspection of the area for any residual polish or wax left from manufacturing or polishing work. The next step—light sanding—serves a dual purpose. It not only creates micro-screed texture that the adhesive can grip but also disrupts any glossy film that could act as a barrier. A fine grit in the 800–1200 range is typically sufficient for most plastic or composite surfaces found on modern fairings. After sanding, a thorough wipe-down with a lint-free cloth removes dust and fibers that could trap air beneath the bond line. In some cases, a tack cloth is worth keeping handy to catch the final, microscopic particles that can sidle into the joint during assembly. The prepared surface should feel slightly rough to the touch, never shiny, and free of abrasive residue.
With the surface properly prepared, the choice of epoxy becomes a question not of raw strength alone but of compatibility and usability. Two-part epoxies designed for plastics or composites offer the right balance of stiffness and flexibility. The resin and hardener components should be mixed according to the manufacturer’s instructions, with the ratio—commonly 1:1 or 2:1—observed precisely. Thorough mixing is essential, not only to achieve full cure but also to avoid any soft spots that could act as initiation zones for cracks under vibration. After mixing, a brief pause—often a few minutes as recommended by the data sheet—can help ensure complete wetting and uniformity of the blend. This pot life is not an excuse to rush; it is a window in which the adhesive remains workable before its workability begins to fade. During this stage, it is useful to consider the thickness of the bond line. A uniform, thin layer usually yields better long-term performance than a thick application, which can trap solvents or create stress concentrations as the material cures.
The actual application combines technique with discipline. Use a spreader or a thin-edge spatula to spread an even coat across the bonding surface. Avoid creating air pockets that could expand into micro-bubbles once the adhesive cures. The aim is a continuous, congruent layer that smoothly transitions from one panel to the next. In some instances, it makes sense to clamp or tape parts temporarily to maintain alignment and pressure while the epoxy sets. This is especially important for joints that join panels at non-parallel angles or where there is a potential for movement as the fairing is secured to the subframe or adjacent components. When clamping, distribute pressure evenly along the joint to avoid localized squeezing that could squeeze out excess resin and produce dry spots at the bond line. The intent is to keep the components pressed firmly together without warping the panels or introducing bend stresses that the finished fairing cannot tolerate.
Curing is the long, quiet phase in the life of a bonded fairing. Room-temperature curing, typically spanning 24 to 48 hours, is sufficient for the majority of structural and cosmetic joints on motorcycles. During this window, the environment matters as much as the resin chemistry. Humidity, ambient temperature, and airflow all influence cure kinetics. A damp or overly cool environment can slow cure and leave the joint marginally pliable, inviting micro-movements as vibration resumes once riding begins. Conversely, an excessively warm, stagnant space can accelerate curing to the point of producing internal stresses or a brittle edge. The safest practice is to maintain a stable ambient around the bond, allow the joint to cure undisturbed, and avoid disturbing the panels during the entire cure window. If the bike is in a workshop, a gentle, steady room temperature—around typical indoor conditions—supports a predictable cure. In some cases, a mild external heat source, if recommended by the adhesive data sheet, can accelerate cure time in cooler climates, but this should be used with caution to avoid over-heating or uneven curing. The post-cure texture should feel firm to the touch, with the joint showing no signs of tackiness or deformity when gently pressed. Only after the full cure should the fairing be subjected to handling, trimming, or any finishing steps.
Safety is the quiet backbone of a successful epoxy project. Epoxies release potent vapors and can irritate the skin or eyes. Work in a well-ventilated area, ideally with a direct path for fumes to escape. Protective gloves should be worn at all times to prevent skin contact, and eye protection is essential when mixing or once the resin is underway. It is prudent to work with small, controlled batches to minimize waste and reduce the risk of uncontrolled curing once the components are mixed. A steady, measured approach minimizes the chance of mis-mixed resin casting a hard, impenetrable seam where removal would be difficult should disassembly ever be necessary. And speaking of removal, it is reasonable to acknowledge that epoxy bonds are designed for durability. When future disassembly is anticipated, consider using a bond line that allows some degree of separation, such as incorporating a controlled gap that can be developed into a removable mechanical joint or using a less aggressive adhesive with partial cure characteristics. It is always wise to review the technical data sheets for guidance on bond line thickness, cure times, and recommended surface pre-treatment.
In practice, a well-executed epoxy bond becomes more than a mere chemical connection. It is a living interface that tolerates the bike’s dynamic life: the micro-movements as the engine and wind load the frame, temperature variations from dawn to high noon, and the occasional cornering or wheel-bump that taxes the panel. When done correctly, the bond line maintains a clean edge, with minimal squeeze-out to tempt a trim and finish that could dull the fairing’s aesthetic and functional profile. The result is a panel that looks seamless, yet remains capable of enduring the rigors of riding and maintenance. It is within this quiet strength that the epoxy reveals its value: a compound that respects the plastic or composite substrate while providing the resilience needed for a motorcycle’s most demanding cosmetic and structural roles.
The guidance offered by manufacturers of automotive and motorcycle adherents emphasizes disciplined practices. They advocate a methodical workflow—from substrate preparation through mixture, application, and controlled curing—to maximize adhesive performance. The emphasis is not on a single magic formula but on a reliable process that can be replicated across different fairing models and bike brands. The practical takeaway is straightforward: invest time in surface preparation, apply a uniform, thin bond line with careful alignment, protect the joint during cure, and follow the data-sheet instructions for mixing and curing. When those steps are followed, even a relatively modest epoxy system can deliver long-lasting performance without requiring heat or specialized equipment during installation.
For readers who want a deeper dive into the procedural details and substrate compatibility, the technical resources of adhesive manufacturers offer practical guidelines tailored to plastics and composites used in automotive and motorcycle applications. These resources describe surface activation methods, degreasing formulations, and recommended pre-treatments that can expand the range of plastics and composites that will bond successfully. In addition to manufacturer guidance, communities of builders and repair technicians often share their experiential notes, highlighting the importance of consistent surface prep and the care required to maintain panel alignment during cure. If you are building or repairing a modern fairing collection that includes different plastics or composite layers, consider sourcing a two-part epoxy system explicitly designed for plastics, and follow it with the exact steps outlined above to ensure a reliable, durable bond.
For a targeted look at assets related to specific fairing families and to explore community-driven insights, you can visit the Honda fairings collection. This resource provides a catalog of common panels and mounting interfaces that are particularly relevant when planning epoxy repairs or rebuilds of Honda fairings. Linking to the catalog helps ensure you’re aligned with the types of joints and materials that are frequently encountered in modern motorcycle bodies: Honda fairings.
In practice, the best epoxy application approach remains rooted in a disciplined routine. Start with a clean slate—literally, a clean surface—then progress through measured mixing, careful application, and controlled curing. Treat the process as a craft that respects both chemistry and mechanical dynamics. It is precisely this blend of science and hands-on technique that yields fairings capable of withstanding the road’s demands while preserving their aesthetic integrity over time. The better the preparation and the more thoughtful the cure, the more forgiving the bond will be to future maintenance, removal, or modification. This balance—between strength and adaptability—is at the heart of choosing epoxy for motorcycle fairings and at the heart of every successful repair or assembly. For further reading on the practical application of epoxy adhesives to plastics and composites, consult the external technical resources that summarize best practices across the industry, including guidelines for bond-line control, substrate activation, and post-cure considerations. You can explore these insights at a general resource that covers epoxy adhesives for plastics and their use in automotive applications: https://www.loctite.com/en-us/technical-resources/epoxy-adhesives-for-plastics.
Bonded for the Ride: Epoxy Systems for Motorcycle Fairings
Choosing epoxy for motorcycle fairings is a practical exercise in balancing mechanical performance with process practicality. The fairing must absorb vibration, withstand temperature swings, and remain repairable. The resin matrix and the reinforcement it binds determine stiffness, toughness, impact resistance, and how the panel behaves in wind and over long miles. Epoxy resins, when paired with the right fibers, become more than glue: they are the structural heart of the fairing, shaping how it resists delamination, transfers loads, and accepts repairs when needed. The practical upshot is that the best epoxy system is not a single product but a deliberate pairing of resin chemistry with fiber architecture and with the intended service environment.
A room temperature curing epoxy resin adhesive is especially appealing for fairing work because it avoids the need for specialized heating equipment in the workshop. Such systems cure fully at ambient conditions, forming a strong bond between dissimilar materials and allowing on site repair or retrofit. The curing schedule should balance open time for thorough wetting with an efficient final cure to minimize project downtime. In practice, ambient cure epoxies support large fiberglass panels and repaired castings typical of fairing structures, while keeping heat input low enough to avoid softening delicate plastics.
Fiber choice matters. Fiberglass-epoxy systems provide predictable performance and cost-effectiveness, which is why they remain common in touring and mass-produced fairings. Carbon fiber-epoxy offers higher strength-to-weight ratios and stiffness for performance oriented builds, but with higher cost and more demanding processing. Hybrid laminates that combine glass and carbon seek a pragmatic compromise, spreading load while controlling weight and cost. The exact mix should be driven by the riding context and the required balance between impact resistance, stiffness, and repairability.
Practical fabrication and assembly hinge on good surface preparation, controlled resin mixing, and a repeatable cure protocol. Surfaces should be clean, dry, and free of contaminants; light abrasion helps mechanical interlock; degreasing ensures even wetting. The epoxy must be mixed in the correct ratio and stirred to minimize resin-rich or resin-poor pockets. A uniform, thin bond line reduces differential thermal movement, while clamping or fixturing preserves curvature during cure. Finally, the cure should be allowed to progress to a stable state before exposing the panel to heavy loads, heat, or ultraviolet exposure.
In the end, the best epoxy choice is a design decision. Touring riders may prioritize repairability and cost, while race-oriented builds demand maximum strength and lightness. The material system should be validated through testing and field experience, then mapped to a lifecycle plan that considers maintenance, repair, and long term durability. The result is a fairing that maintains its shape, resists delamination, and can be repaired in a way that preserves both performance and aesthetics.
Final thoughts
Understanding the best epoxy for motorcycle fairings is vital for ensuring durability, reducing repair times, and enhancing customer satisfaction in the motorcycle business segment. By selecting high-quality products like J-11 Room-Temperature Curing Epoxy Resin Adhesive and applying them using proper techniques, business owners can achieve reliable results. The continuous evolution of epoxy technology promises even better solutions for the future, making it essential for businesses to stay informed and adapt their practices accordingly. In the competitive motorcycle industry, utilizing the right materials can set your offerings apart and build a loyal customer base.