
Repairing motorcycle fairings with fiberglass is crucial for any business that deals with motorcycle maintenance and bodywork. Understanding the steps and requirements for repairing these components not only enhances customer satisfaction but also ensures the long-term integrity and aesthetics of the motorcycles. This guide covers preparation and surface cleaning, materials assessment, and application techniques essential for effective and efficient repairs. Each chapter builds upon the understanding of fiberglass repair, equipping business owners with the knowledge needed to perform high-quality work that meets industry standards.
From Clean Surface to Bonded Strength: Precision in Preparing Fiberglass Motorcycle Fairings
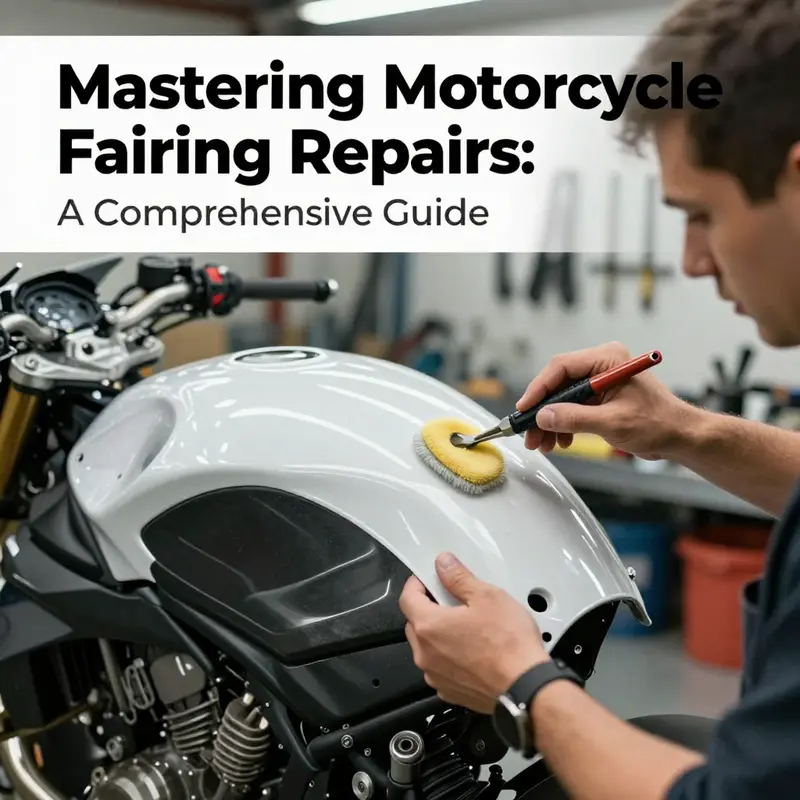
Every repair begins before resin meets material. In fiberglass fairing restoration, the preparation and surface cleaning stage is not a mere prelude; it is the foundational work that dictates adhesion, longevity, and the final visual quality. A rigorous, methodical approach during cleaning and prep directly translates into a stronger bond between the old substrate and the new fiberglass reinforcement. It is here that the repair either gains a lasting integrity or falters under the impact of contaminants that stubbornly resist resin penetration. To appreciate why this step earns the most careful attention, imagine the surface as a stage awaiting a performance: if the stage is slick, oily, or uneven, the performers—fiberglass cloth, resin, and filler—cannot hold their choreography for long. By aligning technique with material behavior, we set the scene for a repair that endures both the test of time and the exposure of road conditions.
The process unfolds with three core aims. First, remove all foreign matter that can impede resin bonding. Dirt, grease, wax, and old coatings form a barrier layer that reduces surface energy and creates interfacial weaknesses. Second, establish a slightly roughened, clean, and oil-free canvas that offers mechanical keys for resin to grip. Third, safeguard the repair during curing by controlling moisture, temperature, and contamination exposure. Accomplishing these aims requires a careful blend of chemistry, technique, and environmental awareness, because fiberglass repairs are as much about controlling the micro- environment as they are about applying resin and cloth.
The initial act of preparation begins with thorough cleaning. A dedicated automotive or motorcycle cleaner is a practical choice, but the essence lies in selecting a solvent system strong enough to cut through dirt and grease while gentle enough not to attack the bicycle’s plastic matrix. Degreasing agents paired with a lint-free cloth or sponge are ideal for this stage. The goal is to dissolve wax residues and emulsify oil without leaving fibers behind, which means soft, non-abrasive materials and a technique that avoids corner-cutting. For stubborn residues, a second wipe with isopropyl alcohol helps to remove any lingering film and to evaporate rapidly, reducing the risk of solvent entrapment beneath any new resin. The emphasis here is on deliberate, repeated passes rather than a single rush to finish. Each pass should remove a layer of contamination and reveal a consistent, clean surface behind it.
Rust and corrosion require particular attention because they introduce porosity and unevenness that can compromise adhesion. If subsurface corrosion exists, it must be treated and neutralized before any sanding or layering begins. A rust remover can be used with caution, followed by light sanding to smooth the treated area so that the surface remains uniform. This is not a step to rush; any residual oxidation can become a site for initiating microcracks once resin is applied. The underlying principle is straightforward: any roughness or reactive spots left on the surface will translate through the repair layers, making the final finish appear uneven and potentially weakening the bond where the glass meets the base.
After the surface is clean and free of obvious contaminants, light sanding comes into play. The objective is not to strip the fairing down to bare plastic but to create a micro-roughness that the resin can key into. A fine grit range—typically 120 to 220—strikes a balance between creating sufficient texture and preserving the integrity of the original fairing material. Sand in gentle, even motions, using a sanding block or an orbital sander to maintain consistency in contour and avoid introducing flat spots or indentations. The double purpose of this sanding is to physically roughen the surface and to sweep away loosened particles that could otherwise become inclusions in the resin once it flows.
The removal of dust and debris is the next essential ritual. After sanding, there is no room for complacency; dust carried into the repair can become an invisible but stubborn defect that interrupts the smooth interface required for a quality bond. A clean, lint-free cloth is a favored tool for wiping down the surface, followed by a careful application of compressed air to dislodge any fine particles from crevices and recesses. Even micro-particles trapped in corners can create peaks or voids in the repair, which stresses the margin where resin meets old material. The emphasis is on thoroughness rather than speed, a recurring theme in any precise composite repair.
Optional priming or bonding agents can further augment adhesion at this stage. While not mandatory in every repair, a thin, even layer of primer or bonding agent designed for plastics and composites can help the resin-to-surface interaction by improving surface energy compatibility. This step is particularly beneficial when the old surface has varying textures, or when the fairing has experienced multiple repairs that may have introduced micro-level inconsistencies. A bonding agent does not replace the need for clean and roughened surfaces; rather, it complements them by ensuring a more uniform interface across the whole work area. If you choose to apply primer, do so sparingly and allow it to become tack-free before resin application, following the specific instructions for the chosen product. The underlying logic is simple: better surface compatibility leads to more predictable wetting by resin and a reduced risk of trapped air or poor interfacial bonding.
To reinforce the philosophy of this stage, consider the broader mechanics at work. Fiberglass resin seeks to penetrate into the weave and flow across the surface with minimal resistance. If the surface is contaminated, resin cannot wet it properly, which creates a perched interface that can crack or delaminate under stress. When the surface has a subtle roughness and is free of oils, resin can spread evenly, saturate the cloth, and wet the substrate. This wetting, which describes how well a liquid film covers a solid surface, is the invisible determinant of a durable repair. In practical terms, the better the surface is prepared, the less likely you are to encounter air pockets, resin starvation, or weak spots where layers meet. Preparation, in this sense, is the quiet, practical force behind the visible perfection of the finished fairing.
As the preparation scrutinizes the surface, it also sets the tone for subsequent steps. The cut and application of fiberglass cloth, the layering of resin, the cure, the sanding, and the final finish all hinge on the prep quality. If the initial surface has been neglected, the patchwork may appear visually convincing at first but can deteriorate under the paint, heat, or vibration of riding. Conversely, when prep has been meticulous, subsequent layers have a more forgiving path to curing and shaping, and the final color and gloss can be achieved with greater fidelity to the original appearance. The practical upshot is that the time invested in preparation pays dividends later in the process, both in structural integrity and in the ease of achieving a seamless finish.
In this light, the preparation and surface cleaning phase is more than a sequence of tasks. It is a disciplined approach that respects the physics of adhesion and the realities of field repairs. It invites the technician to balance chemistry with technique: to choose appropriate cleaning agents, to temper the aggressiveness of sanding with the need to preserve the fairing’s geometry, and to recognize the subtle signals of contamination that can undermine the entire repair. Some riders repair a small nick with a simple filler, while others tackle more extensive damage that requires careful assessment and validation before proceeding. In any case, the responsible path remains the same: a clean, well-prepared surface stands as the measure of the repair’s potential success.
To help you navigate toward a repeatable and reliable outcome, a few practical reminders can anchor your approach. First, treat every repair as if it were the restoration of a sculpture: the surface deserves patience, precision, and respect. Second, work in a well-ventilated area and wear protective gear. Resins and solvents are effective but hazardous, and exposure should be minimized. Third, document any unusual surface conditions you encounter—pitting, deep scratches, or previously applied fillers—which may influence your choice of materials and the subsequent repair strategy. Fourth, keep the repair area as clean as possible throughout the process. A small dust particle can become a stubborn defect once resin is applied. Finally, remember that the preparation phase not only shapes the technical quality of the repair but also informs the aesthetic outcome. A well-prepared surface is more forgiving to the eye, enabling a finish that blends with the surrounding fairing rather than shouting for attention as a patch job.
For readers who want to explore a broader set of related components and options, consider visiting Honda fairings as part of your broader project planning. The internal product category for Honda fairings offers a spectrum of panels and options that enthusiasts often consider when planning a repair that includes replacement pieces or a complete restoration of the fairing’s appearance. This can be especially relevant when color matching and texture are critical to achieving a seamless look after the repair is complete. Access the category here: Honda fairings product category.
As you proceed from preparation toward actual repair, the quality of your surface work will continue to echo in every subsequent layer. The resin’s ability to wet the surface, the cloth’s sag and lay, and the eventual sanding and finishing all rely on the foundation you have laid in this critical phase. A moment of thoroughness now reduces the risk of rework later and improves the likelihood that the final finish will resemble the original fairing. The details matter—the alignment of the edge, the uniformity of texture, and the absence of haze or surface irregularities all begin here, during the conscientious cleaning, roughening, and dust-free preparation that precedes any resin work. When approached with patience and discipline, preparation becomes the quiet engine of a durable, aesthetically pleasing fiberglass repair that can stand up to the demands of the road and the scrutiny of the street-gear connoisseur who values a bike that looks as good as it performs.
In sum, the preparation and surface cleaning stage is not simply about removing dirt. It is about engineering a reliable interface for the repair. It is the stage where meticulous handling, proper material selection, and disciplined technique converge to create the conditions under which a fiberglass repair can thrive. This is the cornerstone of a repair that remains solid, remains true to the original contour, and remains resistant to the stresses of speed, weather, and mileage. The rest of the process will unfold from this strong base, but it will only perform as designed if the surface has been treated with the care and attention it deserves. To readers who prefer to consult authoritative guidance on the broader techniques of fiberglass fairing construction and repair, the following external resource provides a detailed treatment of methods and considerations relevant to this entire chapter: https://www.researchgate.net/publication/348976578ConstructionofFiberglassMotorcycle_Fairings
Choosing the Fiber Backbone: A Deep Dive into Materials for Fiberglass Motorcycle Fairing Repairs
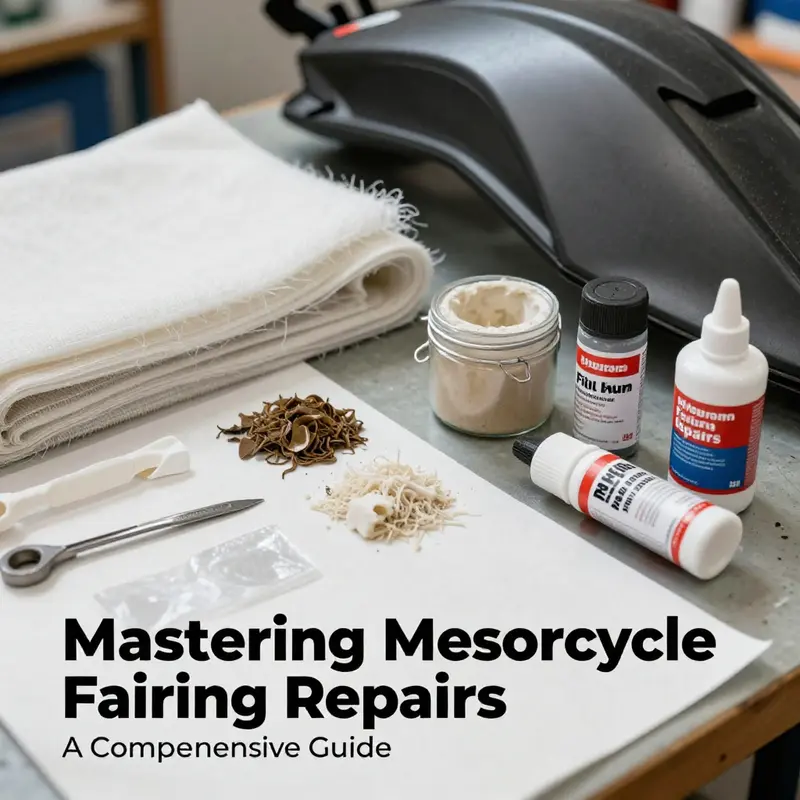
Choosing the fiber backbone for a fiberglass motorcycle fairing repair is more than a practical decision; it is a strategic one. The materials you select determine not only how strong the fix will be but also how seamlessly the repair will blend with the original shell, both aerodynamically and visually. In this chapter, we move through the material landscape with a focus on how each choice shapes the repair’s durability, surface finish, and long-term performance. The goal is to build a repair that stands up to vibration, heat, moisture, and the daily fatigue of riding, while still allowing a finish that looks like it belongs on the bike from the showroom floor. The discussion centers on resin systems, reinforcement fabrics, surface preparation aids, and fillers, and it threads a throughline from initial material decision to final paint, with careful attention to how these choices interact with the fairing’s plastic or composite substrate. The flow of the repair is guided by the damage’s severity, the fairing’s geometry, and the environmental conditions in which the work takes place, but the decisions about materials set the ceiling for what is possible and practical in a DIY or shop setting.
Resins are the heart of any fiberglass repair. Polyester resin remains the most common starting point for hobbyists and professionals alike because it is affordable and forgiving enough for many repairs. It cures quickly and sands fairly well, and it accepts a simple layering approach when adding reinforcement fabric. Yet polyester resin has its tradeoffs. It is more prone to moisture absorption over time and can be less forgiving in heat-rich environments, where shrinkage and minor warping can appear if cure is not properly controlled. Epoxy resin, by contrast, offers superior strength and improved resistance to environmental factors. It bonds aggressively to the old material, develops a tougher finished structure, and performs well under sustained heat and humidity. Epoxy’s chemistry also provides better gap-filling properties, which can help when the old fairing surface is uneven or slightly deformed. The cost is higher, and handling requires a bit more attention to mixing ratios and pot life, but the payoff is a repair that behaves more like a structural patch rather than a cosmetic bandage. When durability is a priority—such as on high-mileage bikes or parts exposed to frequent sun and rain—epoxy stands out as the more robust choice.
The choice between polyester and epoxy should be informed by the specific repair context. For small cosmetic cracks or shallow surface damage, polyester’s speed and ease make it a sensible option. For deeper cracks, missing chunks, or any repair that will be relied upon in demanding riding conditions, epoxy is worth the extra planning and cost. It is important to align the resin choice with the fairing’s substrate. Some plastics used in modern fairings interact differently with solvents and bonding agents, and certain epoxies are formulated to exhibit better adhesion to these plastics. In practice, many technically minded riders will prep the surface thoroughly, use a clean, compatible bonding agent, and then apply an epoxy system to ensure a rock-solid bond. A careful approach to resin selection can reduce the need for excessive sanding later and help the final layer of paint lay down more evenly.
Reinforcement fabrics form the structural spine of the repair. Fiberglass cloth, in its woven forms or in mat, offers an excellent balance of strength, conformability, and ease of use. The woven cloth provides predictable draw characteristics and a smooth surface that can wrap around gentle curves with fewer wrinkles. It is the standard choice when the goal is a repair that can withstand flexing and stress without compromising the fairing’s overall shape. Mat or roving, on the other hand, can be used to build up thicker sections quickly or to add bulk where a large void needs filling. The key with any reinforcement is to ensure the fabric lies flat against the repair area while the resin saturates it fully. Air pockets or dry spots are the enemies of adhesion; they create weak points that can propagate cracks under vibration. When choosing fabric, consider the fairing’s curvature. Woven cloth tends to adapt better to gentle curves, while roving can be advantageous for flat or sharply angled sections where multiple layers are required to build up the thickness.
Surface preparation is the invisible handshake that makes the entire repair possible. Thorough cleaning removes oils, waxes, and silicone residues that can undermine adhesion. A dedicated automotive or motorcycle cleaner is ideal, followed by careful drying. If rust or superficial corrosion exists near the edge of the damage, address it with a rust remover and a light sand. Every contaminant left on the surface is a potential barrier to the resin’s ability to grab onto the old fairing. It is equally important to consider the bonding surfaces. In some cases, a bonding agent or primer designed for plastics and composites can significantly improve adhesion between the existing fairing and the new fiberglass layer. The choice of bonding promoter is not merely a convenience; it is a means to extend the life of the repair by ensuring the laminate remains bonded even under the forces created by vibration and temperature changes. The surface prep stage is the quiet career-builder of the repair—often unglamorous, but decisive for long-term success.
Fillers occupy a different arc in the repair narrative. They are the tools that shape the transition between the repaired area and the original fairing, smoothing out irregularities that come from imperfect resin saturation or uneven initial layups. Microballoons and fiberglass fillers are common choices. Microballoon fillers are light and patch small imperfections without adding excessive weight, making them suitable for cosmetic refinishing. Fiberglass-based fillers provide a stronger base for larger shaping tasks and can help level thicker repairs before final sanding and priming. The decision to use filler is not simply about making things look smooth; it is about enabling the paint to lay down evenly and match the surrounding texture of the fairing. In practice, a repair that starts with careful layering of resin and cloth often ends with a skim of filler to eliminate micro-blemishes. The smoother the surface at this stage, the more uniform the final coat of paint will appear, and the less time you will spend chasing pinholes or stubborn texture differences.
In addition to the core materials, there are ancillary considerations that can materially affect the quality of the finished repair. Mold release agents, for example, can simplify the removal of temporary forms or backing materials used during the repair. While not always necessary in a straightforward patch, these agents can be a lifesaver when shaping complex geometries or creating a backer for a recessed surface. Surface activators or primers applied before the resin can also promote better adhesion and provide an even base color for subsequent paint work. The role of these agents is sometimes overlooked in DIY repair guides, but the reality is that small investments in preparation and adhesion aids here pay dividends in the final gloss and smoothness of the surface.
The next layer of decision-making comes from considering the fairing’s intended life cycle and environment. If the bike is a daily rider, frequently exposed to sun, rain, road salt, and heat from the engine’s proximity, then the repair should be built with materials and a process that resist moisture permeation, offer robust adhesion, and respond well to multiple paint layers. Epoxy’s resilience to moisture and heat makes it attractive in such scenarios, but it does demand careful handling and curing. The curing environment matters as much as the materials themselves. A room temperature cure that is consistent and free from moisture and direct sunlight yields the best outcomes. Rapid curing can trap volatiles and create internal stresses, leading to microcracking later. A patient, controlled cure ensures the laminate reaches full strength before any sanding starts. With these constraints in mind, the repair protocol emerges as a carefully choreographed sequence in which each material choice guides the next step, from surface prep to final paint.
Texture and finish are the final veil between a repaired part and the original fairing. Gel coats, if available for the specific fairing, can provide an initial texture and a protective outer layer. Gel coats can be applied in a manner that preserves the original gloss level, but achieving a match requires careful color and texture control. When a gel coat is not used, the finishing sequence becomes even more critical. A well-executed sanding and polishing regime can coax the repaired area to visually disappear into the surrounding surface. This is a craft as much as a chemistry, demanding attention to grit progression, pressure control, and consistent motion. The goal is a surface that accepts paint uniformly and shows no evidence of the repair under light or at typical viewing angles.
The technical dialogue about materials does not exist in isolation from the practical realities of a workshop. Tools matter, but intent matters more. The decision tree starts with damage assessment: what is the size, depth, and location of the repair? From there, you select resin type, fabric reinforcement, and fillers to match the anticipated load path and contours of the fairing. The repair then proceeds through a disciplined sequence: surface prep, resin and cloth layups, additional layers for reinforcement, curing, sanding, filling, priming, and painting. Each stage depends on the one before it, and the chain is only as strong as its weakest link. The more carefully you calibrate your materials to the specific task, the smoother the entire process will unfold and the greater the likelihood that the final finish is indistinguishable from the factory surface.
If you are repairing a Honda fairing or any other model with a particular contour or edge radius, the interaction between materials and shape becomes a practical guide rather than an abstraction. The fabric must lay into tight curves without wrinkling, and the resin must saturate without creating sags. In these cases, the exact choice of reinforcement fabric, combined with a well-matched resin, can dramatically affect the ease of layering and the quality of the final contour. For readers who want a concrete anchor in their planning, a look at the Honda fairings category can reveal how different fairing styles respond to common repair strategies and what practitioners report as reliable combinations for those shapes. You can explore the broader spectrum of options at this link: Honda fairings category.
As the repair progresses, a reflective pause helps keep the process aligned with the overarching goal: a fairing that looks and behaves like new. The material choices made early in the project ripple through the rest of the workflow. Choosing epoxy with woven fabric often translates into fewer layers and a sturdier backbone, but it also influences the sanding and finishing approach because epoxy-heavy laminates can sand differently from polyester-based laminates. The finishing strategy—whether you intend a matte or a high-gloss finish—will also steer your primer and paint selection. The final appearance hinges on meticulous surface prep, even application of primer, and controlled color-matching techniques that respect the original texture and sheen of the bike’s bodywork. The effort invested in the materials phase pays off in the paint stage, where a flawless, factory-like finish emerges from a well-bonded laminate and a smooth substrate. A cohesive approach to materials not only improves the repair’s immediate strength but also contributes to long-term durability, reducing the likelihood of future cracks or delamination across the repaired area.
To ground this discussion in practical guidance, it is useful to acknowledge the broader resources that guide professional practice in fiberglass repairs. A trusted repair manual offers step-by-step instruction on material selection, safety precautions, and technique. While the path from theory to practice may vary with the bike, the core principles remain stable: thorough cleaning, proper bonding, layered reinforcement, careful curing, and precise finishing. For readers seeking a structured, authoritative reference, the motorcycling repair manual archive provides a robust framework that can supplement hands-on practice in a workshop. The importance of adhering to recognized procedures cannot be overstated; it builds confidence and yields predictable results, especially when working with critical components like fairings that impact aerodynamics and aesthetics alike.
The discussion above circles back to the central aim of this chapter: to equip you with a materials-aware lens for repairing motorcycle fairings with fiberglass. The material choices are not mere technicalities; they shape the repair’s performance and its visual fidelity. By balancing resin type with reinforcement strategy, by harmonizing surface preparation with bonding agents, and by calibrating filler use to the repair’s exact needs, you can achieve a repair that endures. The level of finish you want—whether a subtle, nearly invisible repair or a high-gloss restoration—will be determined in part by your materials plan and the discipline with which you apply it. In the end, the best repairs are those that feel right under your hands and look right when you step back and inspect them in the garage light. The care you invest in material selection now will pay dividends in a smoother, longer-lasting ride later on, and that is the measure of a repair that truly respects the sport and the machine.
For readers seeking broader, detailed guidance that complements the approach outlined here, an established repair manual offers a comprehensive perspective on fiberglass fairing repair. This resource covers material specifications, safety considerations, and technique in a way that can deepen your understanding of the process and support more confident decisions during real-world projects. In addition to the core material choices discussed, such manuals underscore the importance of proper ventilation, personal protective equipment, and environmental controls—factors that significantly influence both the quality of the repair and the safety of the person performing it. By integrating these practices with the material-centered approach described in this chapter, you create a robust foundation for repairing fiberglass motorcycle fairings and restoring them to like-new condition.
In closing, the materials assessment for fiberglass fairing repair is not a checklist; it is a philosophy of preparation and precision. The resin you choose, the fabrics you lay, the bond you achieve, and the finish you demand—all cohere to determine the repair’s ultimate success. Treat each element with respect, stay mindful of the fairing’s geometry and service environment, and the result will be a repair that not only lasts but also looks—and feels—like a true part of the bike rather than a temporary fix. The next chapter will carry this continuity forward, translating the materials decisions into a practical finishing sequence that delivers a factory-like texture and color match, ensuring the repair remains visually seamless as the bike returns to road use.
External resource for further reading: official fiberglass repair manual
Fiberglass Fidelity: Mastering Application Techniques to Restore Motorcycle Fairings
Repairing a motorcycle fairing with fiberglass is less about brute force and more about disciplined technique. The goal is not merely to fill a crack or hide a scratch, but to recreate a sandwich of material that behaves like the original shell: strong, light, and capable of withstanding vibration, heat, and the occasional tip from a curb. The application techniques that govern this repair sit at the intersection of chemistry, mechanics, and artistry. When done with care, the finish is nearly invisible, and the repair can outlast the damage that caused it. The following narrative threads together the essential moves in a way that keeps the work flowing, from initial surface preparation to the moment the last clear coat settles into a flawless, ride-ready surface. Throughout, the emphasis is on a seamless blend with the surrounding fairing and a durable bond that stands up to the elements and weathered road surfaces.
The preparation begins long before you mix resin or cut cloth. Cleanliness is the first instrument in the repair kit. A dedicated automotive or motorcycle cleaner loosens and dissolves the film of oil, wax, and grime that has built up on the damaged area. A soft cloth or sponge is essential here; abrasives or rough towels can introduce micro-scratches that undermine adhesion. If rust or surface corrosion is present, it deserves immediate attention. A rust remover followed by light sanding not only stabilizes the metal interfaces beneath a composite repair, it also reduces the risk that a rust bloom will work its way into the resin and cause future failures. Contamination is the silent killer of adhesion. Any solvent residue, dust, or oily film can create a micro-layer under the repair that invites moisture and debonding, especially in the labored flex zones of a fairing that must endure vibration and heat cycling.
With the surface clean, the next decision concerns materials. For small cracks or punctures, less than an inch in diameter, fiberglass filler or gel coat can be adequate to restore the contour. But for any structural break or larger area, a fabric reinforcement—fiberglass cloth in mat or woven roving form—paired with a two-part resin system offers the durability required for road use. The two resin families most commonly referenced are polyester and epoxy. Polyester resin cures quickly and is user-friendly, but epoxy resin provides superior strength, moisture resistance, and a tougher bond to many plastics used in fairings. The choice often comes down to the damage profile and the long-term performance you expect. Regardless of the resin you settle on, the resin-to-hardener ratio should follow the manufacturer’s instructions to the letter. Precision here matters; a skewed ratio can lead to under-cure, gelation, or heat buildup that distorts the fairing during cure.
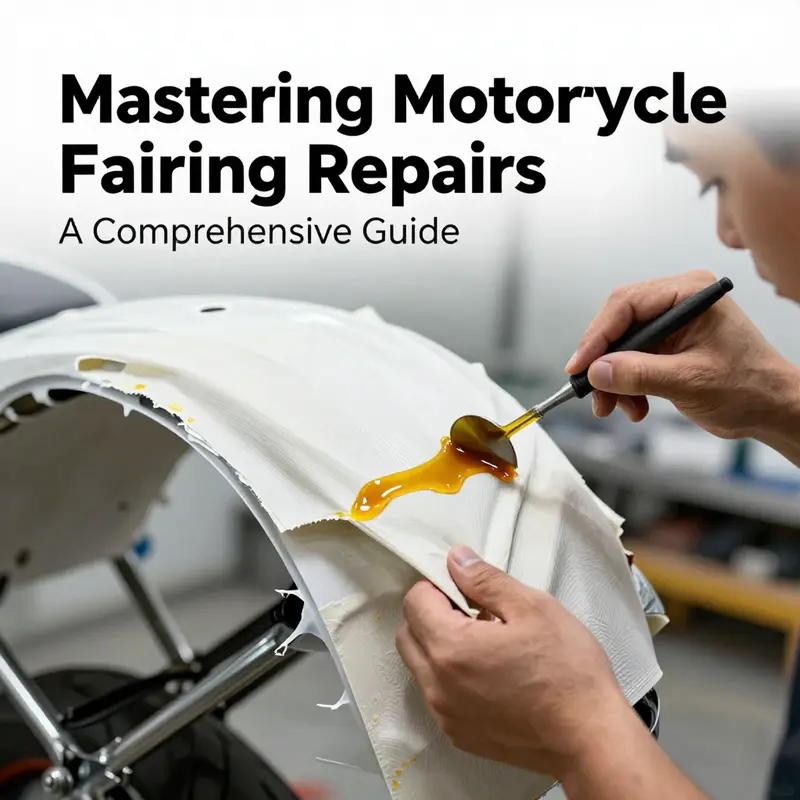
Once the damaged area is cleaned and the material choice is settled, you move to the cutting and layering stage. Cut the fiberglass cloth slightly larger than the damaged region, taking care not to cut beyond the intended repair area. A clean edge matters because ragged margins can trap air and create a feathered edge that won’t lay flush with the surrounding fairing. The resin is mixed first; typically a 1:1 ratio is specified, though some systems use a slightly different balance. Mix thoroughly to avoid pockets of uncured resin that can compromise strength. Before laying the cloth, apply a thin, even layer of resin over the repair zone. This primer layer serves two purposes: it wets the surface and it provides a tacky bed for the cloth to adhere to, reducing the chance of wrinkles or air entrapment as the cloth is laid down.
Place the fiberglass cloth over the damaged section with careful attention to alignment and tension. Resist the urge to stretch the fabric or to tug it into place—nonsense tension can cause micro-buckling that will show up as ridges once cured. The cloth should lie flat and drape naturally, following the contours of the fairing. Use a squeegee or a plastic spreader to press out air bubbles and fully saturate the cloth with resin. This step is where the repair earns its strength: a well-saturated layer binds the cloth to the base material and forms the smooth, continuous barrier that resists moisture and stress. After the first layer, assess the need for additional reinforcement. For major damage, two or three layers are common. Each layer should be allowed to partially cure before the next is applied—this staged approach minimizes squeeze-out and helps maintain alignment with the fairing contours.
Cure is a quiet, patient phase. Room temperature for most resins—roughly 60 to 75 degrees Fahrenheit (15 to 24 degrees Celsius)—is ideal. Moisture and direct sun can accelerate or distort cure in unpredictable ways, so a stable environment is worth the extra planning. The typical window is 24 to 48 hours, though some systems allow longer cure times for deeper, thicker repairs. The goal during cure is not to force the resin to set; it is to allow a gradual, complete cross-linking that creates a solid, weather-resistant patch. As the resin hardens, the texture of the repair begins to take shape. This is not the moment for aggressive manipulation; avoid heat sources, drafts, or any mechanical stress that might cause micro-cracking as the resin cures.
When curing is complete, the surface must be prepared for finishing. Sanding begins with a coarse grit and progresses toward finer grits to achieve a flush, uniform contour that matches the original fairing. Start with roughly 80-grit to remove excess resin and to shape the repair into the surrounding profile. This stage is about restoring the geometry without introducing hollows or ridges. Switching to 120- or 150-grit sandpaper lets you refine the transition. A sanding block or an orbital sander helps maintain an even plane and prevents localized dents that betray the repair. The objective is to achieve a surface that sits identically with the rest of the fairing, yet remains perfectly continuous in the eye of the observer and the touch of a gloved hand. Inspection should look for scratches that catch light at various angles; any telltale lines should be addressed with careful sanding and, if needed, a touch more resin to fill any shallow depressions.
Even after the macro contour looks right, there are often micro-scale imperfections that catch the eye under bright light. This is where a light fill with fiberglass putty or a standard body filler can be valuable. The filler is spread into tiny gaps and pinholes, allowed to dry, and then sanded again with progressively finer paper. The trick here is to apply very thin coats and to sand between coats, so you do not build up a wavy surface. The aim is not to hide flaws behind a thick crust but to create a seamless transition that the eye reads as part of the original fairing. The texture should be matched to the surrounding surface. If the fairing has a matte texture in certain light or a high-gloss finish in others, the filler work should respect that texture so the final paint coats do not reveal the repair beneath a surface that catches the light differently.
With the repair area physically smooth and contoured, the next phase is priming and painting. Priming is a bridge between the physical repair and the color you will apply. A primer designed for plastics and composites improves adhesion and seals the repaired area so it accepts paint evenly. The primer coat should be light and even, allowing the true color to come through without the risk of splotchiness or bleed-through from the repair materials. After priming, the paint comes next. Multiple light coats beat a single heavy dump; light coats reduce sags and ensure an even, uniform color depth. The painter’s goal is to reproduce the original hue and gloss level of the fairing. If the original finish is matte, your clear coat should be chosen and applied to protect the color without glossing beyond the intended look. If the finish is glossy, a high-gloss clear coat is appropriate, and the painter should take care to protect the lines and reflections that define the fairing’s shape. Clear coats also enhance resistance to UV exposure and weathering, extending the repair’s lifespan.
The final stage is the careful integration of texture and gloss. Motorcycle fairings are not just painted shells; they are engineered to manage light, shadow, and the feel of the vehicle. Achieving an invisible repair means observing the way the surface interacts with light and adjusting the texture so that the repair mirrors the surrounding area. Some fairings have a subtle texture or a tuned sheen that helps hide micro-variations. In others, a mirror finish is the goal. The painter must anticipate where micro-scratches and micro-peels tend to appear during the next years of use and plan for easy touch-ups. The texture and finish must be durable, resistant to fuel and solvent exposure, and forgiving of the road’s occasional abuse.
Safety, of course, accompanies every stage of this process. Work in a well-ventilated area, and protect your lungs and eyes. Protective gloves and goggles are essential, as is a respirator when sanding resins and fillers. Work outside of direct heat sources, away from open flames, and with careful attention to curing conditions. The resins used can be sensitive to temperature and humidity, which means that a little planning often saves a lot of rework. The chapter on technique would be incomplete without acknowledging that the art of repair is as much about process discipline as it is about the materials themselves. A steady hand, a patient pace, and a consistent routine create a repair that survives the test of time and the scrutiny of road wear.
As you navigate from rough repair to the finished fairing, it helps to keep an eye on the broader context of your bike’s bodywork. The visual balance of the repaired panel with its neighbors matters, especially for riders who chase perfection in the paint shop as part of a broader restoration or customization project. One practical approach is to first fix the structural portion with the proper lay-up and then to address the finish in a separate, clean session. This separation of concerns reduces the risk that an early finish will trap air pockets or fail under stress later when an additional layer of texture or paint is applied. The discipline of this approach mirrors other crafts where a small, calculated sequence of steps yields a high-fidelity result. The aim is a repair that not only looks right on the bike but feels integrated to the rider who sits in front of it, trusting the fairing to shelter the internal components and present a coherent silhouette to the world.
An important consideration is material compatibility. The resin choice should be guided by what the fairing’s base material is formed from. Many motorcycle fairings are derived from ABS or other plastics with specific bonding behaviors. Incompatible resins can lead to delamination or an edge that lifts under temperature cycles. For this reason, many technicians opt for epoxy resins when rebuilding structural sections and for specially formulated plastics primers when the surface needs extra bite for paint. The system’s overall temperature tolerance, flexibility, and impact resistance should align with the fairing’s operational environment. After all, the repair exists not just to be visually indistinguishable on a bench but to endure the vibrations and gusts encountered on the open road.
If you are scanning for a broader reference that captures professional best practices in fiberglass repair for motorcycle fairings, it can be helpful to consult a structured guide from an established training resource. This kind of guide provides industry-standard techniques, safety precautions, and material specifications used in professional body shops. Such resources can reinforce the decisions you make at the bench and help you understand the trade-offs between speed, strength, and finish quality. For readers exploring practical examples tied to different bike models and fairing shapes, a broader catalog of parts and fairings can be instructive. A good way to connect with these resources is to explore the wider ecosystem of fairings in the online marketplace, including sections dedicated to specific brands or models. For example, one can browse the Honda fairings collection to understand how different shapes and contours influence repair strategy and finish expectations. This approach keeps the repair work rooted in real-world applications while ensuring that the repair can be returned to its original visual and functional state, regardless of the panel’s complexity.
For readers who want to see a consolidated reference that complements the techniques described here, an external guide offers detailed, authoritative advice on fiberglass repair techniques. It provides additional context on resin systems, cure kinetics, and multi-layer strategies that are essential when tackling more demanding projects. This resource serves as a valuable companion as you build confidence with lay-ups, clamping methods, and finishing sequences, especially when returning a panel to factory-like geometry and gloss. The combination of hands-on practice and reference materials helps ensure that each repair advances your craft and preserves the integrity of the motorcycle’s aesthetic and structural performance.
Internal link reference: If you are exploring how different fairing families influence repair approaches, you may find it helpful to browse a range of model-specific parts collections, such as the Honda fairings category, which demonstrates how contours and mounting points affect the repair strategy and the finishing steps. This integration of model context with general technique is a practical way to connect the skill you’re building with the real-world variations you will encounter on the road. Honda fairings offers a window into how repair approaches are adapted to different shapes while maintaining the core principles of clean surface prep, targeted reinforcement, and careful finishing.
In closing, the journey from a damaged fairing to a restored panel is a sequence of deliberate micro-decisions as much as a sequence of large, visible acts. It is a craft, where each layer and each stroke of resin builds toward a single, durable, aesthetically coherent result. The technique described here is practical and repeatable, encouraging the kind of steady, patient work that yields consistent outcomes. When you master the layering, the curing rhythm, and the finish sequence, you are practicing not just a repair but a method for preserving the integrity and beauty of your motorcycle’s bodywork. The result is more than a patched surface; it is a reaffirmation of the machine’s original design language and a testament to the repairer’s craftsmanship.
External reference: For a comprehensive, field-tested guide on fiberglass repair techniques, see the external resource at https://www.motorcyclefairings.com/fiberglass-repair-techniques. This guide expands on resin selection, layering strategies, and finishing protocols that complement the practices outlined in this chapter.
Final thoughts
Repairing motorcycle fairings with fiberglass is a meticulous process that demands attention to detail and proper techniques. By following the outlined stages—from thorough preparation to careful application—business owners can ensure their repairs not only restore the motorcycle’s structural integrity but also deliver a flawless aesthetic finish. Embracing these practices enhances service quality, customer satisfaction, and the overall reputation of your business in the competitive motorcycle industry.