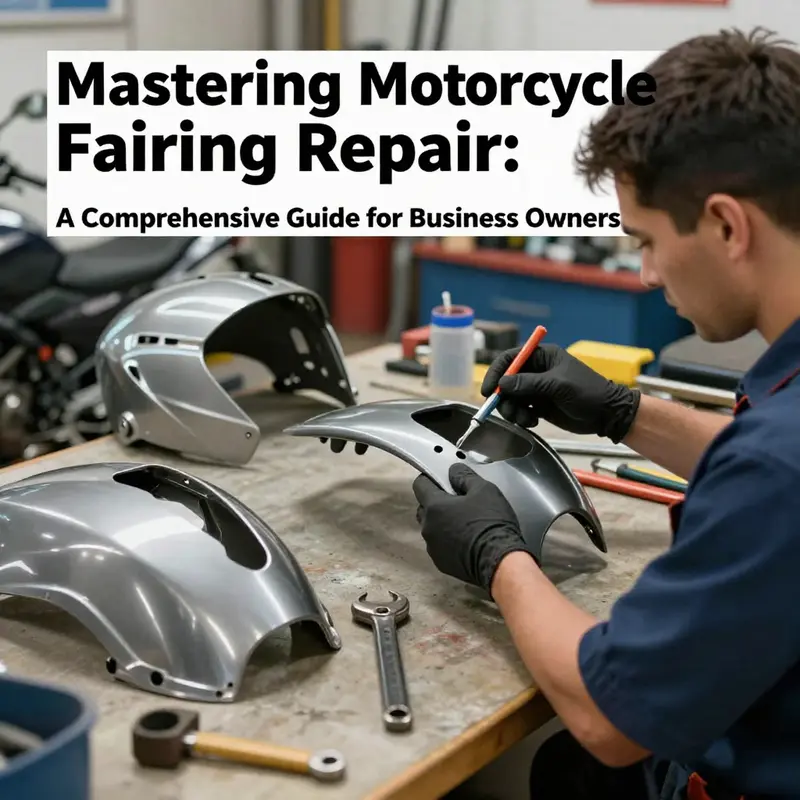
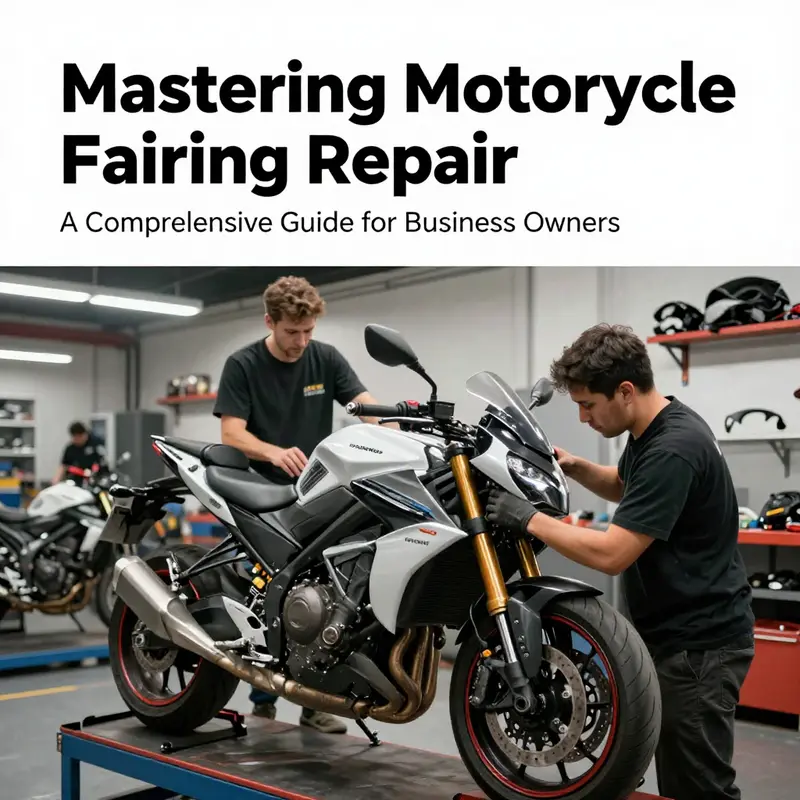
Motorcycle fairing repair is a critical aspect of maintaining the aesthetic and functional integrity of motorcycles. For business owners in the motorcycle industry, understanding this repair process is essential to providing high-quality service to customers. The fairing not only contributes to the motorcycle’s appearance but also plays a crucial role in its aerodynamics. This guide will delve into various aspects of fairing repair, including comprehensive understanding of the repair process, necessary materials and tools, effective techniques for repairs, and the benefits of professional services. By equipping yourself with this knowledge, you can ensure that your business remains competitive and capable of meeting customer needs efficiently.
Restoring Aerodynamics and Aesthetics: A Practical Guide to Motorcycle Fairing Repair
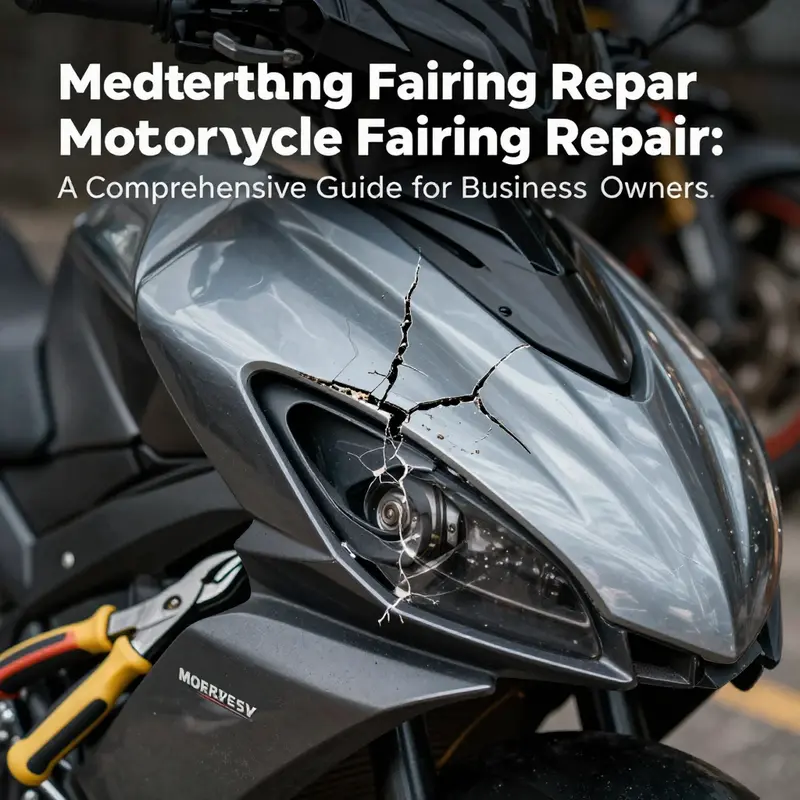
Motorcycle fairings do more than dress the bike in a polished shell. They shape the air, shield the rider from debris, and anchor the motorcycle’s heritage of performance. When a fairing cracks or splits after a tumble, the temptation is to swap the panel and move on. Yet even minor damage can disrupt aerodynamics, alter handling feel, and erode the visual language of the bike. The repair journey, however, can be as rewarding as it is practical. It allows a rider to preserve factory geometry, maintain original contours, and extend the life of a bike that’s valued for its ride and its look. The process sits at the intersection of care, technique, and patience, and it benefits from approaching repair as a craft rather than a quick fix. This means assessing the damage with honesty, choosing materials that respect the original structure, and following a disciplined sequence that meets both performance and aesthetic goals.\n\n The first responsibility is damage assessment. Fairings, particularly on models that enclose the engine or frame, carry more than cosmetic weight. A crack that penetrates a mounting point or a dent that deforms a mounting rail can propagate under load and temperature changes. In Honda models and others where the fairing panels are integral to aerodynamics, even a subtle crease can alter airflow separation and turbulence around the radiator or side intakes. The rider who understands this looks beyond the visible split to the potential structural or contour changes that may accompany impact. A careful evaluation starts with a visual sweep, but it benefits from a tactile check: run a gloved finger along the crack to feel for gaps, bounce test the surrounding area for looseness, and check the mounting points for loosened fasteners or broken clips. If the surface feels flexible or the crack runs deep toward a mount, it’s a sign that the repair must be approached with more than surface filler. In cases where the fairing holds critical lines for the bike’s silhouette, or where the panel has warped slightly, professional evaluation becomes prudent. For some riders, the difference between a DIY fix and a professional restoration is not just appearance but the assurance that the panel will withstand wind loads and vibration without a repeat failure.\n\n Once the damage is mapped, the body’s surface needs preparation for repair. Thorough cleaning is essential; oil, wax, and airborne contaminants can undermine adhesion, especially when epoxy resins or fiberglass fillers are involved. A mild degreasing soap, warm water, and a clean cloth should be used to remove residues from the entire affected region and a few inches around it to ensure edge-to-edge bonding. After cleaning, the next phase is to create a bonding surface. Sanding lightly with a fine grit (around 320 to 400) scuffs the plastic enough to give the repair material something to grab while avoiding deep scratches that will telegraph through the finish later. This stage is particularly important for ABS plastics, which respond best to heat-assisted bonding techniques. If heat is part of the repair plan, proceed with caution. ABS can warp under excessive heat, so a controlled approach—warming the area with a heat gun at a reasonable distance and speed—lets the material relax without deforming the panel.\n\n The repair materials themselves demand careful selection. For many fractures and dents, a two-pronged approach works well: a structural filler to restore the panel’s shape and a bonding resin to seal joints. Fiberglass cloth with resin is a time-tested choice for structural integrity, especially on larger areas or where a crack has created a hinge-like failure. The cloth acts as a reinforcing skeleton, while the resin binds the fabric to the plastic substrate, creating a stable patch that can hold fasteners and cope with vibration. For lighter damage or when color matching is paramount, epoxy putty or body filler can be employed to fill cracks and dents. The key is to apply in thin layers and to allow each layer to cure fully before the next, watching for heat buildup or curing cracks that indicate moisture entrapment or poor mixing. It’s tempting to rush these steps, but speed often hides a risk later: a seam that never truly adheres, or a finish that peels away after exposure to sun and rain. The discipline of patience here is a mark of a skilled repair.\n\n The shaping phase follows. After the filler cures, the surface must be contoured to restore the original geometry. Sanding becomes the primary tool of this stage, but it must be deliberate. Start with a coarser grit to flatten high spots, then progress through finer grits to achieve a feathered edge where the repaired area meets the surrounding panel. The aim is a seamless transition that the eye reads as a single, continuous surface. This is where the sport of repair reveals its art: the smoother the transition, the more convincing the repair will look, and the less likely the finish will reveal a repaired seam under sunlight or track heat. A well-executed profile also helps align the panel with adjacent components so that subsequent priming and painting achieve consistent color and gloss along the entire fairing.\n\n Priming and painting come next, and these steps are where the repair graduates from technician’s work to the finish riders notice. Priming serves two essential roles: it improves paint adhesion and it reveals any remaining imperfections that sanding alone cannot reveal. A high-build primer is often the best choice because it fills minor micro-scratches and creates a uniform surface for color. When applying primer, use light, even coats and let each coat dry completely before applying the next. Sand between coats with a very fine grit to maintain a smooth canvas—one that’s ready to receive paint without orange-peel texture or bond failure. Color matching is a meticulous task. Panels on modern motorcycles are often sculpted with complex curves and a jewel-like finish that relies on precise color, gloss, and depth. The color you apply should reflect the bike’s original hue and the panel’s perceived depth, which can vary with lighting and angle. A mixed color that isn’t perfectly matched will stand out in sunlight or under showroom lighting, drawing attention to the repair rather than the bike’s overall elegance. It’s here that many riders choose to rely on professionals for color matching, especially when the fairing is part of a full-color, factory-accented scheme. For those inclined to DIY, practice on a test panel or a spare piece of ABS that matches the same resin or pigment base to calibrate the shade before committing to the actual panel.\n\n The finish brings everything together. A clear coat protects the paint and adds gloss that helps blend repaired areas with the rest of the fairing. The right clear coat should be compatible with the base color and the primer; compatibility prevents cracking, yellowing, or the formation of micro-blisters under heat. A precise application—thin, even coats with ample drying time—minimizes risk and yields a durable, high-gloss surface. In the end, the repaired panel should not only look like new but also feel like it can handle the wind, heat, and vibrations that come with riding at pace. The true test of a successful repair is how well the panel preserves the bike’s aerodynamic profile, how it aligns with adjacent components, and whether the repair remains inconspicuous at typical riding speeds and light inspection angles.\n\n There is also a financial and practical dimension to consider. For full fairings that enclose the engine and frame, the complexity of matching contours, edges, and finishes can be daunting. In such cases, the cost and risk of a DIY repair can exceed the value of the part, or the result may not meet the rider’s expectations for factory-like precision. In these scenarios, professionals with specialized tools and experience can deliver a repair that respects the original geometry and maintains the bike’s performance envelope. Conversely, for minor scratches or small chips, a touch-up kit or a simple, well-executed repair can be perfectly adequate. The decision to repair versus replace is not only about dollars; it’s also about time, the resilience of the repair under environmental exposure, and how important pristine aesthetics are to the rider’s relationship with the bike.\n\n The repair ecosystem extends beyond the repair itself. For riders who want to preserve the look while experimenting with aesthetics or performance, aftermarket or replacement options exist, often in pre-cut fairing kits. These kits can simplify alignment and color matching when the existing panel is beyond straightforward repair. They also provide an option for enthusiasts who want to customize or refresh the bike’s appearance without sacrificing the ride’s integrity. In the context of Honda and other popular models, a well-chosen fairing kit can be a practical complement to thoughtful repairs, ensuring the bike remains visually cohesive while ensuring the fairing continues to perform as intended in terms of airflow and protection. When considering such routes, it’s useful to explore a broader catalog of fairings to assess fit, finish, and compatibility, keeping in mind the original contours that defined the bike’s dynamic presence. A clear approach to repair recognizes that aesthetics and performance are not opposing forces but two sides of the same coin, each supporting the other as you restore the motorcycle’s character and efficiency.\n\n The practical heart of fairing repair lies in knowing when to push through the DIY path and when to call in help. For riders who enjoy hands-on work and have access to a well-equipped shop, the journey from assessment to finish can be deeply satisfying and economically prudent. It reinforces a sense of stewardship over the bike and can teach valuable lessons about materials, adhesives, and finishes that translate to other maintenance tasks. For those facing structural distortions, complex curves, or a need to preserve exact aerodynamic lines, coordinating with a professional service ensures a result that respects the bike’s original engineering intent. The balance between DIY and professional repair is not about rigidity; it’s about recognizing where your skills and tools can meet the bike’s requirements without compromising safety, performance, or long-term value. In all cases, the underlying commitment remains the same: to preserve the fairing’s role in shaping the bike’s speed, stability, and style while honoring the rider’s connection to the machine.\n\n To anchor this discussion in a practical sense, consider how a rider might approach this repair in a typical scenario. A rider with a mid-range Honda model and a moderate crack near a non-load-bearing edge can begin with a conservative plan: clean, sand, and fill, followed by careful shaping and priming. If the crack is superficial and the surrounding surface remains rigid, this path can yield a solid repair that remains nearly invisible after painting. If the damage involves a more extensive fracture or a deformity in the mounting area, the rider may decide to reinforce with fiberglass and possibly replace a small section of the panel rather than attempting a single, heroic repair. The goal is not to push a patch beyond its limits but to restore the panel to a state where it behaves like a single, unified surface in wind and vibration. The result should be a fairing that looks right, fits well, and keeps the bike’s aerodynamics intact—an essential factor for riders who push the limits of speed and handling on open roads or track days. For people who want a deeper dive into step-by-step techniques, there are authoritative guides that break down each stage with precise material choices, curing times, and finishing practices. While the core principles—surface prep, proper bonding, careful shaping, and color-matched finishing—remain consistent, the exact materials and methods can be tailored to the specific model, resin system, and finish required. Those who seek to optimize outcomes may combine insights from multiple sources, always prioritizing safety, adhesion, and alignment with the bike’s intended performance profile. The road to a well-repaired fairing is less about a single trick and more about applying a disciplined method that respects the panel, the rider, and the air that carries them forward. \n\n For readers who want to explore a broader range of fairing options or to understand the latest cataloged possibilities for Honda and other brands, the Honda fairings category offers a curated view of panels that complement repairs and replacements. This resource can help riders assess fitment, contour, and finish as they plan returns to the road. Honda fairings serves as a practical starting point to compare alternatives that align with the bike’s geometry and aesthetic ambitions, while still emphasizing the repair process as the core path to restoration. The journey from a cracked panel to a restored silhouette is ultimately about preserving the bike’s performance envelope and the rider’s pride in the machine, and with careful work, the repaired fairing can ride as smoothly as the day it left the showroom floor. \n\n In closing this chapter of repair philosophy, the guiding principle is balance: balance between repair and replacement, between speed of completion and durability, and between the eye’s impression and the wind’s reality. A fairing that is properly repaired should feel sturdy, align perfectly with surrounding panels, and reflect the bike’s original spirit. The right materials, the right techniques, and the right amount of patience together enable a repair that does more than patch a crack. It reaffirms the rider’s connection to the machine and preserves the bike’s aerodynamic integrity for miles to come. The craft of fairing repair is a reminder that maintenance is not a one-off task but a continued dialogue between rider, machine, and road—the ongoing conversation that keeps performance honest and beauty intact across time. External resource: https://www.aliexpress.com/item/1005002498638517.html
The Quiet Craft of Fairing Repair: Mastering Materials, Tools, and the Road-Ready Finish
A fairing is more than a cosmetic shell on a motorcycle. It is a carefully engineered shield that guides air, protects the rider from wind and debris, and carries the bike’s personality in its curves and lines. When a crack runs through that shield, the repair is not merely about hiding damage; it is about restoring the bike’s aerodynamics, rigidity, and visual integrity. The task is a practical craft, grounded in a clear understanding of materials, a measured approach to tooling, and the restraint to avoid rushing the cure. The right combination of parts and processes turns a dented fragment into something that feels like it belongs on the bike again. It begins with a mindset that combines respect for plastic and an eye for finish that won’t crumble at the first flutter of wind on the highway.
Begin with a calm assessment. A small crack can be a surface blem that requires only a light touch, while a deeper gouge or a crack that splits through mounting points demands a more involved approach. The repair strategy depends on the type of plastic used for the fairing. ABS and polycarbonate are common, each with its quirks. ABS can be forgiving with the right adhesive and filler, but it may require more aggressive sanding to create a reliable bonding surface. Polycarbonate is tougher and more flexible, and it often demands specialized fillers and primers that maintain elasticity under strain. Recognizing these distinctions early helps prevent a repair that looks good in the shop but fails once the bike is back on the road.
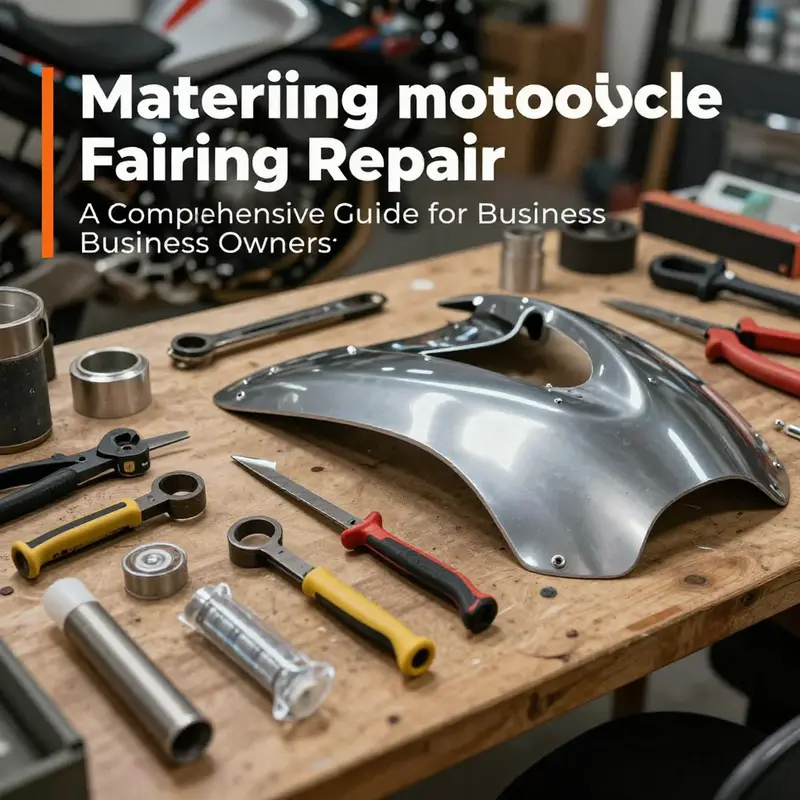
With the damage defined, the toolkit comes into play. The core tools are simple: a precision utility knife for trimming and cutting, a range of sandpapers from coarse to fine, screwdrivers and pliers for disassembly, a putty knife to work body filler or epoxy putty, and masking supplies to protect what you don’t want painted. A heat gun is a quiet ally in these repairs, useful for softening old adhesive or shaping soft plastic around a repair area. The discipline of this work is in the preparation. You do not rush when sanding; you work through grits methodically, letting each step reveal a surface that is receptive to bonding and finishing. The file is the mind of the process: you want a substrate that is clean, dry, and free of oils, with a texture that a filler can grip without peeling away later.
The materials that fill and seal the repair are more than a single product. A two-part body filler designed specifically for plastic, sometimes called a plastic repair putty, is often the first line of defense. It fills dents and cracks, forming a smooth, moldable surface that can be shaped with a putty knife. When a crack is wide or runs along a seam, an epoxy putty or a strong adhesive compound can reinforce the repair and hold broken pieces in alignment. The adhesive choice matters: for permanent bonding, it should be compatible with plastic, offering both structural strength and some give to accommodate the fairing’s flex during riding. A reliable primer designed for plastic or fiberglass is essential, because it creates a robust bond between the filler and the finish coat. The primer is not just a color base; it is a moisture and solvent resistant layer that locks the repair into the same plane as the rest of the fairing.
Color and finish follow, a stage that tests a rider’s patience as much as their hands. The painted surface must be flexible enough to move with the fairing as the bike flexes at different speeds and temperatures. A high-quality spray paint formulated for plastics is ideal. The color should be matched as closely as possible to the original finish, a task that often requires a test panel and careful shade comparison in natural light. In the best scenarios, you choose a color-matched paint from a reputable line, then top it with a clear coat that provides UV protection and an enduring gloss. The clear coat also offers a subtle defense against micro-scratches that can accumulate on a tucked highway ride. The result is a finish that looks seamless under showroom lights and on the road, where real-world sun and weather test the craftsmanship behind the repair.
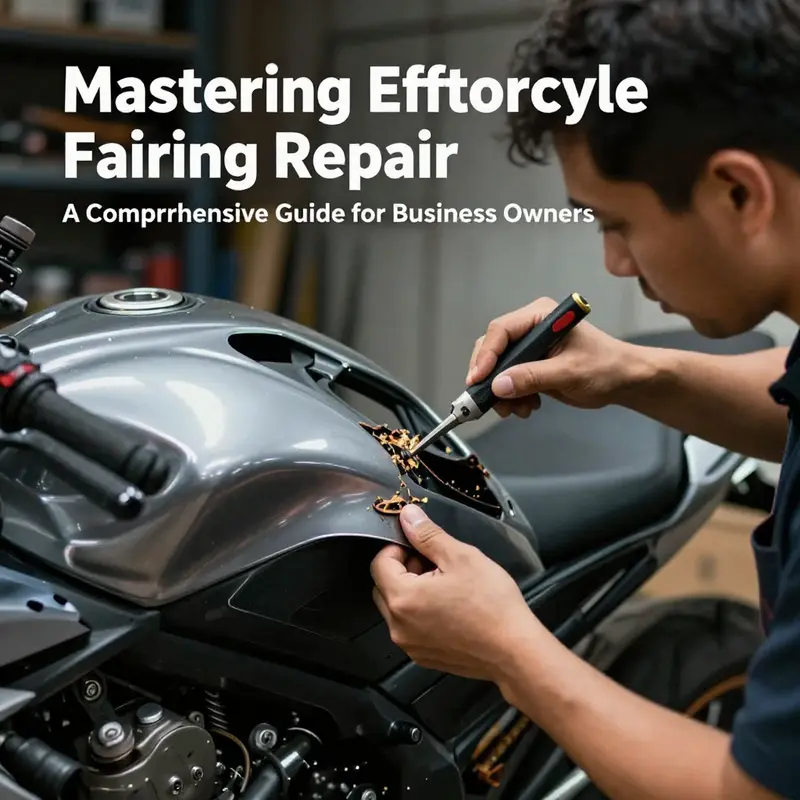
The sequence of work emphasizes the relationship between surface preparation and the longevity of the repair. Start by thoroughly cleaning the damaged area with isopropyl alcohol or a dedicated plastic cleaner to remove any oil, wax, or residue. Degreasing is essential because even a small amount of film can prevent a proper bond. After the surface is clean, roughen the area with a coarser grit, such as 80 or 120, to remove old paint or damaged material and to provide an anchor for the filler. For more intricate features, such as curves and edges, you can feather the edges with progressively finer grits to create a smooth transition from the original surface to the repaired zone. The goal is to create a uniform platform that makes the filler’s job straightforward.
Applying the filler is where science meets art. A plastic repair putty, when mixed according to the manufacturer’s instructions, should be worked into the crack and any dented pockets with a putty knife, pressing the material into the recess and removing excess until it sits about flush with the surrounding surface. If the crack has split across a seam, you may need to reinforce from behind the repair with a plastic bonding adhesive or epoxy putty, which can add structural strength and reduce the chance of the panel cracking again at the same point. The key is to let the filler cure fully. Rushing cure time invites risk: soft material can move as you sand, leading to a wavy, uneven finish. A patient approach pays off in a smooth, ready-to-prime surface.
Once cured, the sanding begins again, this time with finer grits to create a surface that feels uniform to the touch and looks even under light. The sanding process is not just about removing excess filler; it is about blending the repair edges into the surrounding fairing so there is no visible ridge. It can be a satisfying moment when a shallow scuff reveals a seamless line that appears to vanish with the touch of a finger. The next step is to apply primer. A plastic primer, sprayed in thin, even layers, provides a uniform biting surface for the topcoat and helps ensure the paint adheres over the entire repaired zone. Light, overlapping coats are better than a single heavy coat that can sag or peel. After the primer cures, a final light sanding with a very fine grit, such as 400, prepares the surface for paint.
Color matching is the trickiest part of finishing. The bike’s bodywork is rarely a single shade but a composition of panels from different batches and years. The painter’s eye becomes a partner in the process. In a perfect repair, the color difference is imperceptible in natural light, and the transition between old paint and new is a whisper rather than a shout. The paint itself should be flexible and specifically designed for plastics, not for metal, to minimize cracking as the fairing flexes during rides. The clear coat is the final layer of protection, lending resilience to sun exposure and weather while preserving gloss. Application should be in multiple thin passes, allowing for drying time between coats. Wet sanding and a final polish bring back a showroom sheen, but this step must be done with care to avoid compounding away the new paint or creating swirl marks that betray the repair.
The practical dimension of choosing materials is worth noting. A repair can be as simple as a crack sealed with a specialized adhesive and a light skim of plastic filler, or as involved as an epoxy-backed repair that uses fabric reinforcement on larger gaps. The latter approach is rarely needed for minor cracks but becomes prudent when a panel has suffered more dramatic damage or where a crack has spread across a significant section of the shell. In those cases, a layered repair that combines adhesive, fibreglass or carbon fiber cloth, and filler can restore structural integrity while preserving the fairing’s aerodynamic profile. The essence of material choice is compatibility with plastic, a robust bonding strategy, and a finish that behaves like the rest of the bike’s surface under the stress of wind at ride speed.
A rider’s toolkit is not complete without a strategy for safety and workflow. Nitrile gloves protect skin from solvents and resins, while a respirator or well-ventilated space protects lungs from fumes during sanding and painting. A clean work surface and a car-only drop cloth can keep dust and debris away from the repair area and prevent contamination of the filler. The discipline of the process is the virtue here: take time to mask off areas not being painted, and keep a tidy workspace to prevent stray dust from settling into the finish between coats. The more you respect the process, the more forgiving the finish will be should a stray piece of dust decide to land on the wet coat.
For those who are cataloging parts as part of a broader project, consider how the repair sits within the life cycle of the bike’s bodywork. Repairs that keep the original fairing in service can preserve the bike’s aesthetic and aerodynamic integrity, but there is value in evaluating replacement panels as a longer-term solution. If you decide to explore ready-made options, you can browse the BMW fairings category to see if a near-perfect replacement panel fits your needs. The path to restoration does not always end with a repair; it can lead to a blend of repair and replacement that keeps the bike looking and performing at its best. For riders who want to refresh several panels or who may be building a coordinated color scheme, acquiring multiple panels from a category like this can be a strategic move, especially when matched with careful refurbishment practices.
In many communities of riders, there is a shared sense that repair is an act of respect for the machine. The rider who repairs a fairing learns to listen to the bike’s cues—the subtle resistance, the way the panel returns to its shape after a strike, the way paint ached slightly in the sun and now looks flawless again. The repair is not merely hiding damage; it is a restoration of the bike’s silhouette, its aerodynamic performance, and its ability to convey a rider’s story without interruption. The tools and materials described here are not magic bullets; they are a framework for careful, deliberate work. The different shades of plastic require different types of filler and adhesion strategies, and the craftsman must match not only color but the very feel of the surface under a gloved hand. In the end, the goal is to ride with confidence, knowing the fairing has been brought back to life through method, patience, and a little quiet, skilled effort.
For readers who want to deepen their hands-on knowledge beyond the basics, there exists a detailed, step-by-step guide that walks through the entire process, including safety tips, the precise tools needed, and best practices tailored for motorcycle fairing repair. This resource reinforces the practicalities of the approach described here, offering a different perspective that can complement one’s own workflow and provide reassurance when encountering a repair that stretches beyond the simplest cracks. If you’re preparing to shop for parts, you may also want to explore the BMW fairings inventory shown in the linked category, which can help you plan both aesthetics and compatibility as you decide between repair and replacement. BMW fairings provides a clear view of available panels that may align with your project goals, especially when you’re working toward a seamless finish that honors the bike’s original lines.
In the end, a successful fairing repair is less a triumph of brute force and more a quiet mastery of materials, precision, and patience. The tools whispered into action, the filler carefully pressed into every seam, the primer laid down with a light touch, and the paint applied in careful, even layers—these elements come together to deliver more than just cosmetic rehabilitation. They restore the bike’s aerodynamic profile, preserve its structural integrity, and keep the rider connected to the road with renewed confidence. The chapter on materials and tools is not simply a shopping list; it is a map of how care manifests when a rider chooses to repair rather than replace. It invites you to consider not only what you have to do, but how you approach the work and what it says about the relationship between rider, machine, and road. And as you turn the pages of your own project, you’ll hear the quiet satisfaction that accompanies a repair done right—the moment you see the flush line, feel the smooth surface, and know the fairing stands ready to meet the next kilometer of highway with no visible compromise.
External reference for deeper step-by-step guidance can be found in a detailed article that walks through the repair process with explicit instructions, tools, and safety tips. For a comprehensive plan you can follow, see How to Repair a Cracked Fairing: Step-by-Step Guide. How to Repair a Cracked Fairing: Step-by-Step Guide.
Shaping Resilience: Mastering Techniques for Effective Motorcycle Fairing Repair
Repairing a motorcycle fairing is more than cosmetic; it is a careful restoration of aerodynamics, structure, and rider confidence.
The fairing guides air and supports the rider; when damaged, evaluate damage type, material, and load paths to decide between repair and replacement.
Begin with a sensibly staged assessment, because repair work becomes easier when you understand what lies beneath the surface. The majority of modern motorcycle fairings are made of durable plastics such as ABS or polycarbonate blends, though some are polypropylene or fiberglass reinforced composites in certain models. Each material carries its own bonding challenges. ABS loves a good bonding base but may respond differently to heat than a softer polypropylene. In all cases, the first step is to remove the piece if possible and work in a clean, well lit workspace. The goal is not only to seal a crack but to restore the panel’s alignment, contour, and surface rigidity so that subsequent influences—wind, heat from the engine, or road debris—do not reaccelerate damage.
Preparation is incremental and patient. Begin by cleaning the damaged area with a mild solvent that won’t leave a residue, then dry thoroughly. Dirt, oil, and wax are enemies of adhesion; any film on the surface will prevent filler or resin from grabbing hold. Once clean, the surface is scuffed with a fine abrasive—600 to 800 grit is a commonly effective range—to roughen the area just enough to give the subsequent materials a bite without creating new gouges. The objective is not to sculpt the panel at this moment but to create a mechanical key that keeps repair compounds from peeling away. If the damaged zone has a fold or a sharp edge, a light break with the sanding block helps to prevent the filler from bridging too abruptly, which could trap air and lead to a soft spot.
Filling and shaping constitute the heart of small-damage repair. For minor indentations or puncture like flaws, a plastic filler or an epoxy resin designed for plastics provides a solid, durable fill. The technique is straightforward but requires attention to uniformity and curing behavior. The filler is warmed as needed for consistency and then applied in thin layers, each layer slightly overfilling the defect so that, once cured, it can be ground back to the original contour. A flexible blade or spatula helps to smooth the surface flush with the surrounding skin. The shaping step is collaborative with heat and pressure: a light pass with a heat gun can soften the surface just enough to coax the filler into plane with the adjacent area, then a firm, deliberate scrape removes excess. This is where patience pays dividends. Rushing the process can trap air pockets, create drips, or warp the panel, undermining the repair’s long-term rigidity.
For longer cracks or fractures, bonding becomes more nuanced. A crack is not simply a break; it is a seam that requires careful fusion. Plastic welding, performed with a welding gun or a heated instrument and compatible plastic welding rods, is a common method. The process is not about melting the entire seam but about feeding heat steadily along the crack while pressing the molten material into the void to create a continuous, fused joint. The operator must move with deliberate, even speed to avoid overheating, which can degrade the polymer’s crystalline structure or cause scorching that leaves a weakness in the surface. In some cases, a crack might be widened slightly to allow for a reinforcing patch—thin plastic mesh or a similar compliant reinforcement—embedded with the weld to distribute stress. The reinforcement must be placed behind the surface layer or within the repair zone so that it does not disrupt the final shape or the aerodynamic surface.
If welding is not feasible for the given panel, adhesive bonding with a high-strength plastic resin can be an alternative, provided the bond line is adequately prepared. Like welding, bonding requires a clean, roughened surface to maximize contact area and a curing regime that avoids premature downwash from the air or incidental movement during cure. In every case, the aim is to restore the fairing’s structural integrity so that it behaves as a single, continuous shell rather than a stitched union that might crack again at the seam.
After the structural repairs have set, the next stage is to create a seamless exterior. Sanding plays a decisive role in both disguise and durability. The objective is not to erase the repair but to integrate it with the rest of the panel so that the eye reads a single surface, not a patch. The approach uses a progression of grits—from coarser to finer—carefully removing excess material and smoothing the transitions. A typical sequence would begin with 320 or 400 grit to address uneven areas, move through 600 to refine, and end with 800 to 1200 grit for a near-mirror finish. Use a sanding block to maintain flatness; freehand sanding invites waves that will show up in paint. Between grits, wipe away dust to avoid embedding abrasive particles that create fine scratches. For deeper repairs, you might revisit the filler layer and repeat the fill-sand cycle to reach a uniformly smooth baseline.
Polishing is the finishing touch that converts a repaired face into a convincing replica of the original sheen. After the final wet sanding, polishing compounds designed for plastics can restore gloss and bring back the clarity of the surface. The objective is to leave the area with a uniform luster that matches the rest of the fairing, not a showroom shine that creates a noticeable border where the repair sits. When done correctly, polishing reveals a continuous surface capable of withstanding road debris and UV exposure without looking obviously repaired.
Painting and protective coatings are the final acts in most repairs, and they demand respect for the plastic’s adhesion properties. A primer designed to bond with plastics lays the groundwork, sometimes coupled with an adhesion promoter to ensure the topcoat adheres through temperature fluctuations and sun exposure. The paint chosen should be compatible with the material, flexible enough to resist cracking under vibration, and, crucially, color-matched to the bike’s panel. Achieving color fidelity is more than a swatch test; it involves a controlled application environment where temperature and humidity are maintained, and multiple light coats are laid down with careful drying in between. Depending on the panel’s original finish, you may choose a satin, gloss, or semi-gloss clear coat to seal the color and add weather resistance. The clear coat also serves as the UV shield that preserves the color and the panel’s translucency, especially in lighter colors where yellowing becomes more evident.
Throughout the repair, a few practical truths guide the process. First, plastics repair is a curator’s task: the better you prepare, the less you risk in the bonding and finishing stages. Second, the repair should respect the fairing’s geometry. A curved surface demands consistent pressure and even heat to avoid introducing a new curvature that compromises aerodynamics. Third, if the damage touches a mounting point or a stiffening rib, consider whether a repair alone will restore the panel’s rigidity, especially if the crack travels through a load-bearing section. In such cases, reinforcement may be necessary, and it should be placed so that it does not interfere with fasteners or the panel’s mating surfaces.
When the repair runs beyond the surface into deeper structural areas, or when the damage is extensive, the temptation to replace the fairing is understandable. The decision hinges on the panel’s critical role in airflow management, structural stiffness, and rider safety. For light to moderate damage, the techniques described here offer a practical route that preserves originals and yields an aesthetically acceptable finish. A professional repair service can be wise for high-stress areas or panels that have sustained multiple impacts, where the cumulative compromise to the material may exceed practical on-the-spot fixes. The key is to approach repair with the same mindset a race mechanic uses when optimizing a bike’s aerodynamics: aim for consistent, smooth surfaces, predictable behavior at speed, and a finish that looks right in daylight and under street lamps alike.
As you consider your options, keep in mind how to source and match replacement parts when needed. A well-chosen aftermarket or OEM replacement is not merely about appearance; a correctly fitted piece maintains alignment and airflow continuity that a misaligned panel cannot. If you are curious about accessible options to broaden your choices, you can explore a broader catalog of fairings that aligns with different models and aesthetics by visiting the BMW fairings category. This resource can help you compare shapes and contours and identify a potential match for your machine without compromising the repair’s integrity. For readers who want more structured guidance on the repair process, the following external resource provides a detailed, step-by-step approach that echoes the techniques described here. It offers practical tips on tools, safety, and best practices, which can complement this chapter’s narrative and help you build confidence in your own repair work.
In the end, fairing repair is about shaping resilience. The panel is more than a shell; it is a boundary where the rider and the machine meet the air. The craft of repair respects that boundary, returning the fairing to its intended geometry while restoring the surface’s ability to shed wind smoothly. With careful preparation, deliberate bonding or welding, meticulous sanding, and thoughtful painting, a cracked or dented fairing can regain its original character and continue to serve its purpose for many miles ahead. The result is a bike that looks right, feels solid, and performs with the kind of poise that only a well-executed repair can deliver. As with any skilled maintenance task on a motorcycle, perseverance, attention to detail, and a willingness to revisit and refine are the hallmarks of success, ensuring that the fairing remains an ally rather than a liability on the road ahead.
Professional Fairing Repair for Motorcycles: Restoring Aerodynamics, Appearance, and Confidence
When a motorcycle’s plastic bodywork bears the marks of a collision, scrape, or rough road, many riders instinctively reach for a DIY fix. Yet the fairing is more than a cosmetic shell. It anchors the bike’s aerodynamics, shields internal components, and contributes to rider protection by creating a smooth, predictable surface for air to flow around the machine. This chapter examines why professional fairing repair matters, what skilled technicians bring to the task, and how their approach preserves both the bike’s look and its performance. The decision to repair through a professional service rather than replace or patch with improvised methods rests on a balance of damage type, material behavior, and the rider’s safety and riding goals. Modern fairings are more than simple shells. They are engineered from a mix of ABS plastic, fiberglass, and composite resins, sometimes reinforced with internal bracing. Those materials respond very differently to heat, stress, and UV exposure. A technician trained in motorcycle bodywork will assess the extent of damage, not merely what is visible on the surface. A small crack near a mounting point can mask a hairline fracture that weakens the entire element and distorts alignment. For this reason, the professional’s first task is a careful diagnosis. They examine the damaged portion for cracks that run into the mounting lugs, inspect surrounding panels for heat-induced warping, and check whether the internal structure has been compromised. The aim is to determine whether a repair can restore original strength and geometry or if the piece should be replaced with an OEM or certified aftermarket alternative. The choice between repair and replacement is rarely a simple yes-or-no; it is a measured judgment about long-term durability and rider safety.
Once the damage assessment is complete, the repair process unfolds in a precise sequence designed to recreate the fairing’s factory performance. The surface area is cleaned to remove oils, waxes, and dirt that could hinder adhesion. Any loose fragments are carefully removed, and sharp edges are smoothed to prevent further cracking during the repair. Sanding begins with coarser grits to create a mechanical key for adhesives and patches, followed by progressively finer grits to prepare a uniform bonding surface. This preparation is critical. If the bond is poor, the repair may fail at the worst possible moment, such as during a highway gust or a high-speed lane change. A professional workshop uses epoxy resins or fiberglass fillers specifically formulated for motorcycle plastics. These products cure with strength close to, or sometimes exceeding, the original panel in the repaired area, but only when applied under controlled temperatures and humidity. The technician will also consider whether a patch over the crack is appropriate or if a full panel rebuild is necessary. Patch methods can include a fiberglass reinforcement beneath a resin fill, while rebuilds may involve grafting a new section or a removable inner layer to restore stiffness at the attachment points.
The care taken during repair is as important as the materials used. After the structural fix, filler and putty may be applied to smooth the surface, followed by another round of sanding to eliminate any shelling or unevenness. The goal here is not merely a seamless cosmetic finish but an aerodynamically coherent surface that behaves predictably at speed and under wind. A professionally repaired fairing must meet two essential criteria: the surface should reflect the bike’s original contour, and the repaired area should retain uniform thickness and rigidity. Misalignment or an inconsistent surface can create buffeting, vibrations, or even stress concentrations that propagate cracks under load. The alignment step is often overlooked by casual repairs but is a core part of a professional service. Mounting points, edge gaps, and line continuity with neighboring panels are checked against factory specifications. If the fairing must align with a radiator shield, electronic housing, or a windshield, exactness becomes critical. In some cases, technicians perform non-destructive testing or use lighted alignment checks to confirm that the repaired portion sits precisely where it should. When the structural and alignment tasks are completed, the repair enters the cosmetic phase. Here, the technician selects paints, primers, and clear coats that match the bike’s original color and texture. Color matching in motorcycle plastics is a precise art, because plastic paints behave differently than automotive finishes. Colorists consider the plastic’s base color, translucency, and the way light passes through the material. They also account for aging effects from sun exposure, heat cycles, and previous cosmetic work. The final paint layer is applied in thin, even coats to avoid sags and streaks, followed by careful curing. In many shops, curing is done in a controlled environment to prevent dust intrusion and to ensure color stability. A clear coat seals the finish and enhances resistance to UV rays, chemicals, and abrasion. The result should be a surface that blends invisibly with the rest of the bike, preserving the aesthetic appeal while protecting the repair from future wear.
Beyond the artistry of color and shine, professional fairing repair carries practical implications for the bike’s performance. The fairing is a major factor in how air moves around the chassis. Even a minor misalignment can alter crossover airflow, affecting stability at highway speeds and altering the bike’s center of pressure. A professionally repaired fairing, properly mounted, preserves the intended aerodynamic profile, which in turn helps with efficiency, cooling, and handling. For riders who push their machines toward higher performance or track-leaning setups, precision becomes even more critical. In such contexts, experienced technicians may employ more advanced techniques. Vacuum forming can reproduce complex curves for panels that were damaged beyond simple patching, while CNC-machined brackets or fixtures help ensure repeatable, exact fitment. These capabilities are especially valuable when a bike uses a complete or near-complete fairing assembly, where every panel must align perfectly with its neighbors and with the existing mounting hardware. Although these high-end methods are most common in specialized workshops, the underlying principle remains the same: retain the original geometry and ensure the repaired components perform in concert with the entire bodywork system.
Another dimension of professional repair is compatibility and lifecycle expectations. A professional shop will discuss options for OEM parts or certified aftermarket alternatives, along with the implications for warranty, fitment, and long-term durability. The choice between OEM and non-OEM components shapes not only aesthetics but also reliability and crash-worthiness. OEM parts are designed to fit as the manufacturer intended; aftermarket pieces can vary in thickness, curvature, and attachment geometry. A shop that prioritizes quality will verify fitment before shipping the repaired bike back to the owner, and will often offer warranty coverage on the repair work and, where applicable, on any replacement panels. This warranty is a reassurance that the technician stands behind the structural integrity, the finish, and the alignment achieved during the repair. It also serves as a reminder that repair isn’t merely a surface-level fix; it’s a process that rebuilds a critical structural system that interacts with safety systems, rider protection, and overall ride quality.
For riders who want to explore repair options without compromising their bike’s look or performance, discussions with a professional service can illuminate pathways that align with their goals. In many cases, technicians can salvage a cracked fairing by a combination of patching, reinforcement, and refinishing, thereby avoiding a full replacement. In other cases, the extent of damage renders a full replacement the more economical and safer long-term solution. Either way, the professional approach provides an informed assessment, a controlled repair environment, and a tested workflow that reduces the risk of recurring failures. When it is time to consider aftermarket or OEM replacements, riders can review catalog pages that group fairings by type and model to understand what options exist and how they align with their bike’s dimensions. The industry’s collaborative ecosystem—assembly, refinish, and fitment specialists—ensures that even when a full replacement is necessary, the outcome is a robust finish with predictable fit and finish.
The role of a professional service extends beyond the repair itself. Reputable shops also offer a transparent workflow, including documentation of the damage, the repair method, the materials used, and the proposed timeline for curing and color matching. They typically guide riders through care guidelines after repair, such as how to wash and dry the panel to avoid micro-abrasions, and how to inspect the repaired area after riding or washing. A thorough post-repair inspection helps catch any minor issues before they escalate, preserving the bike’s value and ensuring rider confidence. When riders seek a broader, more curated surface, the fairing category of a manufacturer or retailer may present options for OEM or aftermarket components that fit the bike’s line and style while maintaining the same fit and aerodynamics. For instance, browsable categories that group fairings by makes or families can help riders understand which parts are compatible with their bike’s frame and mounting strategy. This emphasizes that professional repair is not isolated from the broader ecosystem of parts and services; it is a part of a connected process that preserves performance, appearance, and the rider’s confidence in the machine.
For readers who want to explore the repair world further, a practical way to understand the options is to browse fairing categories that reflect the variety of panels and shapes available. For example, the Honda fairings category offers a clear view of how OEM and aftermarket panels are organized and described, helping riders appreciate the scope of compatibility and the careful measurements required for a precise fit. This reference is intended to illustrate how professionals anchor their work in a broader catalog of parts and finishes, and how riders can begin to think about repair in terms of geometry, materials, and color science. For those curious about the broader landscape of repair resources, a reputable step-by-step guide can provide a structured overview of the repair process, including the tools, materials, safety considerations, and best practices that professionals bring to the project. Such guides complement hands-on professional work by offering foundational knowledge that helps riders communicate with technicians about expectations, timelines, and outcomes. Links to these external resources can broaden understanding while reinforcing the value of professional expertise when the repair demands more than a cosmetic fix.
In sum, professional fairing repair is a specialized discipline that blends engineering, art, and safety. It requires an understanding of materials that react under heat and stress, a command of bonding and finishing techniques, and a precise eye for geometry and color. The technician’s aim is not only to restore the panel’s original appearance but to reconstitute the fairing’s functional harmony with the rest of the bike. The outcome should be a seamless integration that preserves aerodynamics, ensures accurate alignment, and returns the rider to the road with renewed confidence. When damage is limited and the rider’s goals are purely cosmetic, a repair can be an economical and aesthetically pleasing option. When damage is extensive or compromises safety, replacement paired with a professional refinish can deliver a longer-lasting, safer result. Either way, engaging a qualified service provider brings expertise, accountability, and a structured process that DIY repairs seldom match. To those navigating the path between DIY curiosity and professional intervention, the message is clear: the fairing is a critical component, and healing it with professional care protects the bike’s performance and the rider’s peace of mind. As you consider your next steps, you may find it helpful to view OEM and aftermarket fairing options and understand their fitment and finish characteristics, such as those presented in the Honda fairings category. For detailed, model-specific information, a deeper dive into the available catalog can offer practical context for your repair plan. Honda fairings provides a tangible example of how parts and finishes are organized in a way that mirrors the professional repair workflow: assessment, alignment, color science, and final fitment testing.
External resource: For readers seeking a step-by-step, field-tested guide that complements professional practice, see How to Repair a Cracked Fairing: Step-by-Step Guide. This external reference outlines practical techniques, safety considerations, and best practices that align with the professional approach described here: https://www.bmwblog.com/2023/06/15/how-to-repair-a-cracked-fairing-step-by-step-guide/
Final thoughts
In conclusion, the ability to effectively repair motorcycle fairings is a vital skill that can enhance customer satisfaction and business reputation. By understanding the repair process, utilizing the right materials and tools, applying effective techniques, and knowing when to refer customers to professional services, business owners can significantly impact their service quality. Investing in fairing repair not only maintains the functionality and appearance of motorcycles but also positions your business as a reliable source of expertise in motorcycle maintenance. Stay ahead in the competitive market by mastering these aspects of fairing repair.